7.10 Integration with myPOS
To get the necessary data for integration, you need to "Create a Store".
Please keep in mind that your stores have to be verified by myPOS which may take up to 5 business days. Until they are successfully verified, you will be able to process transactions but within certain limits.
--------------------------------------------------------------
To set up your store:
Log in to your myPOS Account
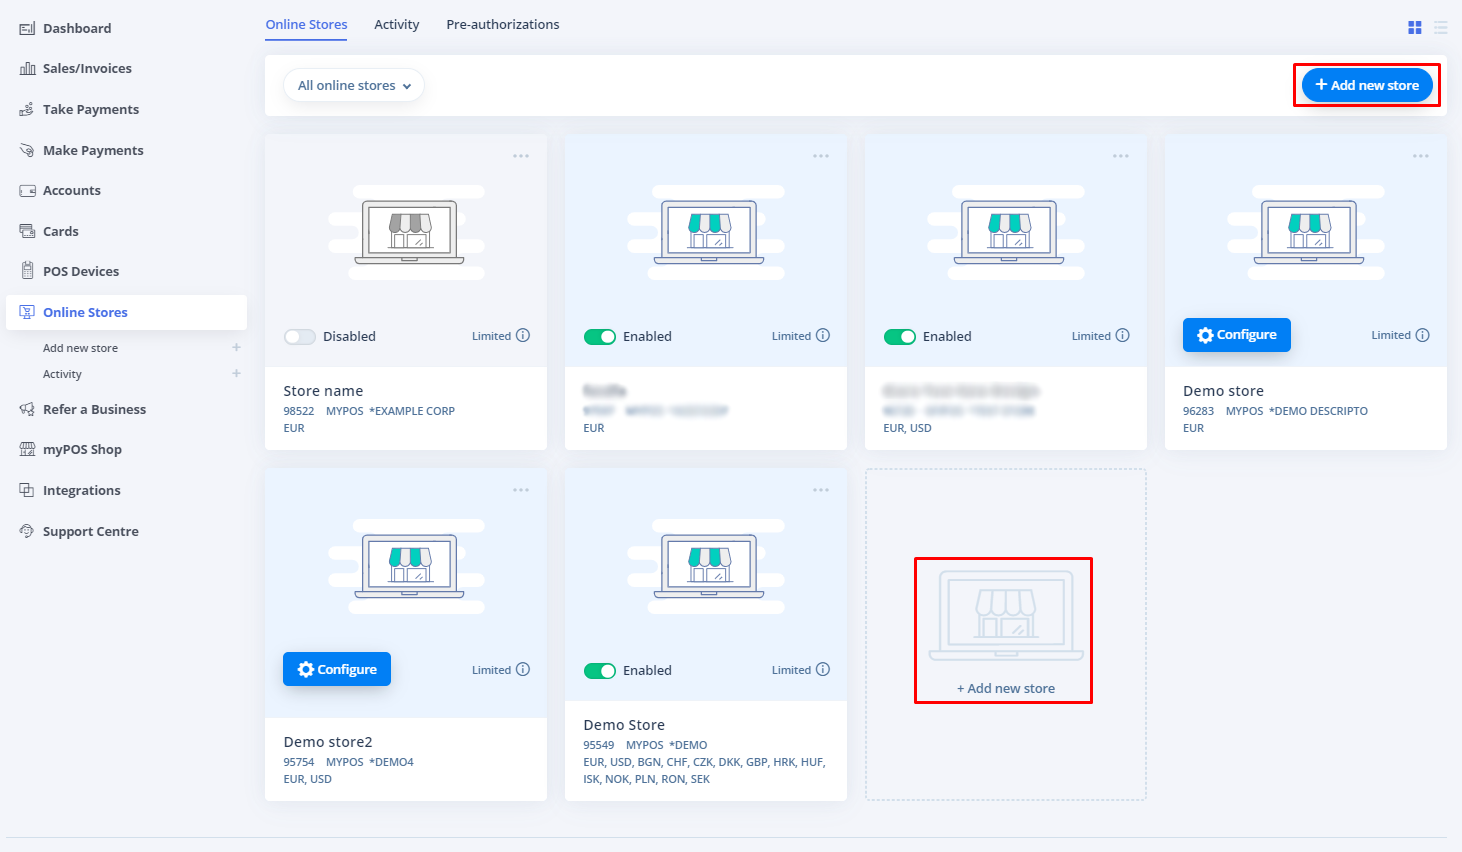
Go to menu "Online Stores"
Click on "Add new store" as shown on the screen below.
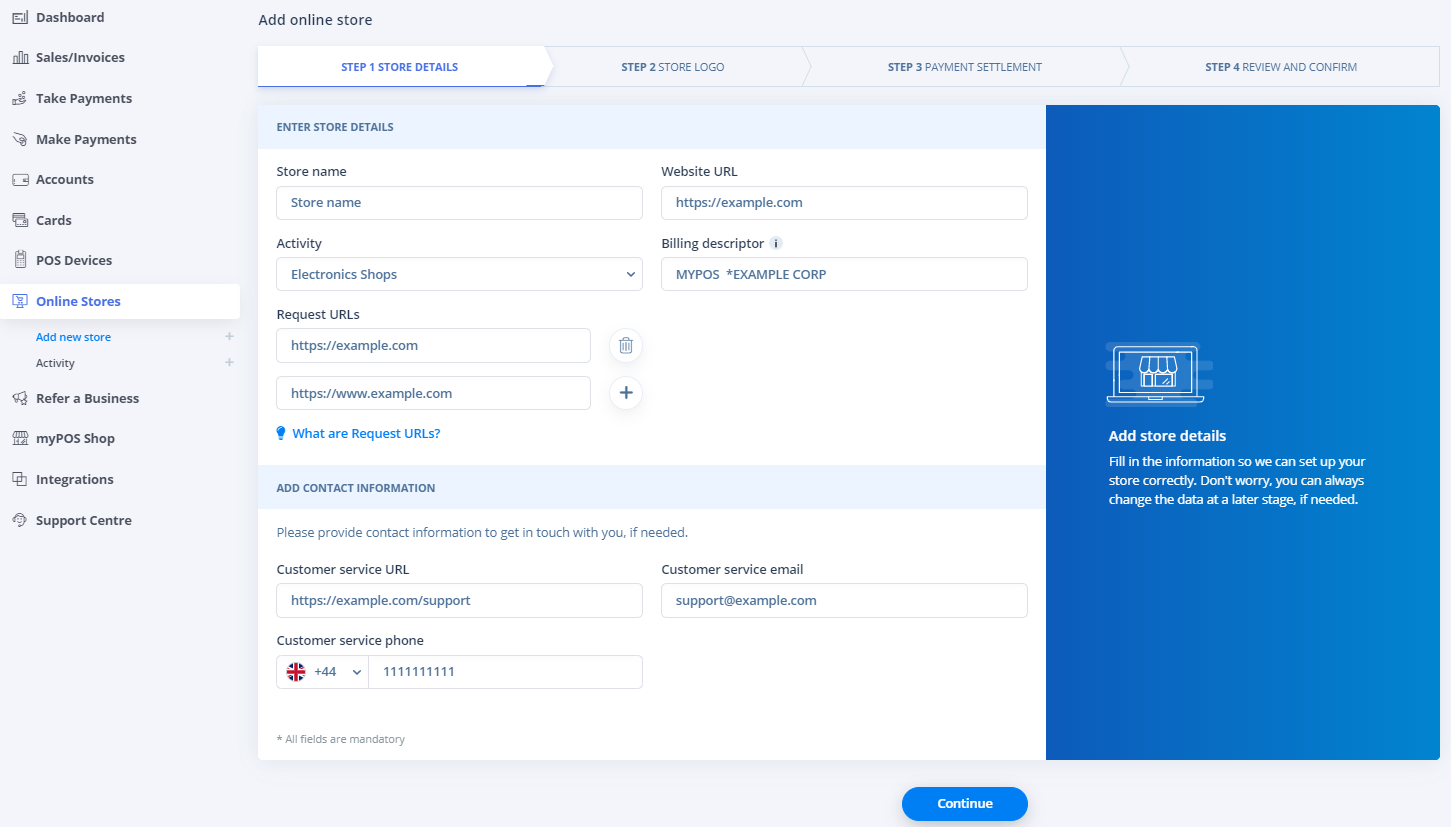
STEP 1. It is necessary to write "Store Details".
NOTE: Requested URLs should be your domain name with and without www
https://example.com/ - Correct
https://www.example.com/ - Correct
https://example.com:8000 - NOT Correct
STEP 2. Uploading the store logo. This step may not be necessary.

STEP 3. Choosing an account for payment.

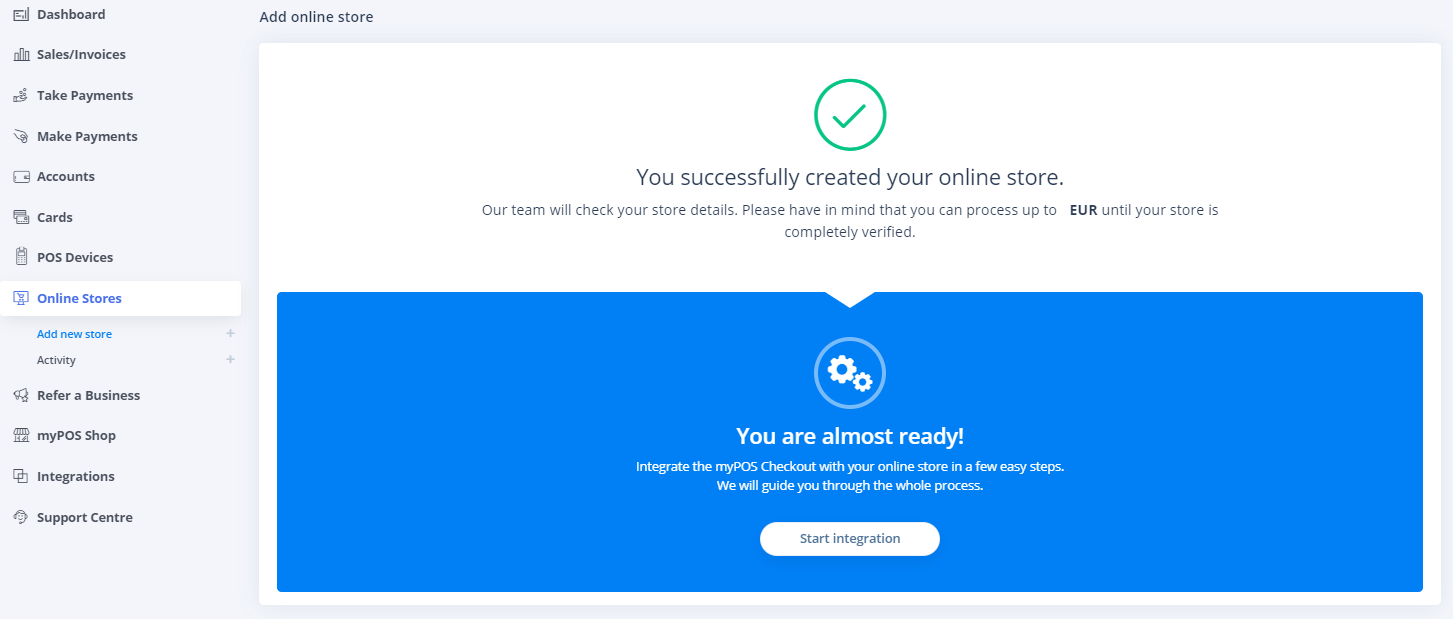
STEP 4. In this step, we check all the information. And if all the information is correct, we confirm it.

The store has been created!
--------------------------------------------------------------
For successful integration with RentSyst, you need to enter Client Number, Store ID, myPOS Public Certificate, Private Key and Key index.

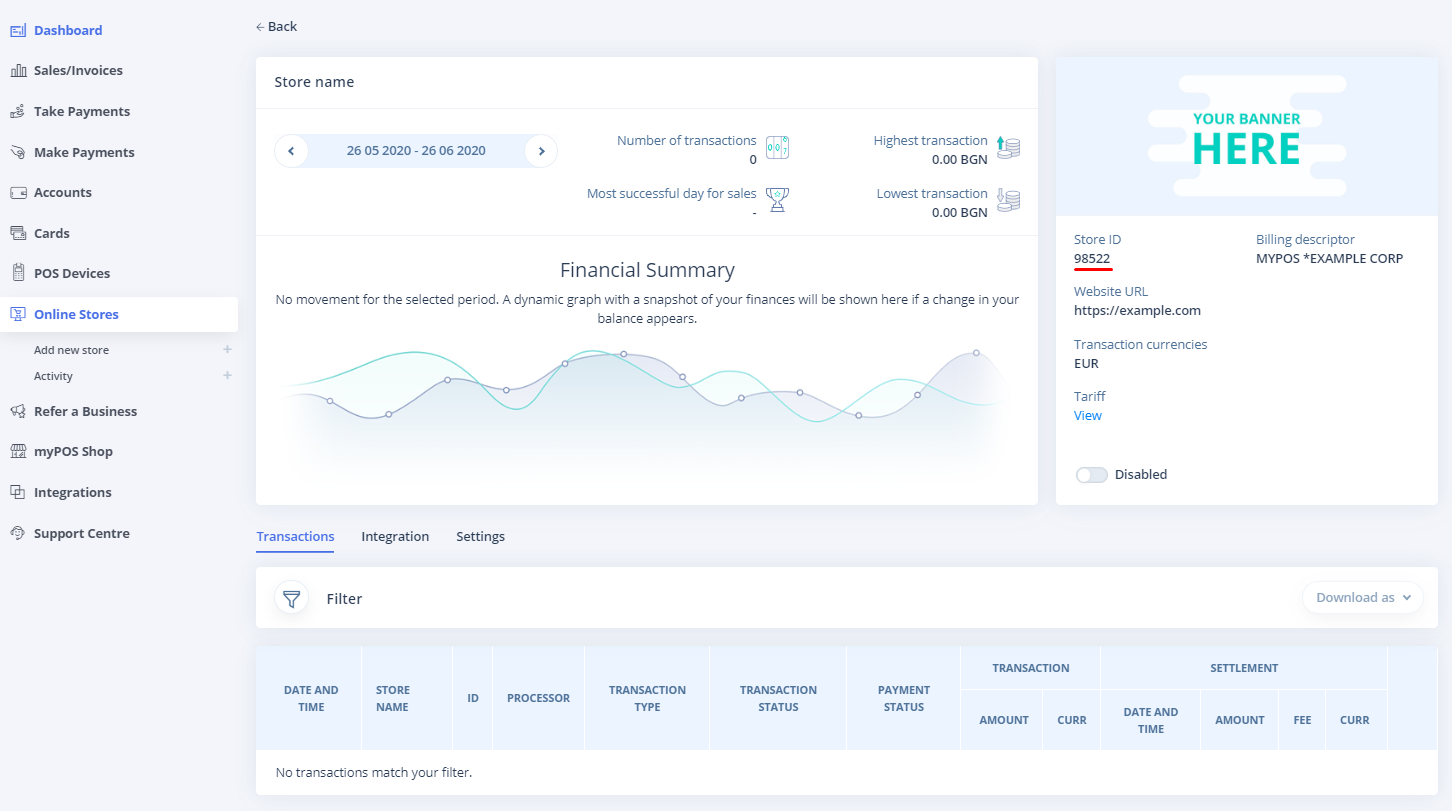
Once added, the new online store will be visible in the "Online Stores" menu.
To be able to accept payments on your website, you will need to integrate the store with the myPOS Checkout via one of the listed Integration methods. You can start the integration process as soon as you set up your store, or do it later by pressing the "Configure" button in the "Online stores" menu.
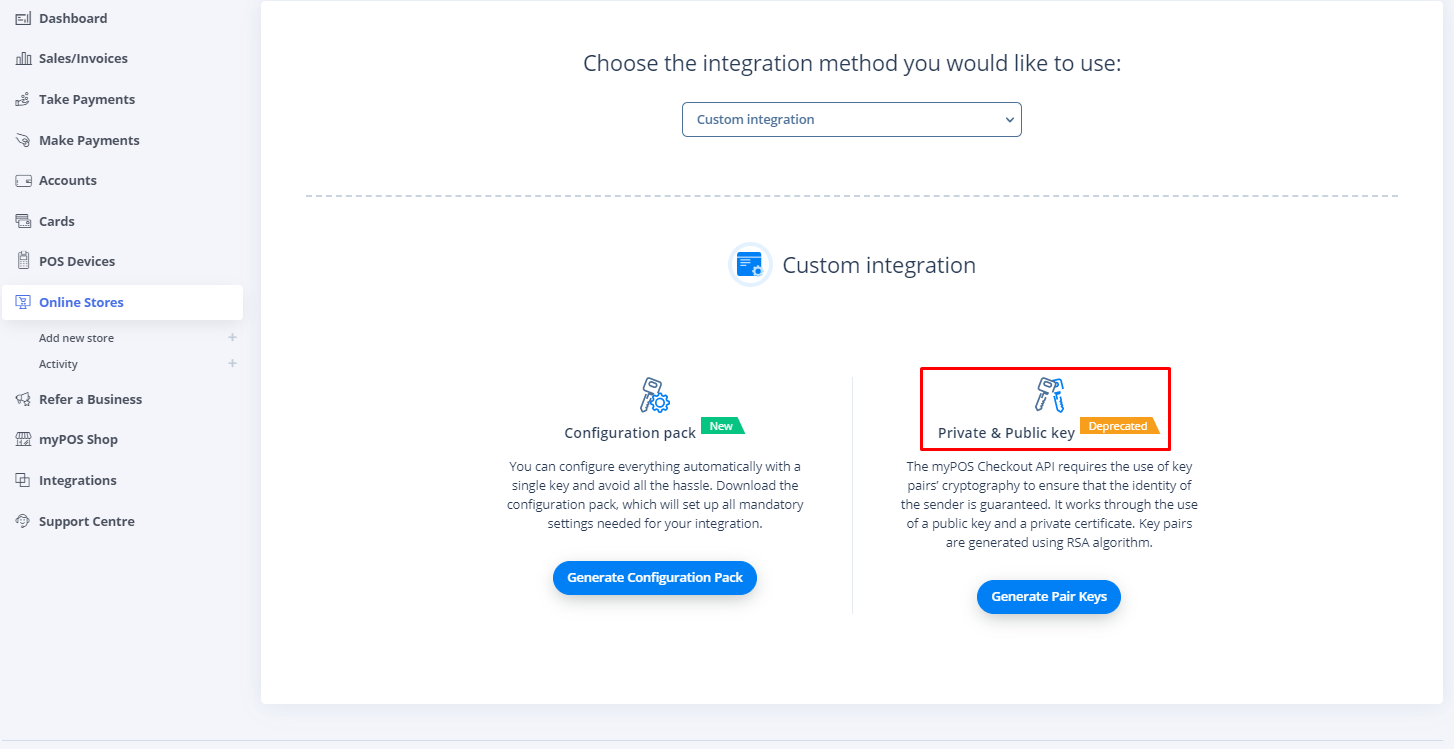
How do I get the keys?
To get the keys, please select "Custom integration" method -> Private & Public Key -> Generate Pair Keys
Setting the Public and Private Keys
You can use these keys in any type of integration but it is easier to use the "Configuration Pack", which has all mandatory settings in one package.
When you choose the "Key pair", it generates two keys that you need to insert into our Settings of our system. Keep in mind that the Private key is shown only once and you need to store it securely. Should you lose it, you will need to generate a new key pair.
The myPOS Public Certificate is saved in the "Integration" tab and can be downloaded at any time if needed.
Please "NOTE" that you should also set the "Key Index" value in your settings. It is found in the "Integration" tab as well, and it indicates that you will be using this key pair with your integration.
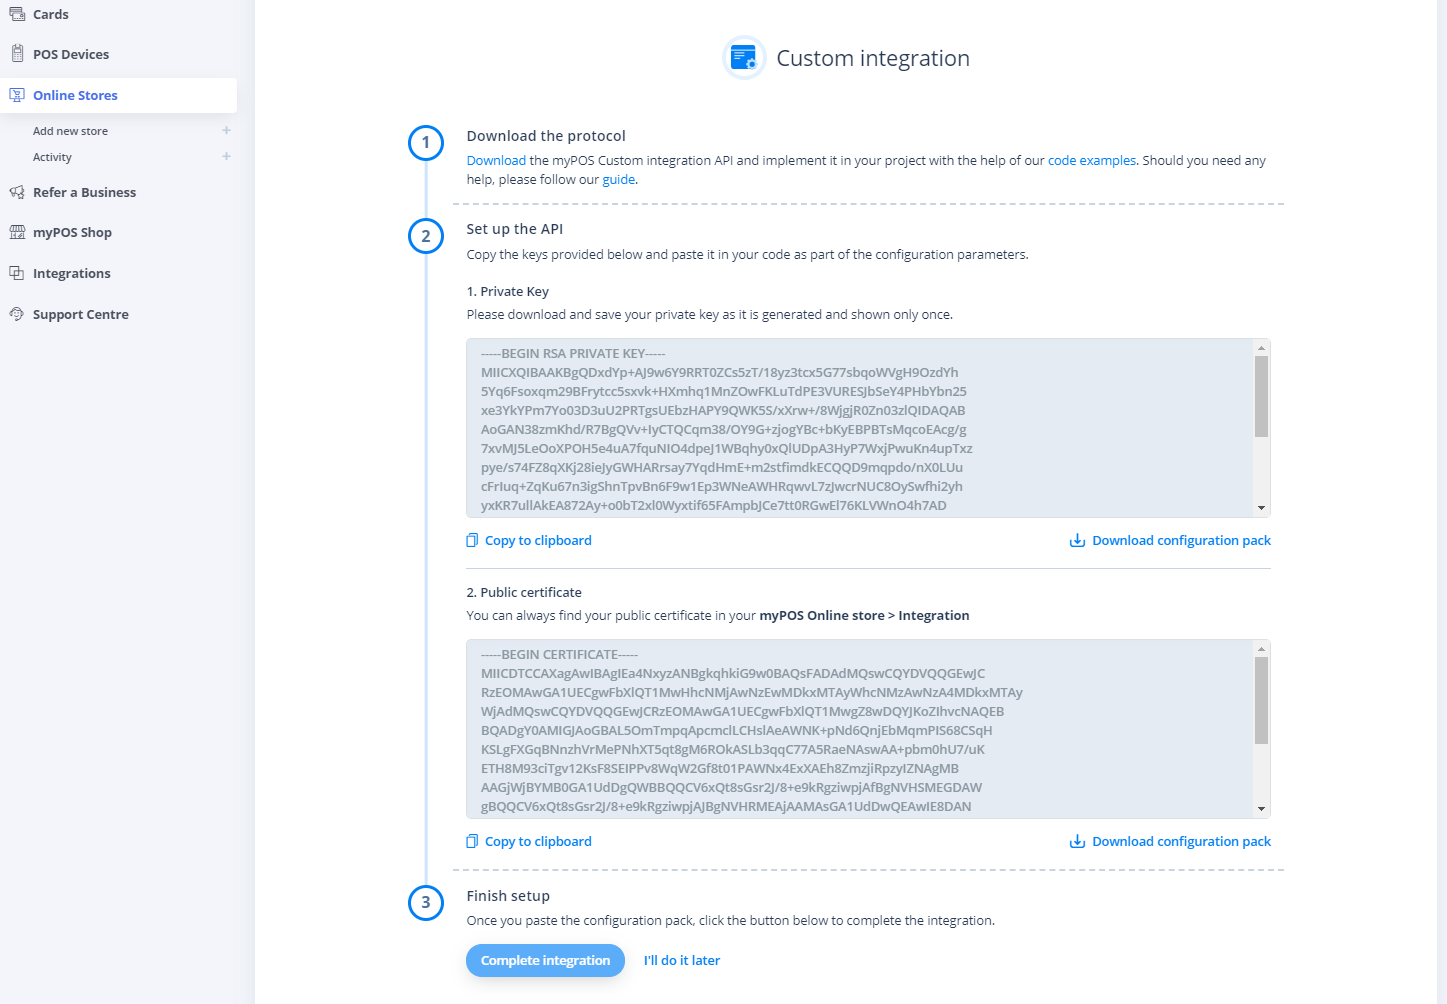
As a final step, after getting the key pair in the settings or your code, you need to set up the remaining parameters - "Store ID" and "Client Number".
"Store ID" (SID) - You can find the Store ID in the general information for your online stores.
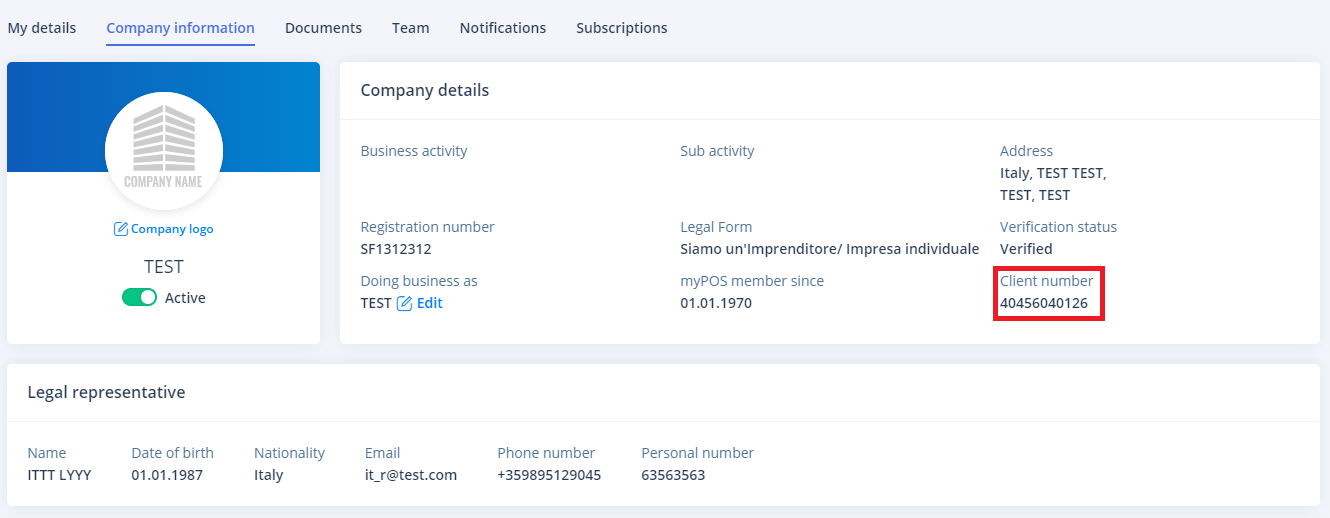
"Client Number" - You can find it in the Company information menu accessible from the top right corner of your myPOS account.

Once integrated, the new online store will be with status “Enabled” and the Merchant is ready to start accepting payments.
Every online store could be Enabled / Disabled separately at any time by the Merchant.
IMPORTANT: Please note that each change to the configuration of your store will have to be verified by myPOS which takes up to 5 business days.
Until your online store is verified, the Merchant may not be able to process transactions through it.