7.16 Integration Guide – Paysera
In this article you will find instructions on how to integrate RentSyst with Payment Gateway Paysera.
Step 1. Get a Paysera account.
Pay attention, that you need to create and set up a Paysera account first. And only the next you may follow the steps below. To obtain an account register at Paysera.*
*
Watch video instructions
*
*
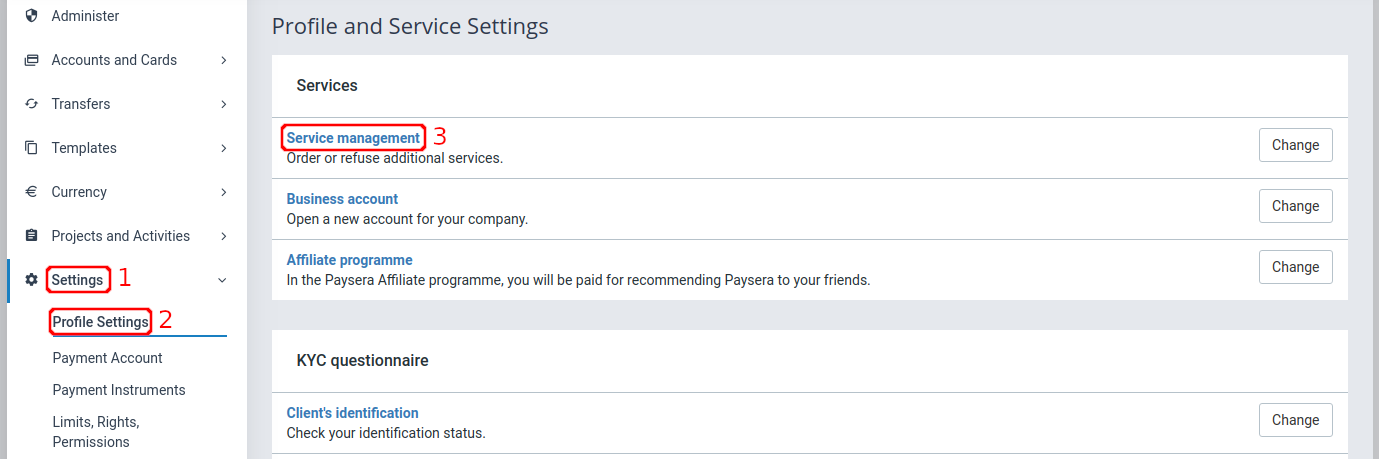
Step 2. Order Payment collection service.
Log in to your created account and follow these steps:
Settings > Profile Settings > Service management > Online payment collection via e-banking and other systems > Order.
If you are interested in payment collection with credit cards, you should order Online payment collection via payment cards.
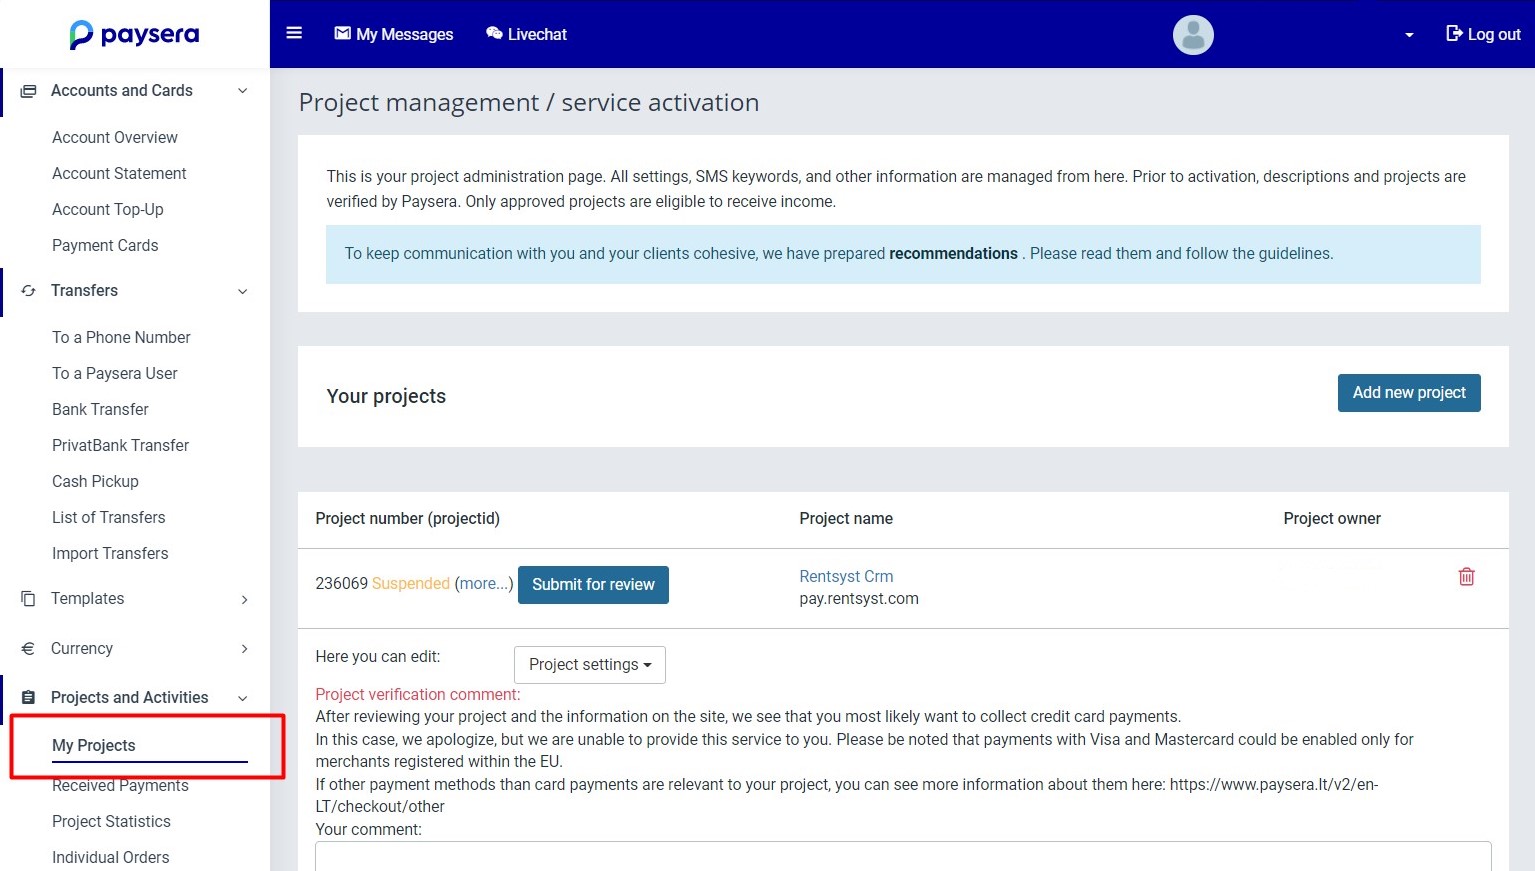
Step 3. Create a project.
In the left-hand menu, select Project and Activities > My projects.
If this section is not visible, reload the page. To create a new project, click Add new project.

and
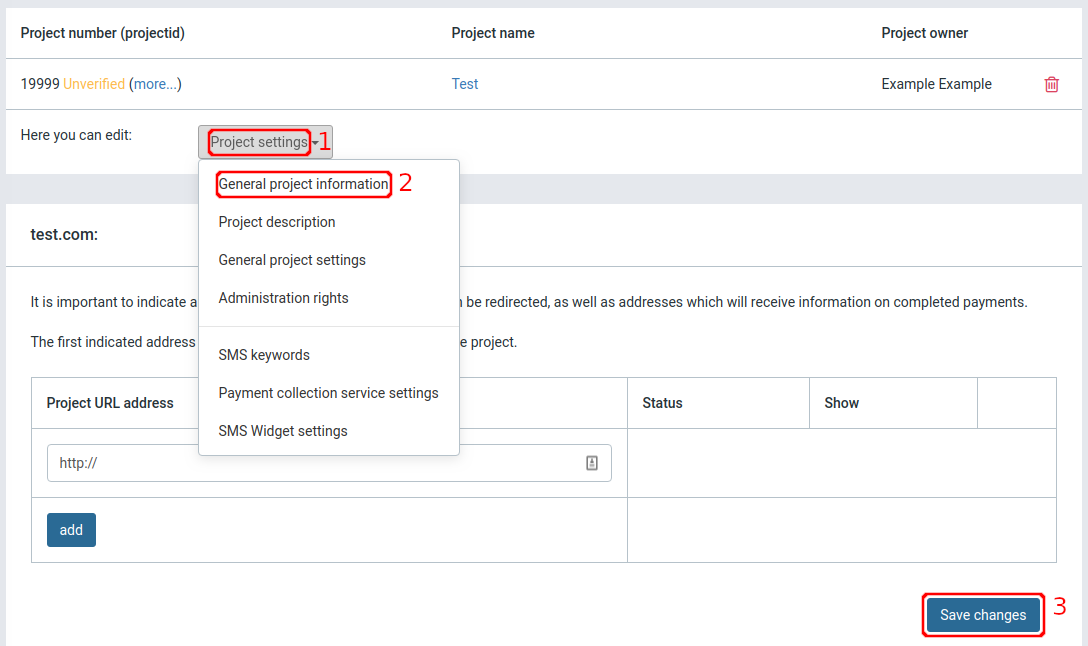
Step 4. Add a Website to the project.
For safety reasons it is required to add your website to the project settings and confirm your ownership of said website. This way your project will accept payments only from your website/s. To confirm your website ownership read the step below. In our case, please add the website pay.rentsyst.com.
Select Project settings > General project information. Type in your website address and press Save changes.
4.1. Please pay attention, that after you add your website domain + our URL pay.rentsyst.com, manual check on Paysera Support Team side is needed anyway.
To speed-up this process and validate integration, please write request to Rentsyst Support, and we will assist with Authorization Letter!
Authorization letter to validate RentSyst domains:
website url: https://rentsyst.com/
redirect from: https://pay.rentsyst.com/
testing operations: https://pay-dev.rentsyst.com/
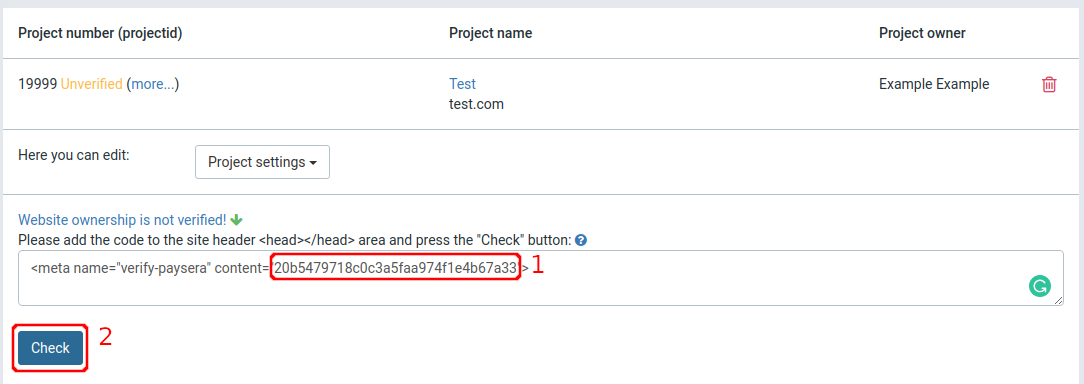
Step 5. Confirm website ownership.
To confirm website ownership, you must use the website ownership code, which is located in the project settings. You can place it in the head section of your website or upload a file to your website’s main catalog.
If the check for the ownership code fails, you can contact Paysera Technical support, don't forget to add Project Id into the mail, for a manual check. Email: [email protected]
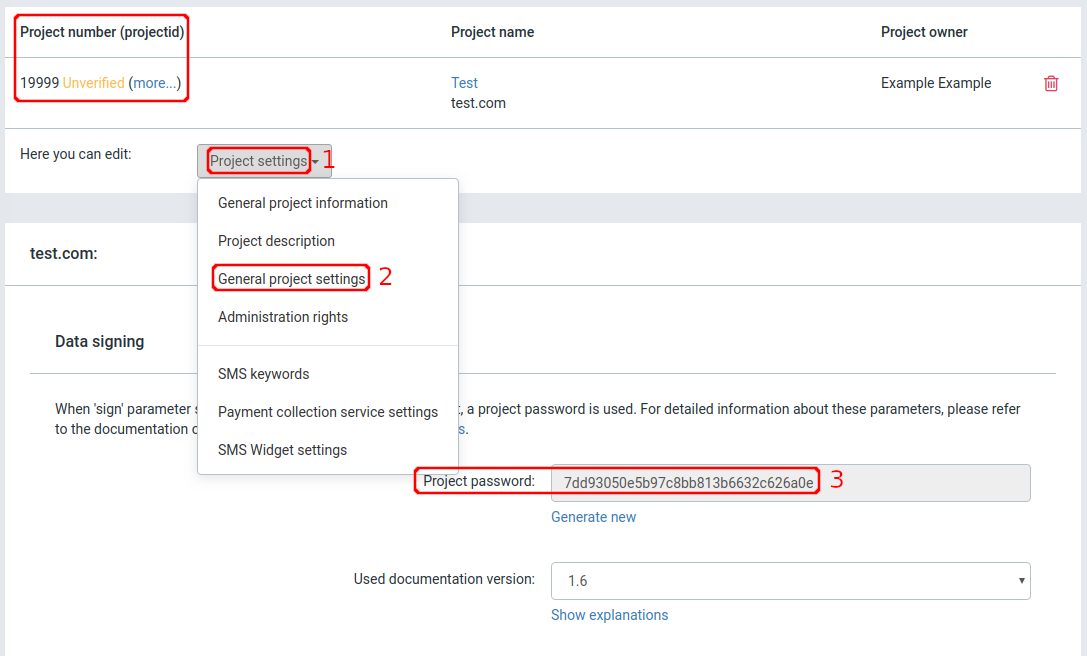
Step 6. Credentials.
For the integration you will need project number and project password.
Both of these parameters are listed under Project settings > General project settings.
If you encounter any errors during or after the integration process, see the chapter -
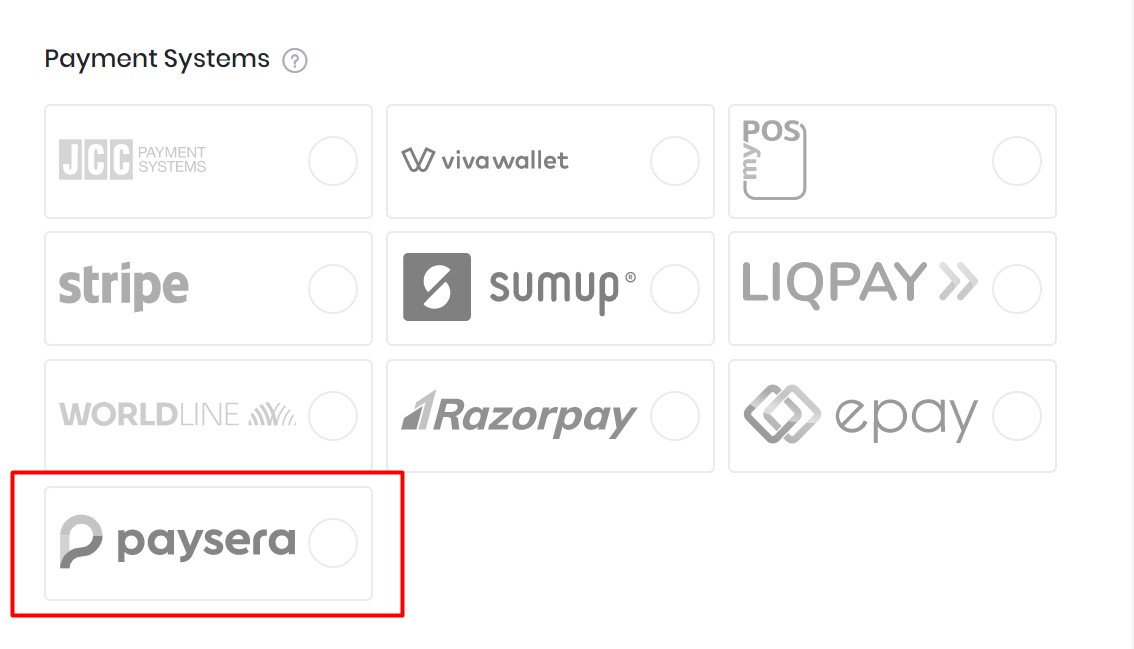
Step 7. Integrate.
Put received credentials to your RentSyst account > Settings > Integrations & Agents > Choose Paysera:
In pop-up window – enter Project number and Project password:
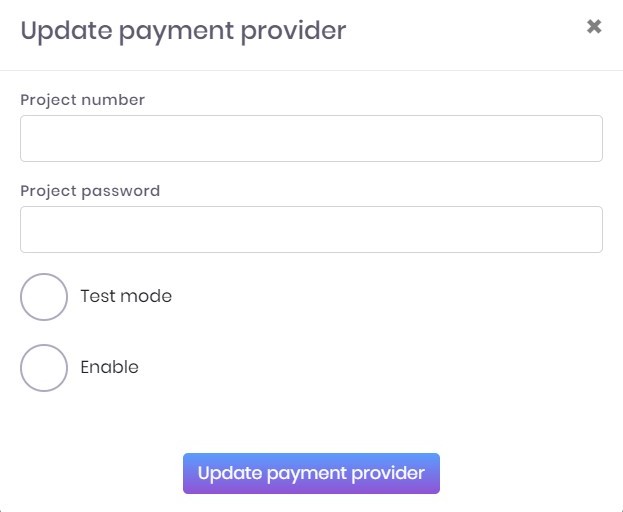
Press Enable and Update payment provider.
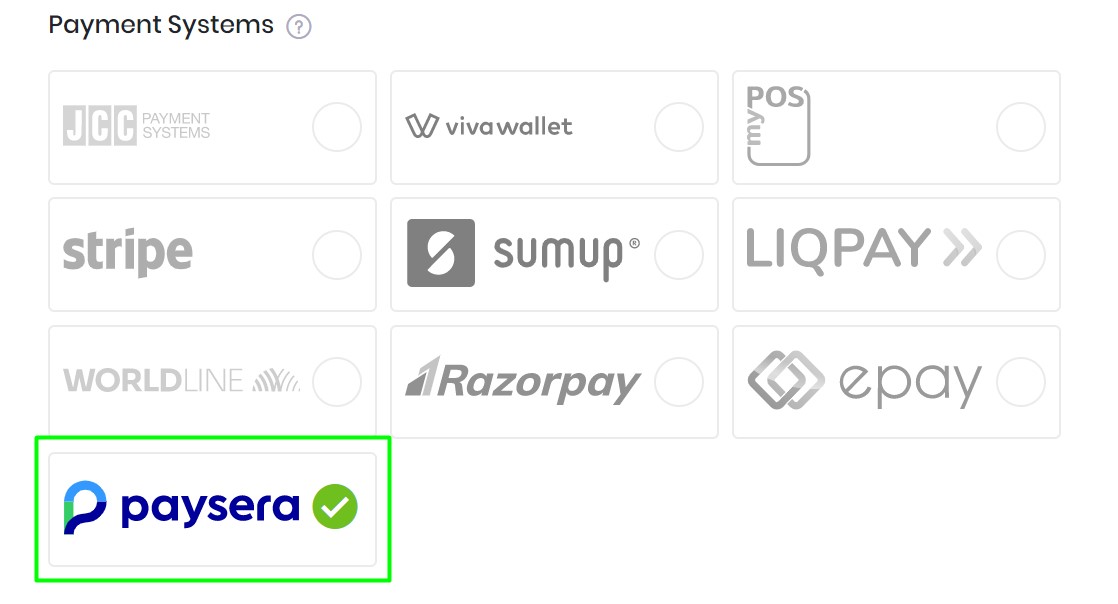
Now integration with Paysera is connected and you will be able to automate payments by card through Rentsyst directly.
If you have any questions about integration with Paysera or wanna integrate with the new Payment Gateway, please contact us.
Recommend to check our Video guide Integration with Payment Gateway: