7.7 iFrame. How to use it?
Go to your personal account, go to “Settings”, find the tab “Agents & Discounts”. You need the Agents section.
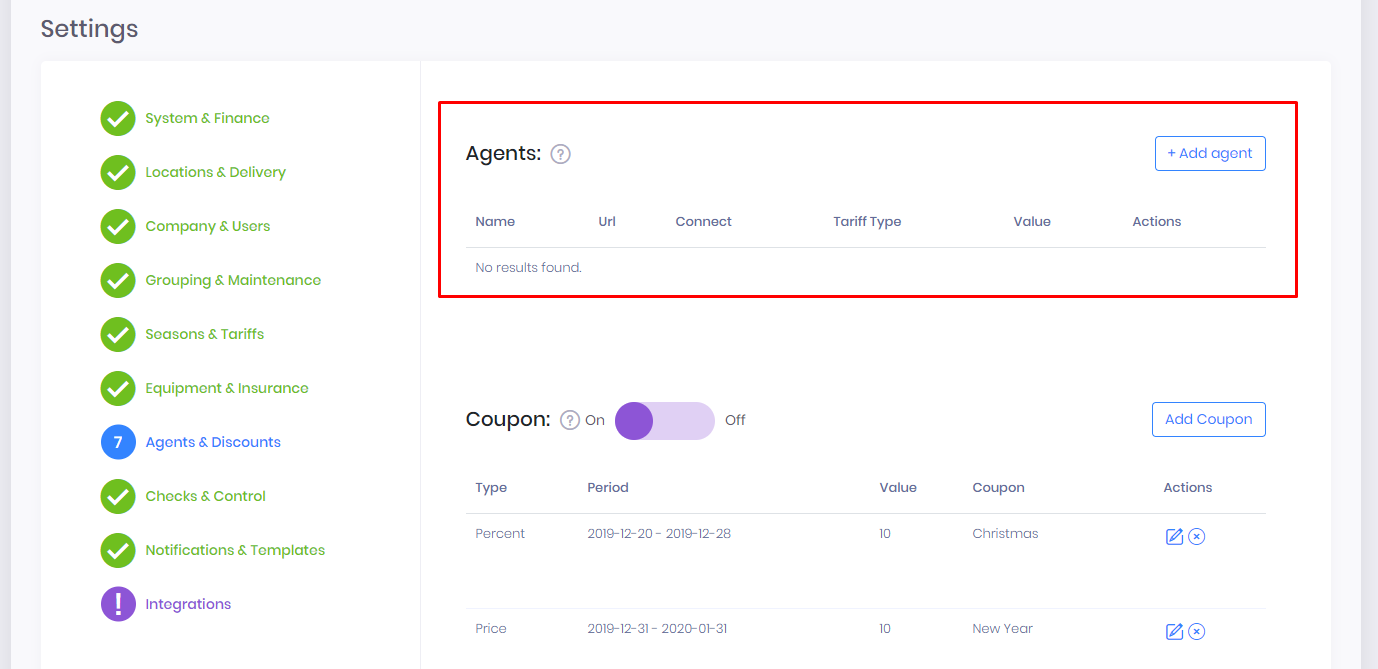
You need to create a new agent to work with. The new agent is your website.
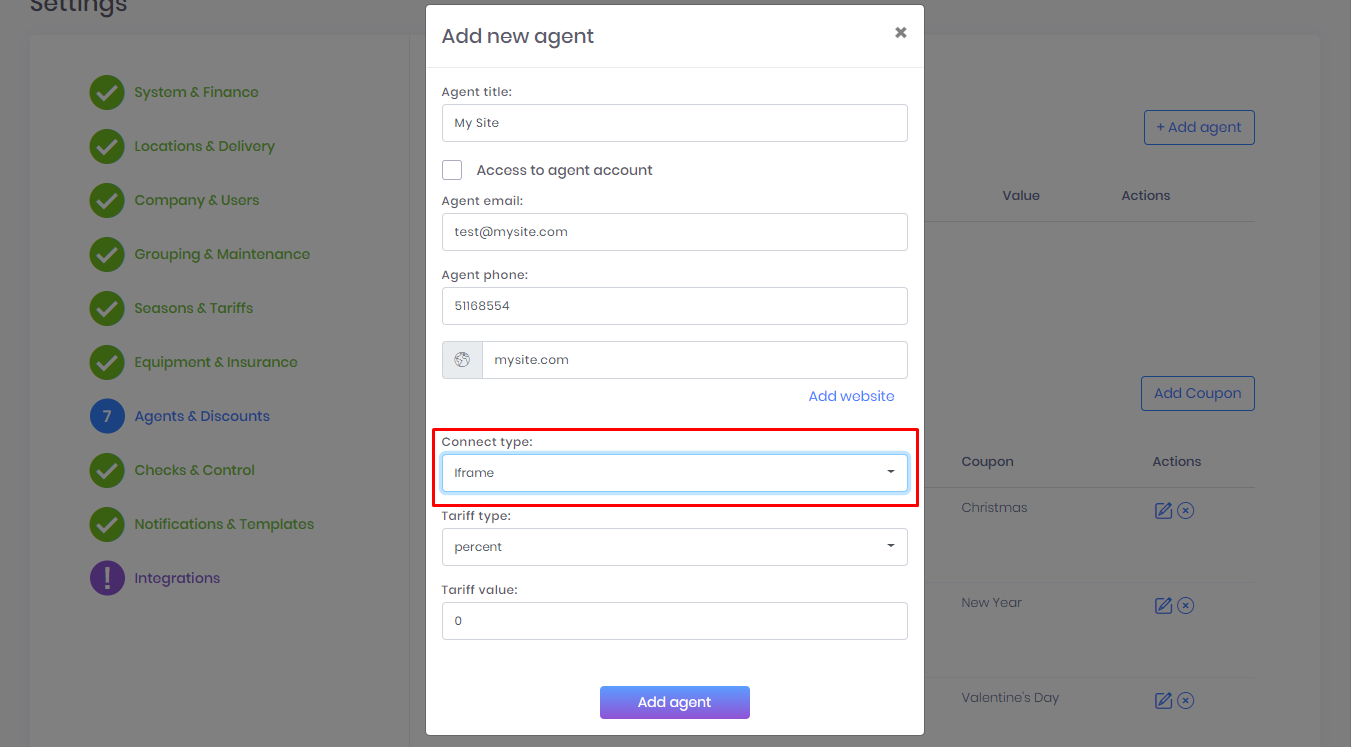
Click on the “Add Agents” button. In the window that appears, fill in all the necessary data. In the field “Connect type”, select iFrame.
After this, click on the “Add Agents” button.
As you can see, your website has been added and the iFrame code has been created. To receive it, click on the last icon.
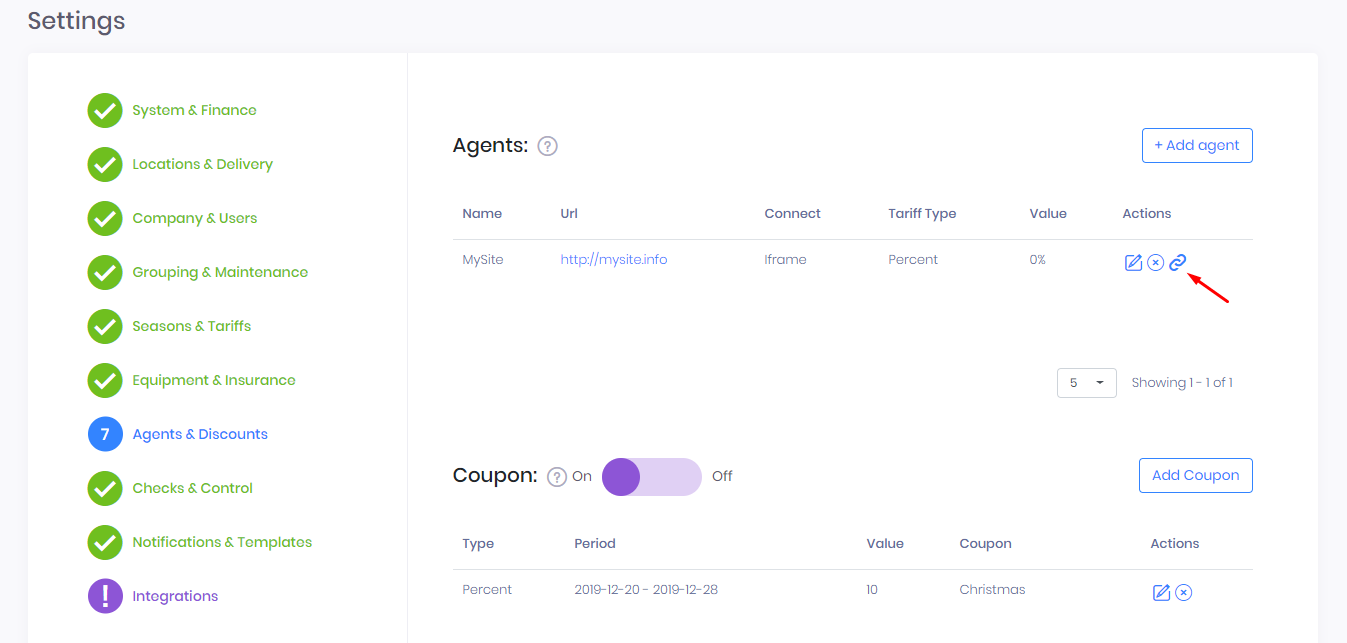
There will appear a window with the code. As you can see, there is Token in it with which your unique personal number is already connected. This number is linked to your personal account in the RentSyst car rental software and it is almost impossible to repeat.

As you can see, there are “Width” and “Height” sliders. They are responsible for the width and height of your widget. You can set the dimensions you need on your own. If the “Width” value is 100%, it means that your widget will be displayed over the entire width of your web page.
Plugin editing page!
There is an “Edit” button. When you click on it, you get to the widget page where you can edit any element of the widget!

In our widget, we indicated “4 steps” to register a car.
1 Step. The client selects the place of delivery / return of the car and the date. In the settings of your personal account, you can choose the minimum and maximum rental period. If the client wants to rent a car for 3 days, and your settings indicate that the “Minimum rental period” is 5 days, the widget will show a warning to the client.
2 Step. The client selects a car. They can use filters.
3 Step. The client selects “Advanced” and “Insurance”. Next, “General Information” about the order is displayed. The “Advanced” section displays what you have added in the Settings of your personal account.
4 Step. Client data and payment method. In the settings of your personal account, you can set the minimum and maximum age of people who are allowed to rent your cars. If the ages do not match, the widget will inform the client about it.
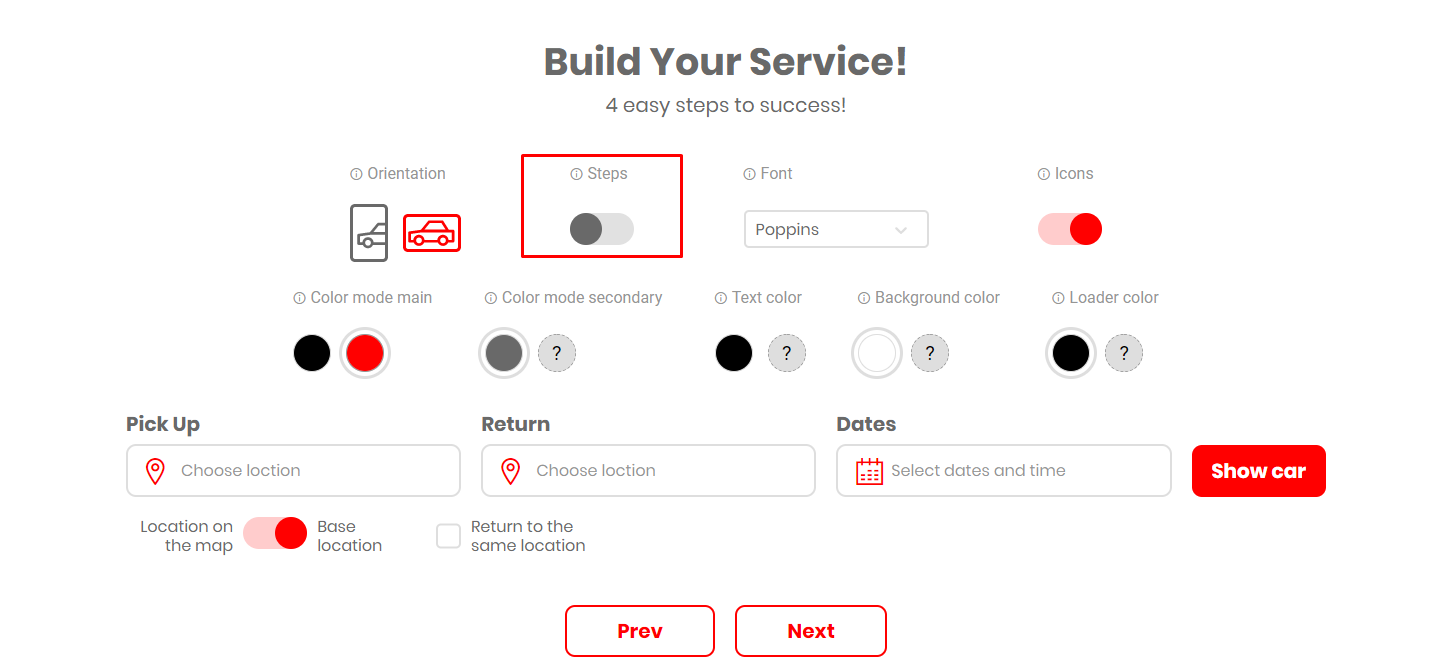
What can be edited in the plugin?
The first phrase. You can either delete it or write your own text.
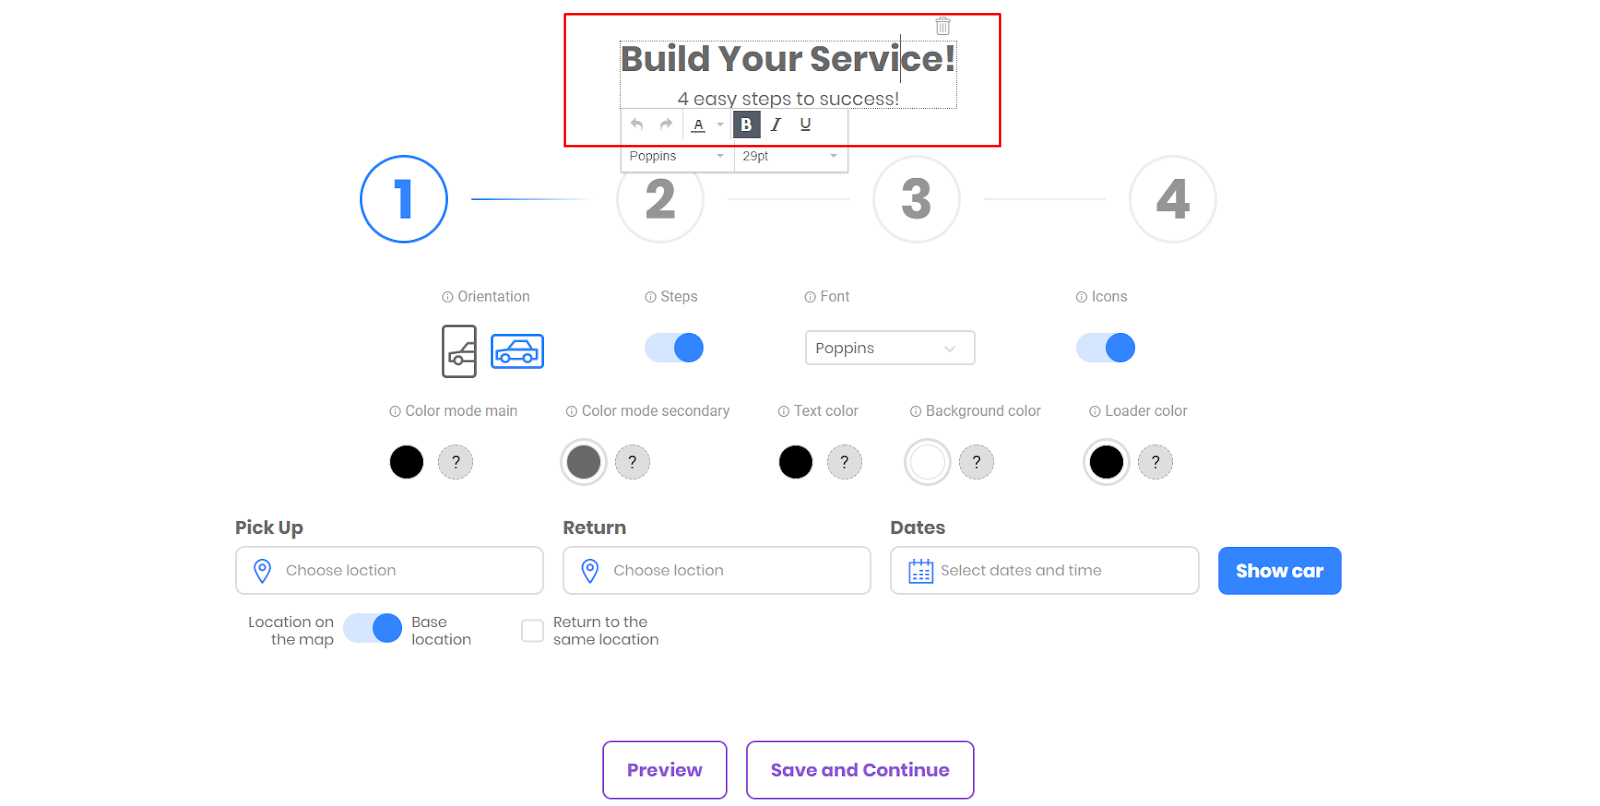
Steps.
If you hover over each of the numbers, you will see a window in which you can change the color of each element.

You can easily disable the “Steps” by switching the necessary slider.
Text.
If you want to change the text, its size or font, all you need to do is to select the text you need, and there will appear a pop-up window with an editor.

You can also select the default font in the desired section.

Indentation.
By moving the mouse over each element, you can add or remove indents from the element. To do this, press + or -

Filters.
At step number 2, when the client chooses a car, you can choose which of the filters will be available. If you want some kind of filter to be hidden, just uncheck the box next to the necessary filter.

Color.
Each company has its own color options. Therefore, you can change the colors for each element of the widget. At every step, there is a field in which you can change the color.
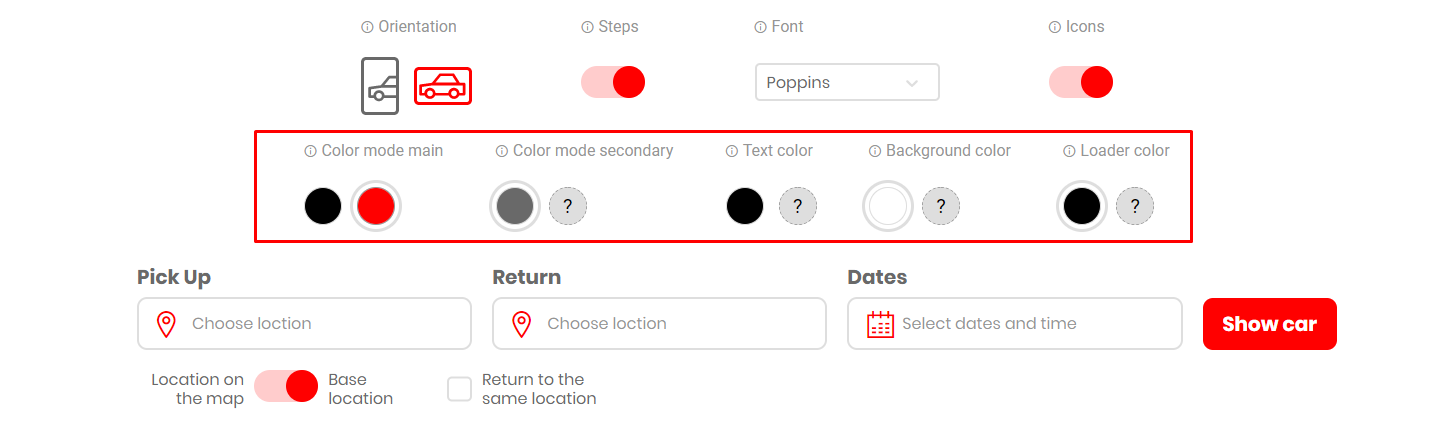
Icons.
You can easily disable all the “Icons” in the widget by switching the necessary slider. The icons will disappear. This must be done at every “Step”.

Orientation.
When editing the widget, you can see how each “Step” will be displayed on different devices with the help of the “Orientation” function.

After setting up the widget, you just need to copy the iFrame code and paste it into the necessary part of the website.
All the orders that will come from your website will be displayed with a mark.

Note! The name of the “Agent” displayed will be the one you specified in the iFrame settings. In the example, I specified the name “My Site”.