3.2 Create a new reservation
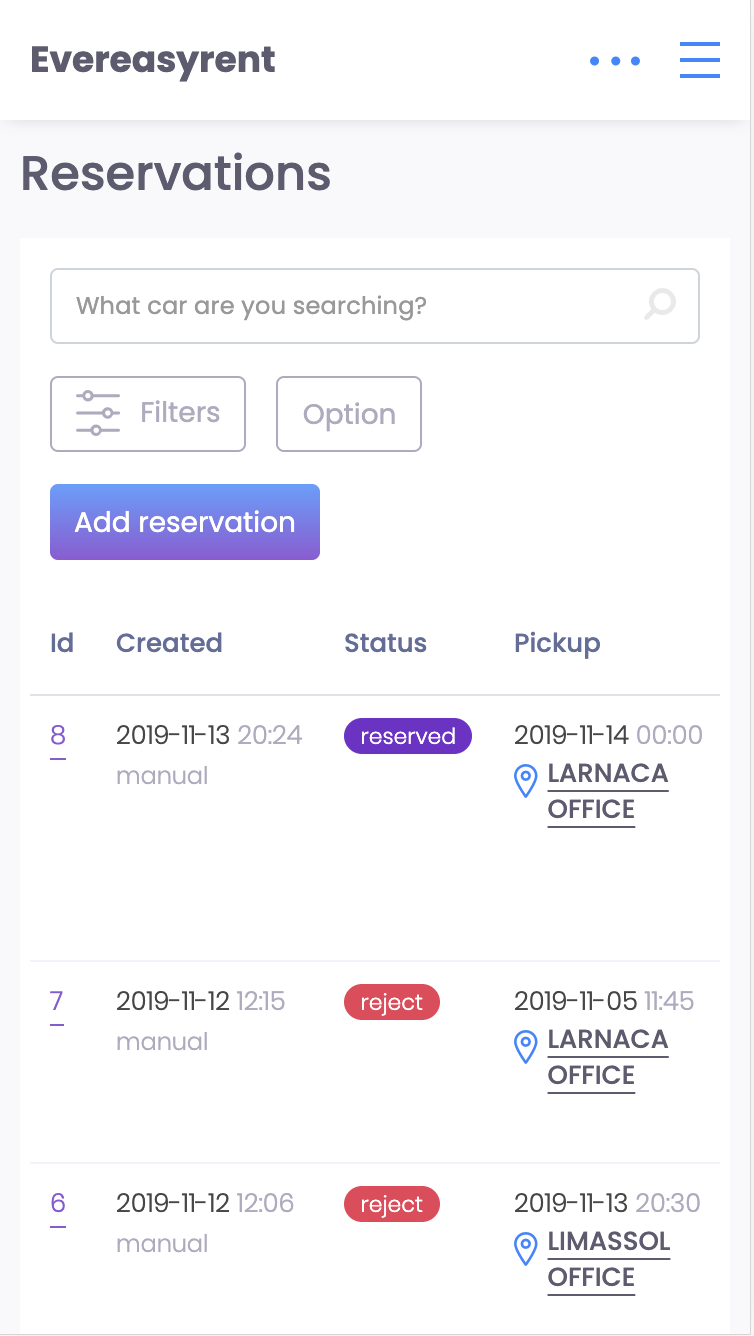
To create a new order, go to the Rentals tab, find the Reservations section in it and in the upper right corner you will see the “Add reservation” button.

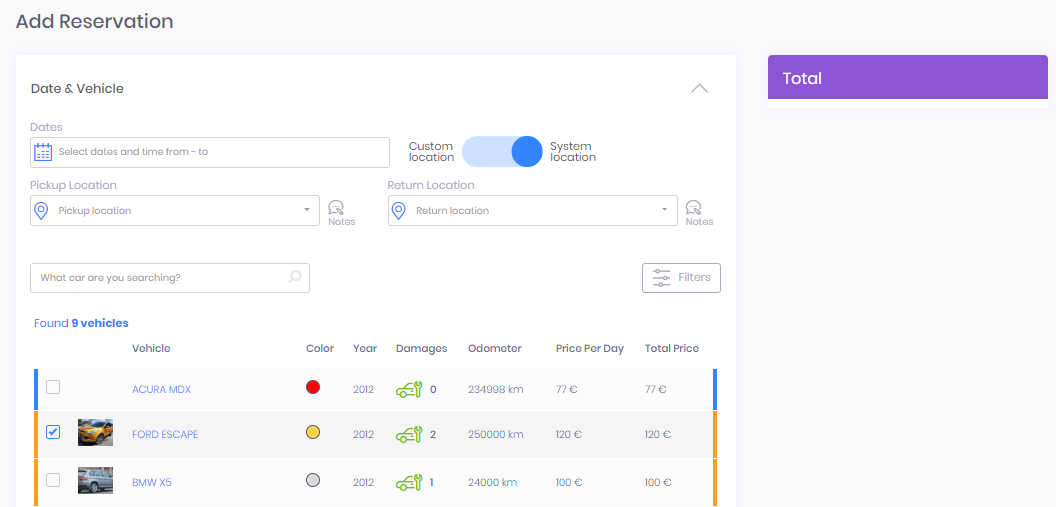
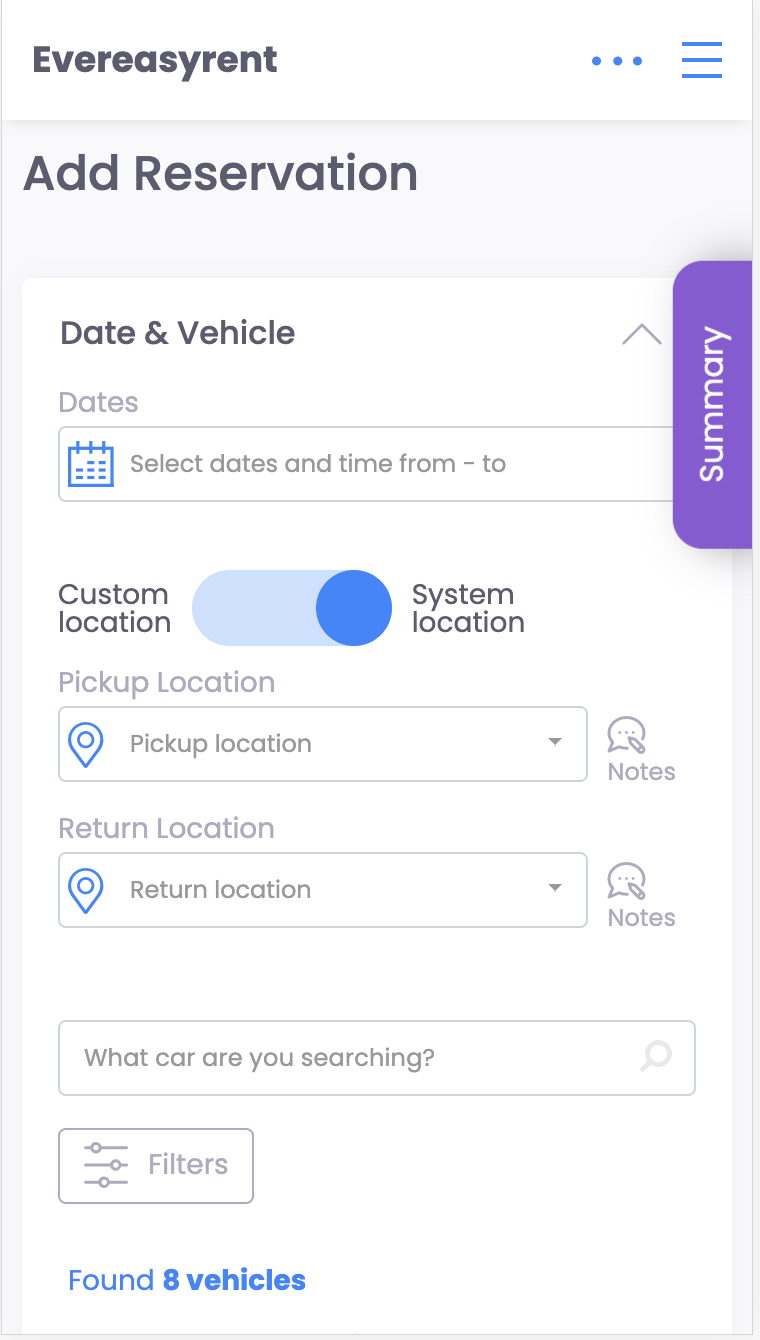
After pressing it, a new screen opens. It consists of five steps.
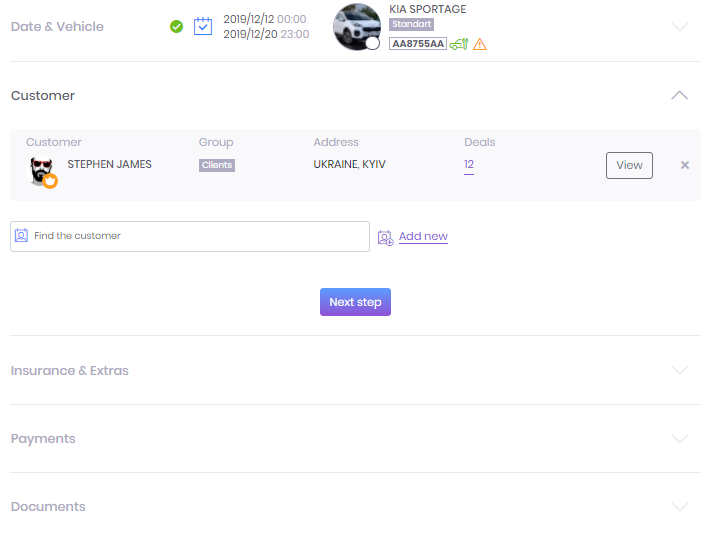
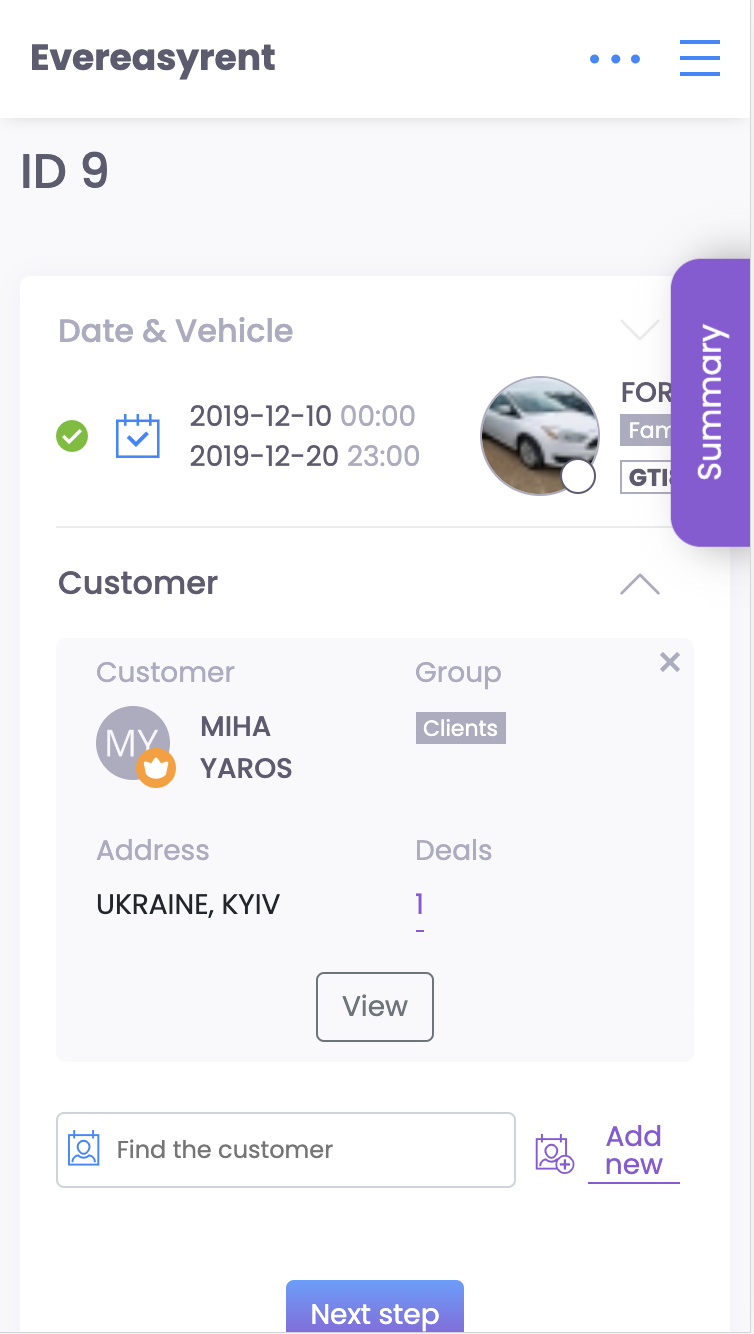
At the first stage, you need to choose a vehicle for reservation and indicate the time and place of its rental. Use the drop-down lists, and to select a vehicle also a search bar if necessary. Put the “✔️” mark in front of the vehicle for which you plan to apply. The place of delivery and return can be selected both from the base offices (Section 1.14), and any place on the map (a prompt from Google Maps will load) when the slider is switched from the “System Locations” status to “User Locations”. When activating the “User Location”, the settings (Section 1.14) from the nearest “System Location” and its parameters will be taken into account.
Pressing the “Next step” button allows you to go to the next step - to fill in customer data. If this is a new client, add it to the database by clicking the “Add new” button. You will need to fill in all the fields that open on the screen. If this is a client with whom you have already collaborated, select their name from the drop-down list after entering the initial letters of the name. The “Add new” button next to the search bar allows you to add several drivers to one order. To indicate which one will be the main one, set the “crown” icon next to their avatar. Upon completion of this step, proceed to the next, third, step. Click the “Next step” button.
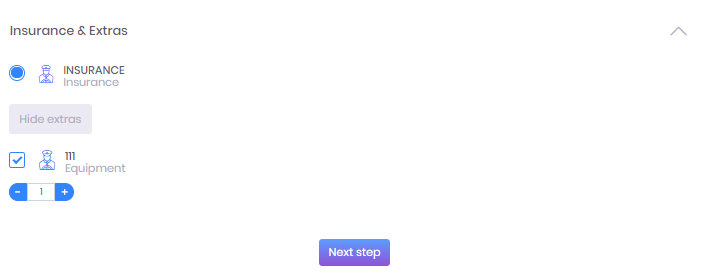
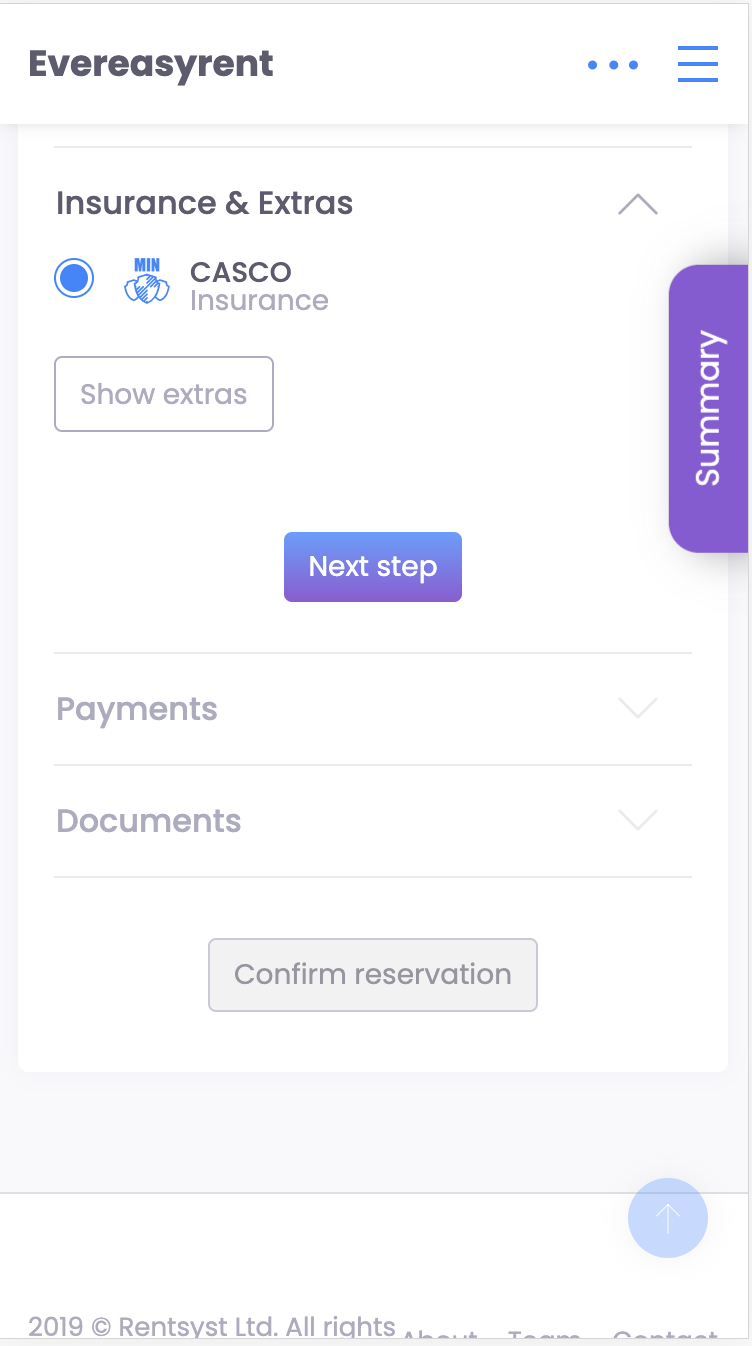
Here you need to specify which insurance and what additional equipment from the proposed in the lists to add to the order. The list for selection will display the information that the Equipment & Insurance section was filled with (Section 1.23 and Section 1.24). Connect one of the available insurance, its cost will be taken into account in the general price list. From the list of additional equipment, select the necessary one in a specific reservation request and indicate its quantity.
Go to the next, fourth, stage by pressing the “Next step” button.
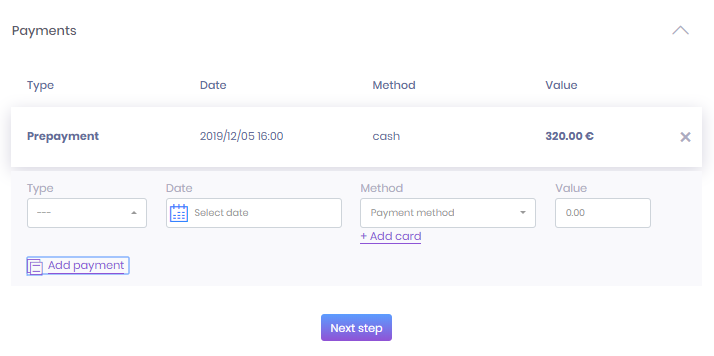
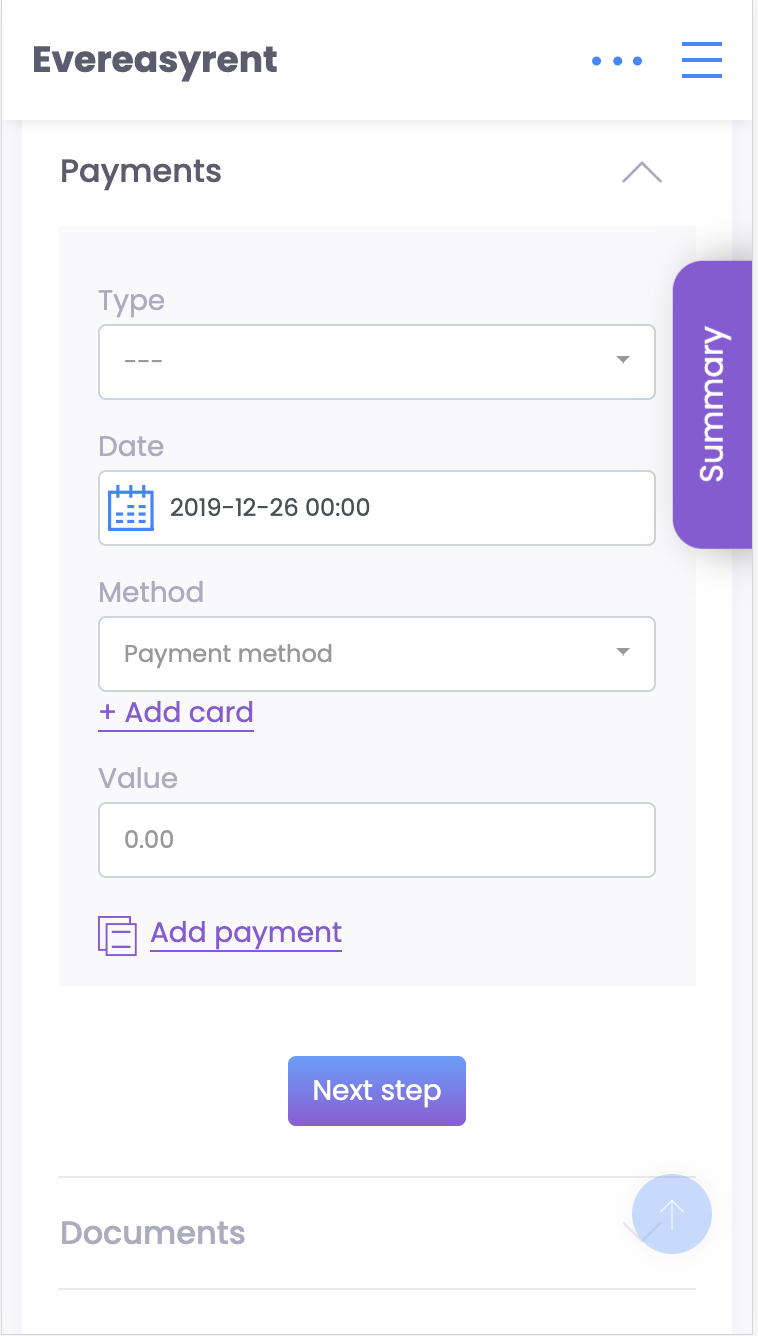
When filling in the payment data, use the drop-down lists - determine the type and method of payment, specify the payment date and amount.
To assign a payment card to a specific client, add it to the drop-down list by clicking on the “Add card” button.
To add payment to the invoice, click on the “Add payment” button.
To proceed to the fifth and final stage of creating a reservation request, click the “Next step” button.
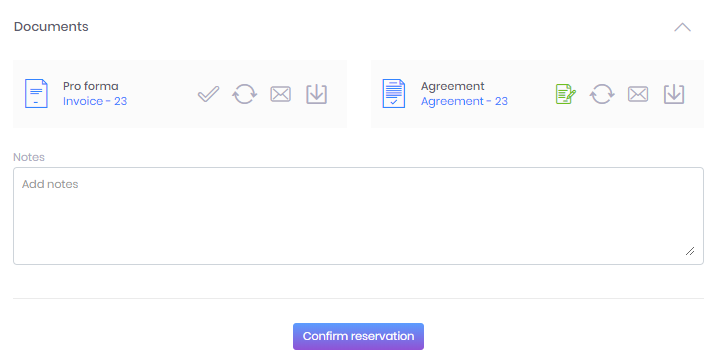
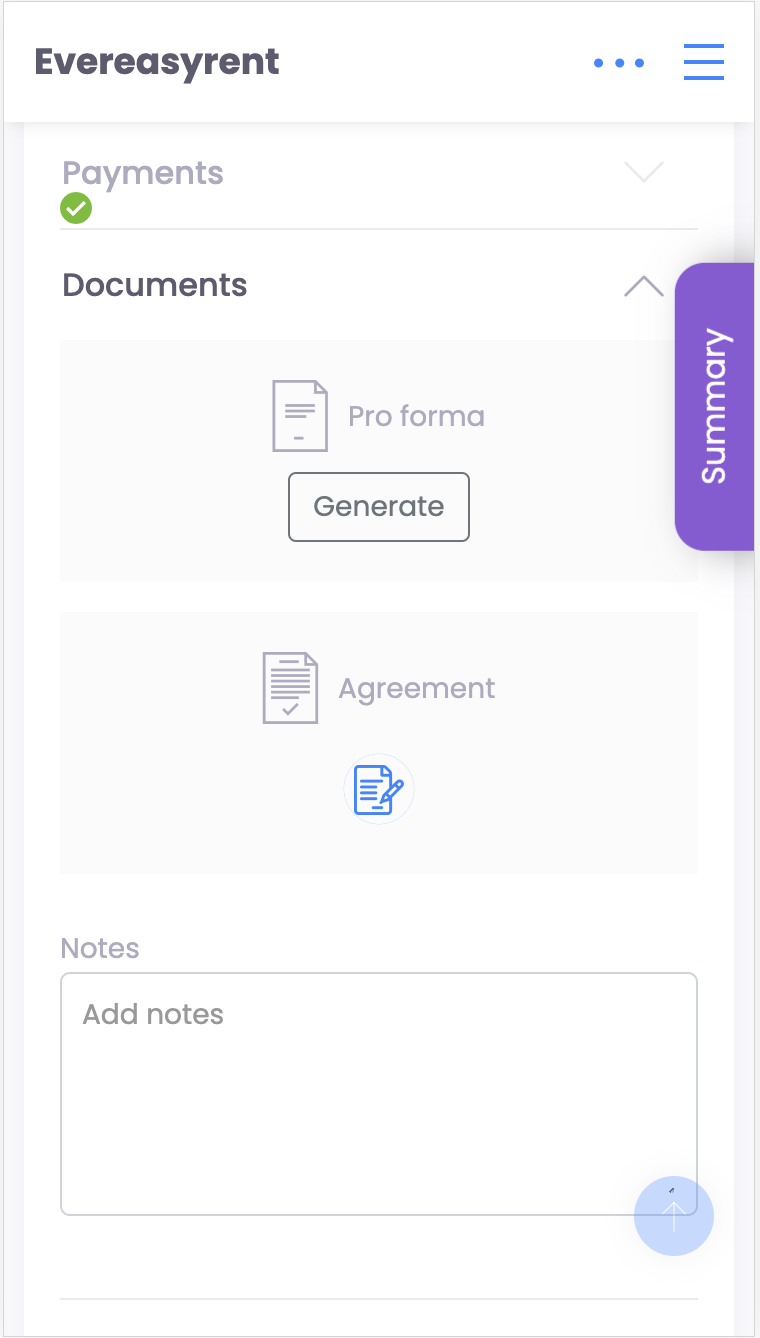
The final stage involves the management of documents (Section 1.9) - an invoice and a lease.
They can be signed, updated in accordance with the changes made to the application, as well as downloaded or sent by mail. You can also add a note to documents in the special field “Add notice”.