7.2 RentSyst Wordpress Plugin
The RentSyst plugin is easily integrated with the website.
It automatically displays all the orders in the CRM system that came from the website. By activating the plugin, you synchronize the entire fleet and groups of vehicles that you have added to your personal RentSyst account.
Please pay attention, that our plugin is designed for standard WP redactor and cannot be fully compatible with Elementor, DIVI Builder, or similar WP builders.
"/wp-json/rentsyst/v1/access-token" -- this url cannot be cached under any circumstances!
We were made a mechanism for updating the access token through the rest api in order to avoid caching. And in the REST API, our developer added headers for our http request that say that it cannot be cached, but your plugin is configured to force caching of all rest requests.
PART I. INSTALL AND ACTIVATE PLUGIN.
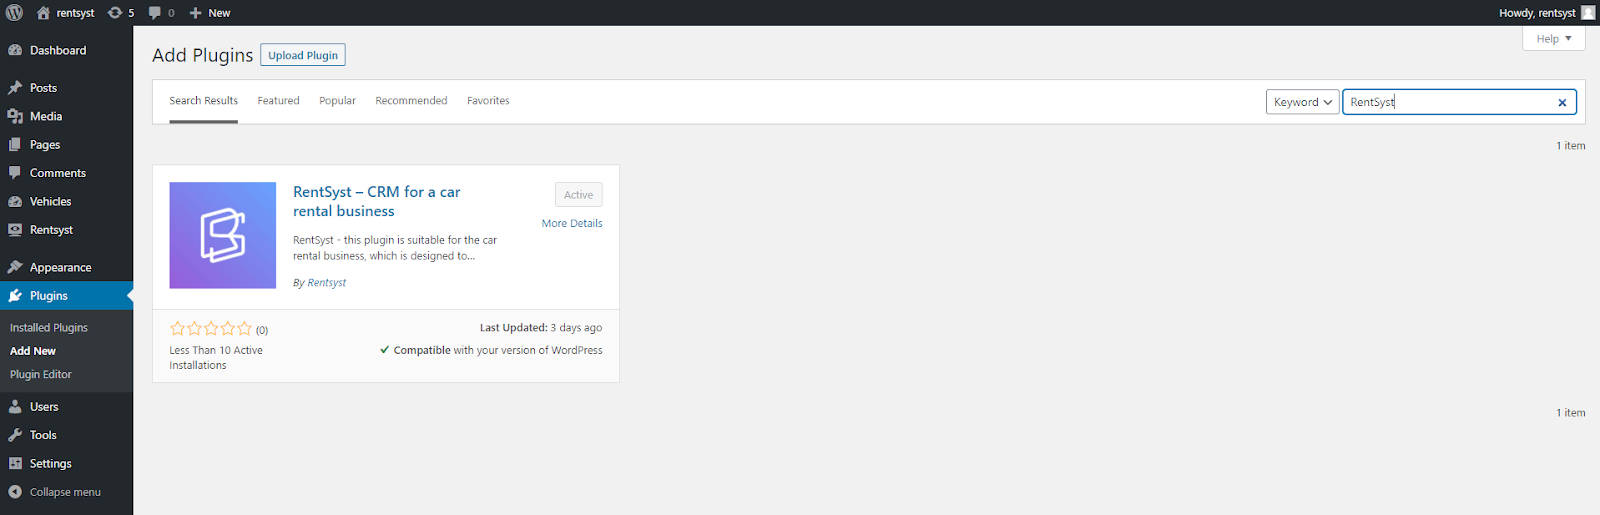
STEP 1. Download the RentSyst plugin from the official WordPress website or find our plugin in the WordPress admin panel.
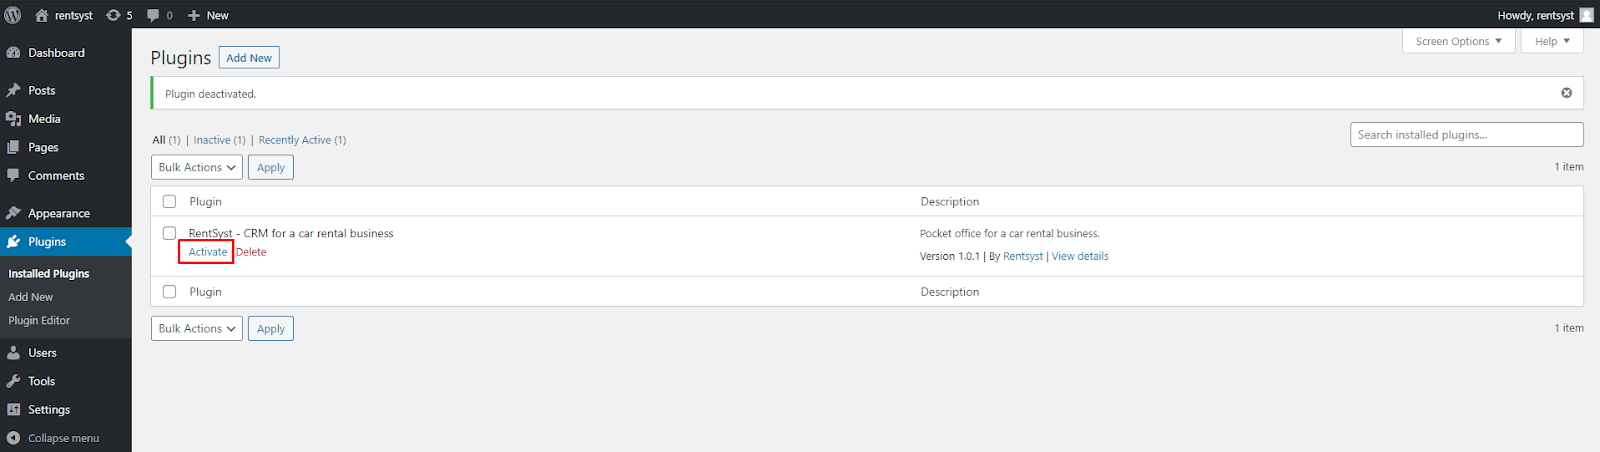
STEP 2. Go to the Plugins section in WordPress and click "Activate" on RentSyst plugin.
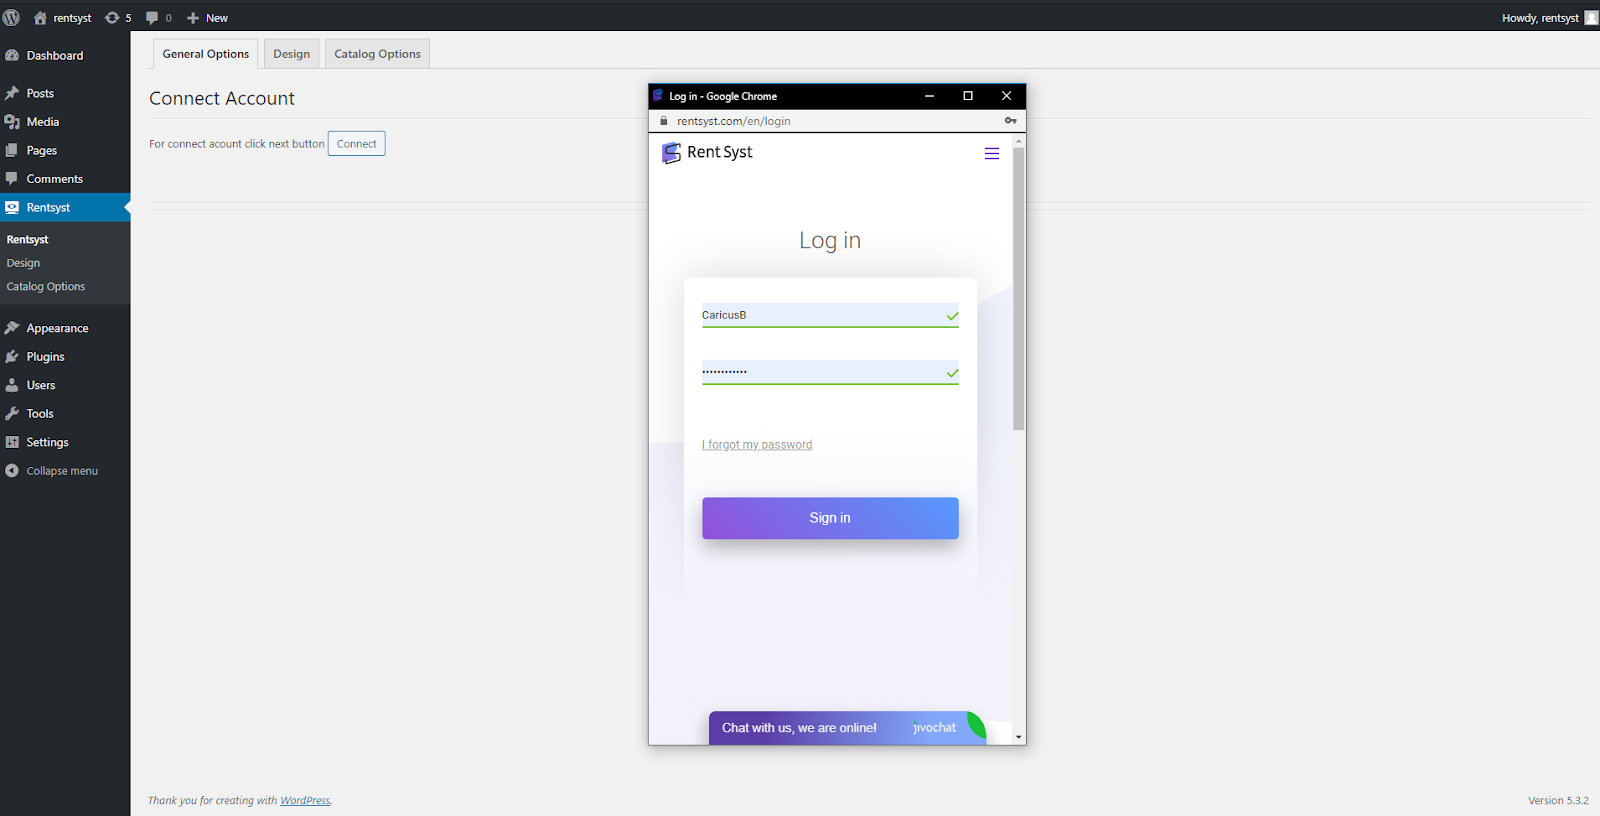
STEP 3. Open the RentSyst tab and click "Connect".

STEP 4. There will appear a Pop-up window in which you will need to enter the login and the password of RentSyst account.
PART II. HOW TO USE PLUGIN?
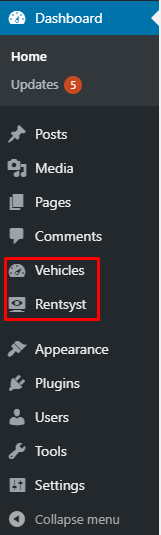
After activating RentSyst plugin, in the sidebar of WordPress, you will have two main tabs: VEHICLES and RENTSYST.
STEP 5. VEHICLES TAB.
5.1. The Vehicles tab shows the entire fleet that is in your RentSyst account as a list. This page displays the main vehicle parameters:
- Name of the car;
- Comments on the website;
- Date of vehicle publication;
- Year of vehicle manufacture;
- Color;
- Photograph;
- Group (to which the vehicle is assigned);
- Body type;
- Fuel;
- Gearbox;
- Rental price;
- Number of seats;
- Amount of large and small baggage.
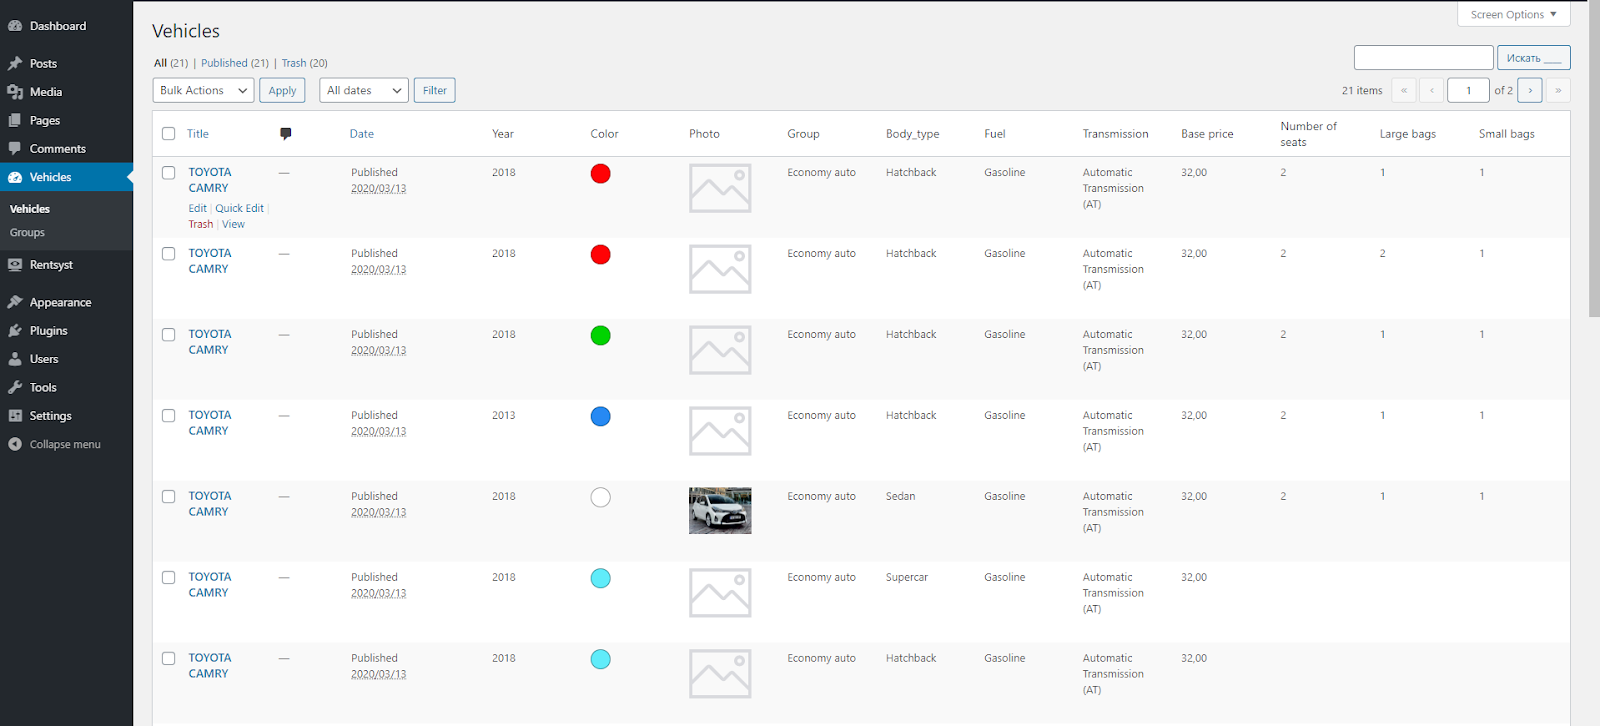
5.2. If you move a mouse over any of the vehicles, additional settings appear:
- Edit
- Quick edit
- Trash
- View

5.3. By clicking on the Edit button, you will jump to the Editor where you can edit the vehicle page. In the page editor, you can add an additional vehicle description.

5.4. You can activate or deactivate comments on this page. To do this, check or uncheck the box at the bottom of the page.

5.5. By clicking on the Quick edit button, you open quick settings where you can edit the page name, page url, publication date. You can set a password for the page or make it private, change the “Group” of this type of transport, allow comments or not. Select the status of this page (Published, Pending Review, Draft).

5.6. Click on TRASH, and this page will go to “Trash”. For a casual user, this page is NOT VISIBLE, but you can edit it.
5.7. Click on VIEW, and you will see how the page will be looks like on your website.
5.8. The GROUPS tab displays all the vehicle groups that you have added to your RentSyst account.

STEP 6. RENTSYST TAB.
6.1. This tab contains three additional options for configuring the RentSyst plugin. The first parameter is GENERAL OPTIONS.
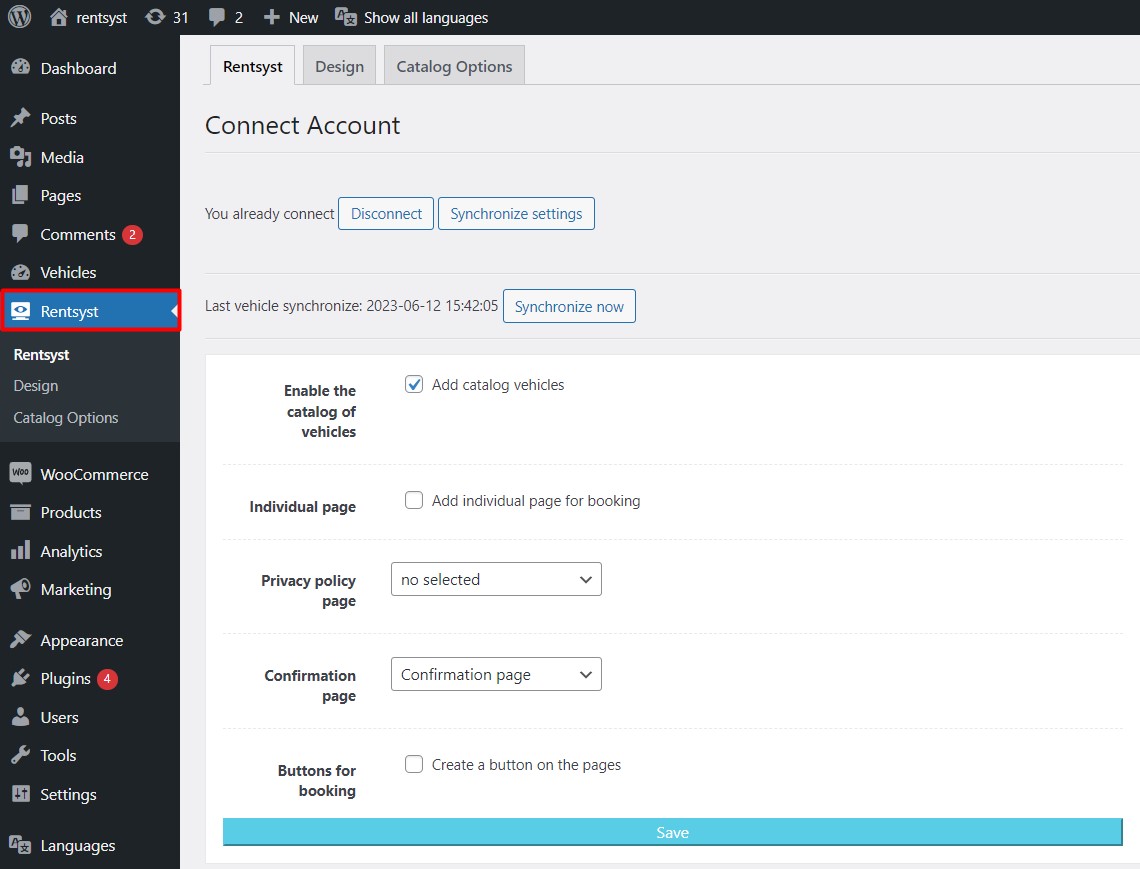
6.2. On this section there is 2 VITAL BUTTONS (as you already connected to your RentSyst Account you will see notification "You already connected"):
1) Synchronize settings -- this is very important button which is responsible for updated settings from RentSyst account. Press it every time when you make any updates or changes with your RentSyst settings.
2) Synchronize Now -- here you will see actual date of last update for your fleet. Press it every time when you update your Fleet in RentSyst (delete vehicles, add new models, update prices, locations, etc.)

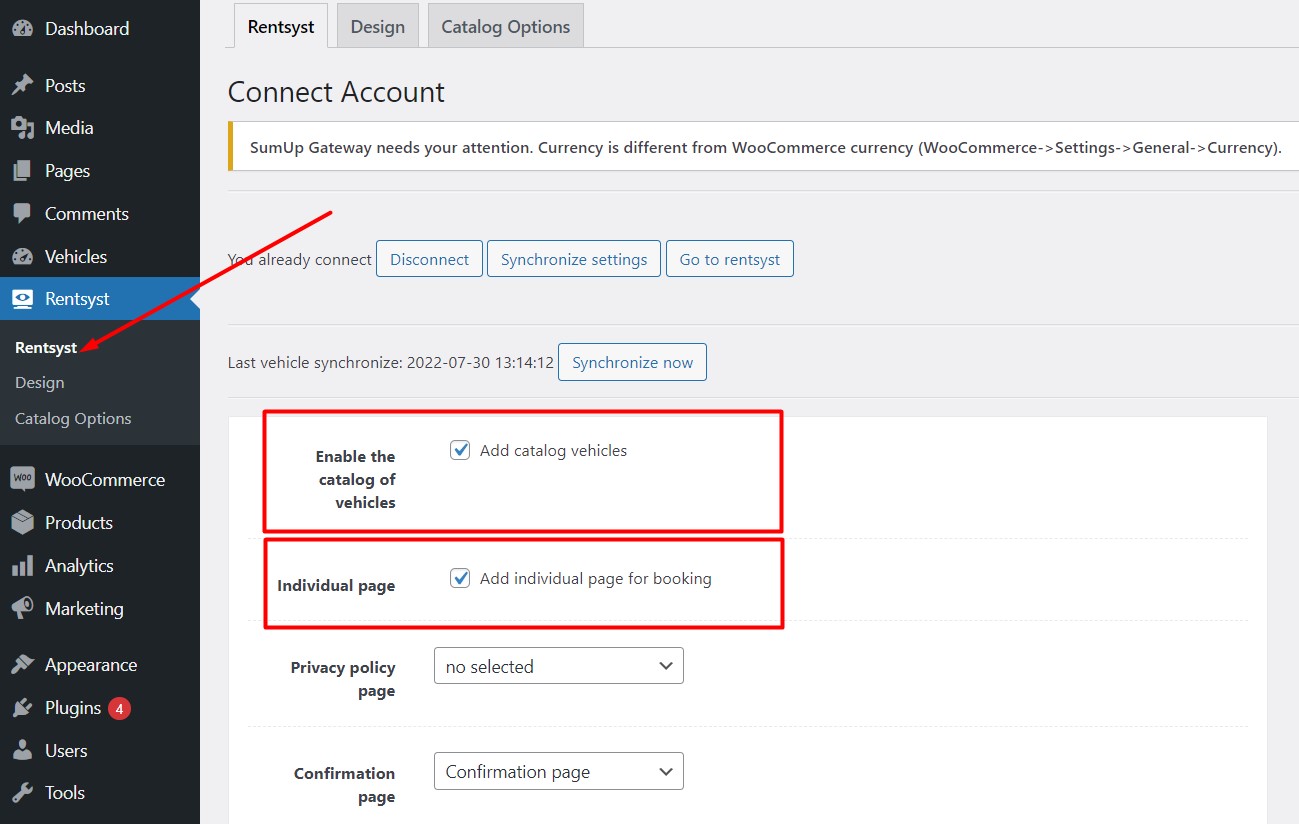
6.3. The other parameters here are:
ENABLE THE CATALOG OF VEHICLES -- this item is responsible for adding the vehicle catalog to your website

INDIVIDUAL PAGE -- allows you to activate a separate page when booking a car (if the box is not checked, a side reservation menu will appear)

PRIVACY POLICY PAGE -- possibility to select Privacy Policy page from your pages list.

BUTTONS FOR BOOKING -- after activating this parameter, a reservation button will appear on your website.

When you activate this option -- additional settings to this button will appear below:
BUTTON TEXT
LOCATION OF THE BUTTON
COLOR
ANIMATION
LOCATION OF THE BOOKING PANEL (location of the reservation panel when the button is clicked)

Click on the Save button for your settings to take effect.

STEP 7. BOOKING DESIGN.
7.1. The second parameter is design.
On STAGE 1 you visually customize the “Reservation Panel” to the style of your website. You can visually see what the selected color scheme will look like at each stage of the reservation.
7.2. You can edit almost all text that you see inside design redactor. For instance, first phrase you can either delete it or write your own text.
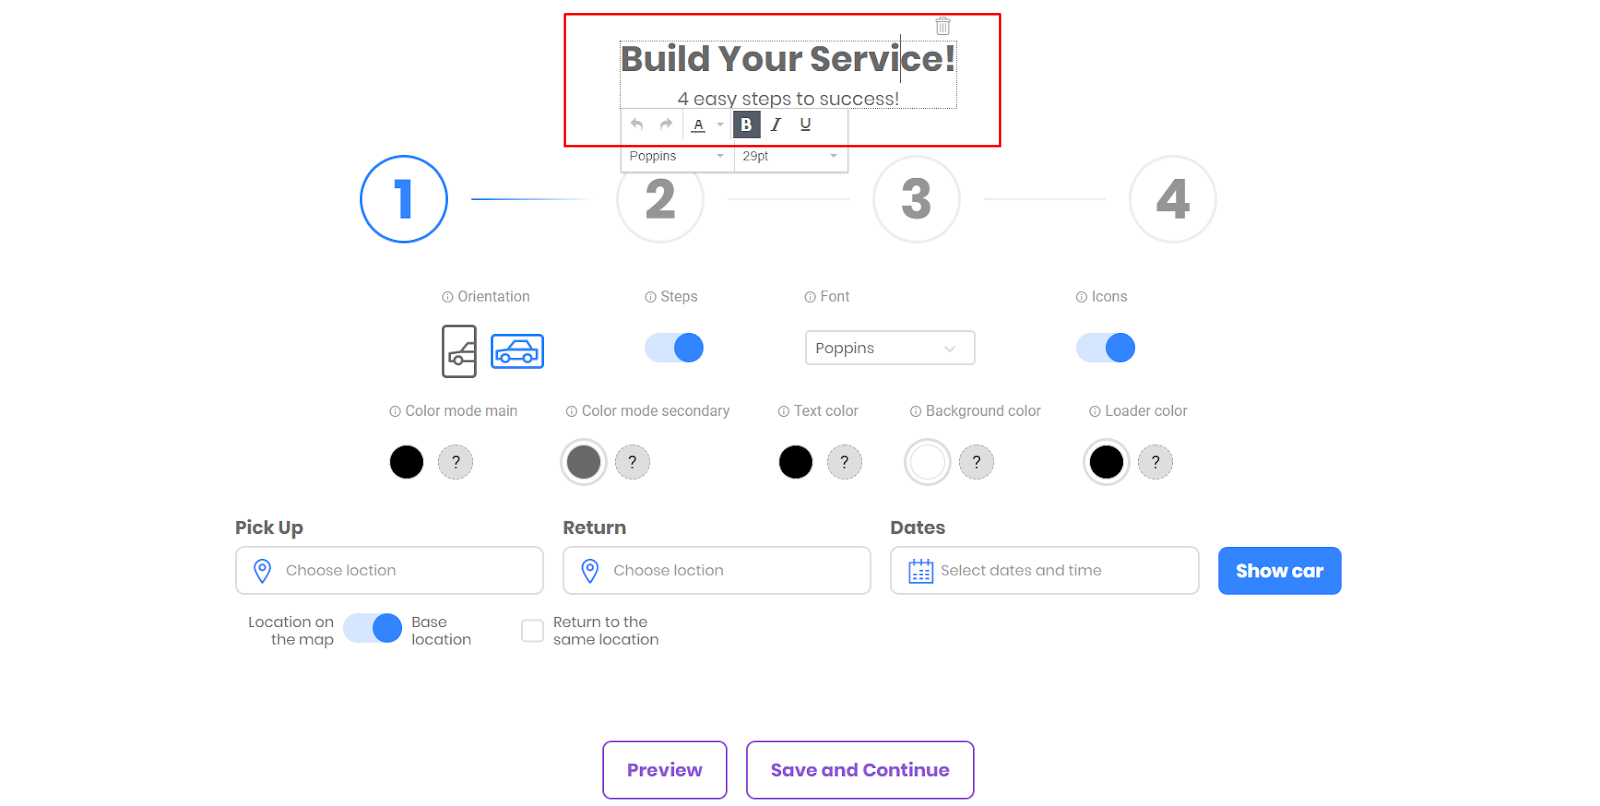
7.3. If you hover over each of the numbers, you will see a window in which you can change the color of each element.

7.4. If you want to change the text, its size or font, all you need to do is to select the text you need, and there will appear a pop-up window with an editor.


7.5. By moving the mouse over each element, you can add or remove indents from the element. To do this, press PLUS or MINUS.

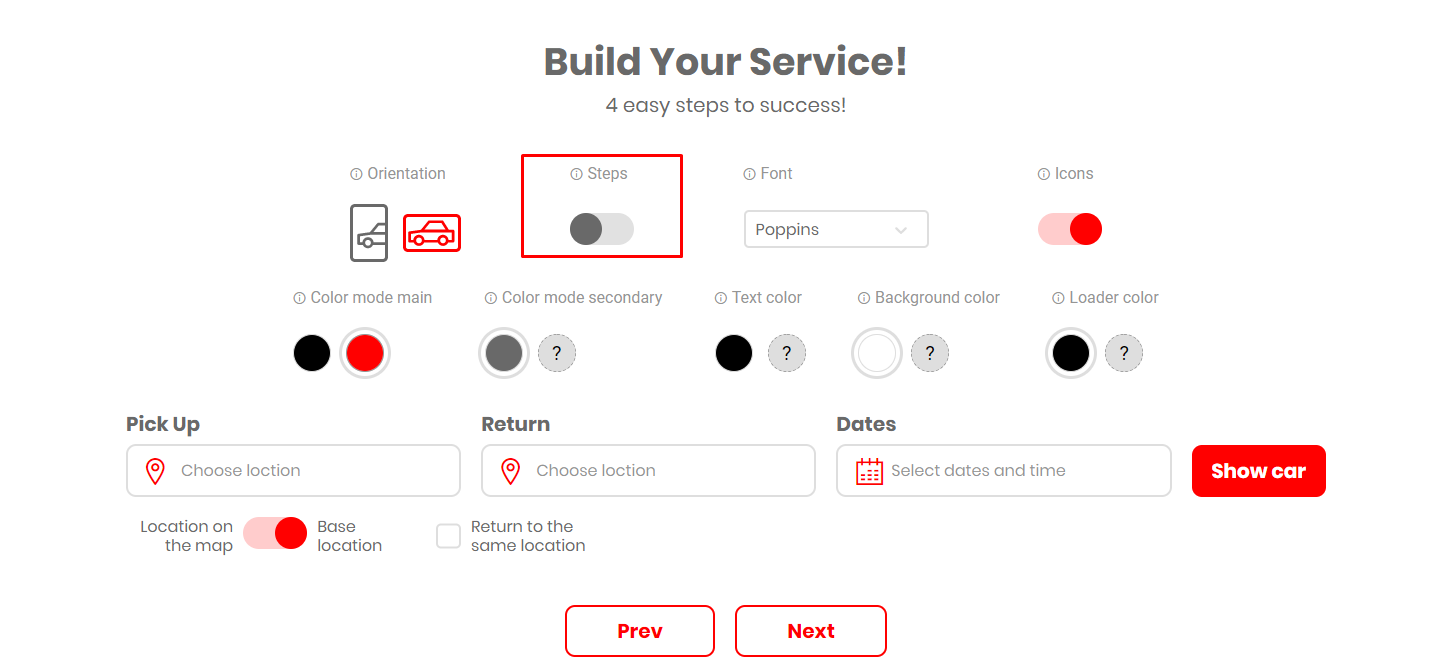
7.6. At STAGE №2 (available fleet) -- you can choose which of the filters will be available. If you want some kind of filter to be hidden, just uncheck the box next to the necessary filter.

7.7. Each company has its own color options. Therefore, you can change the colors for each element of the widget. At every step, there is a field in which you can change the color.
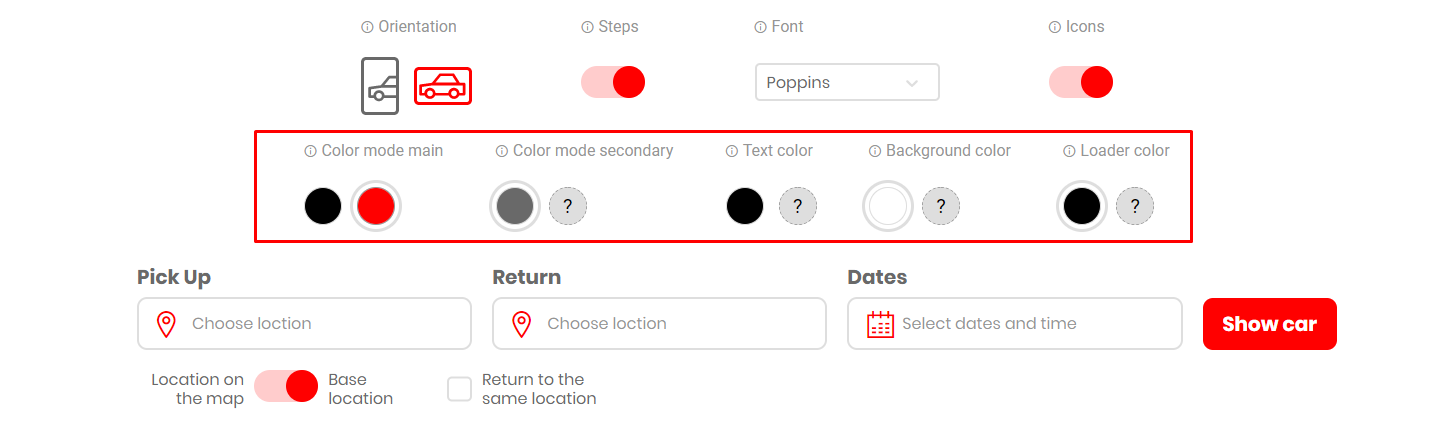
7.8. You can easily disable all the “ICONS” in the widget by switching the necessary slider. The icons will disappear. This must be done at every “Step”.

7.9. When editing the widget, you can see how each “Step” will be displayed on different devices with the help of the “Orientation” function.

7.10. STAGE №3. The third parameter is Extras.
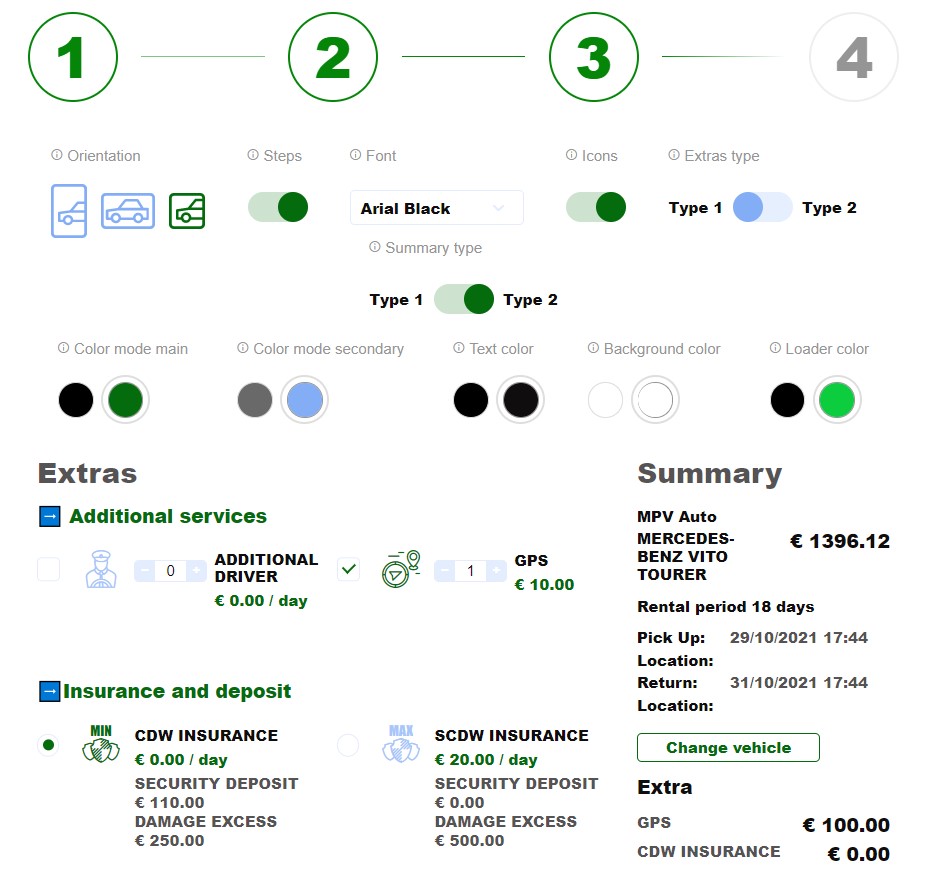
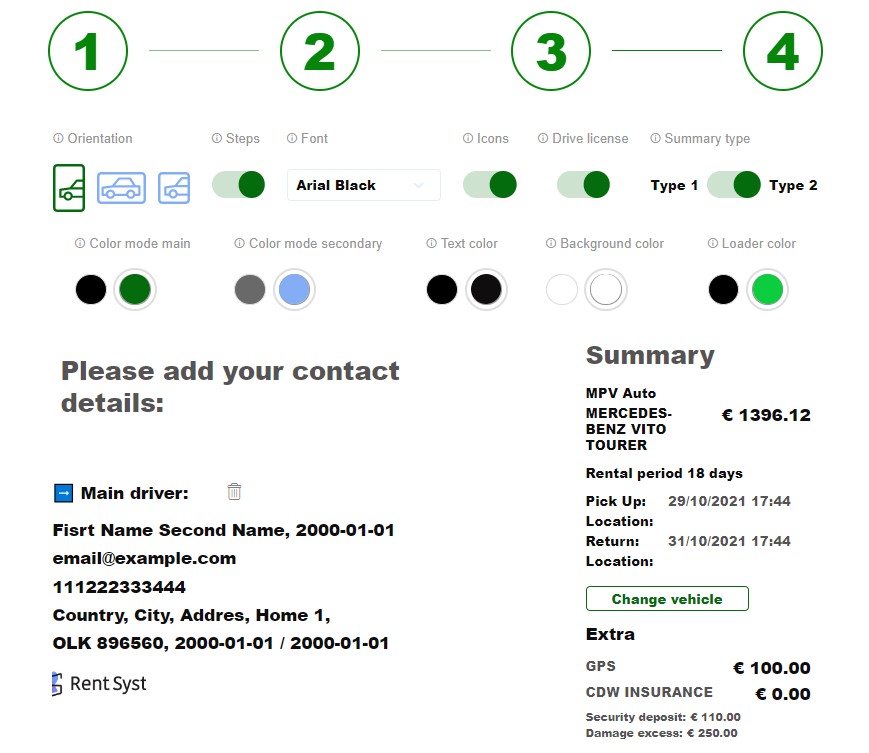
7.11. STAGE №4. Driver details and payment methods.
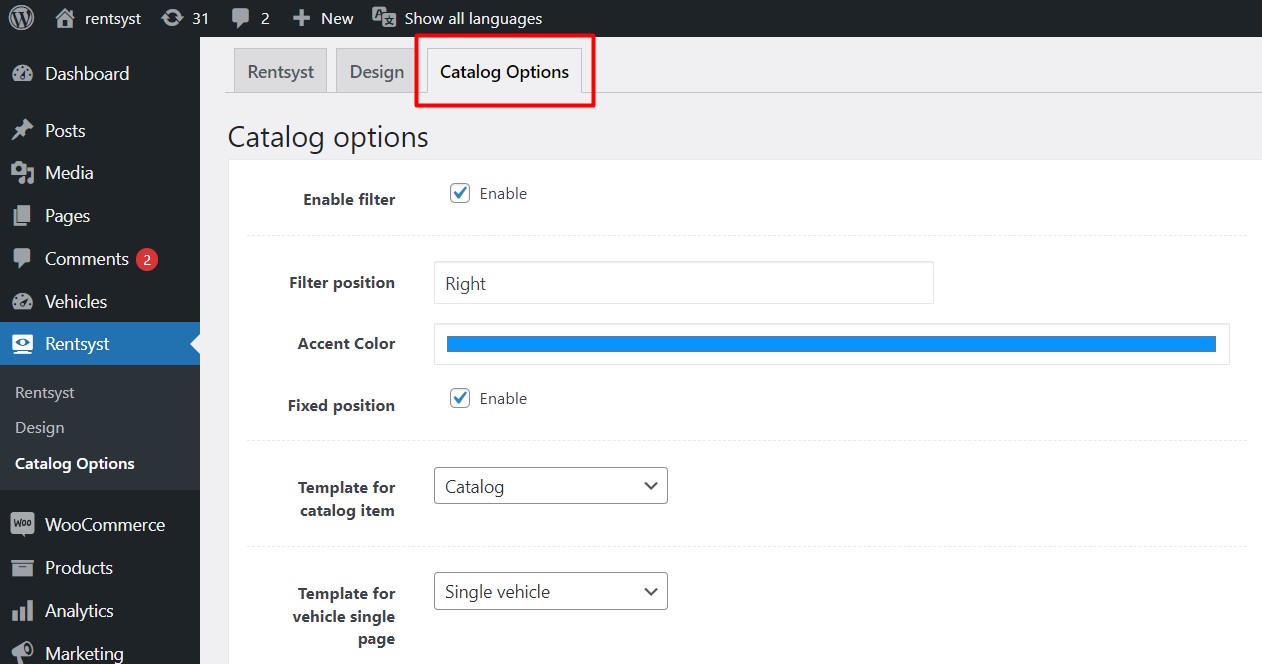
STEP 8. CATALOG OPTIONS.
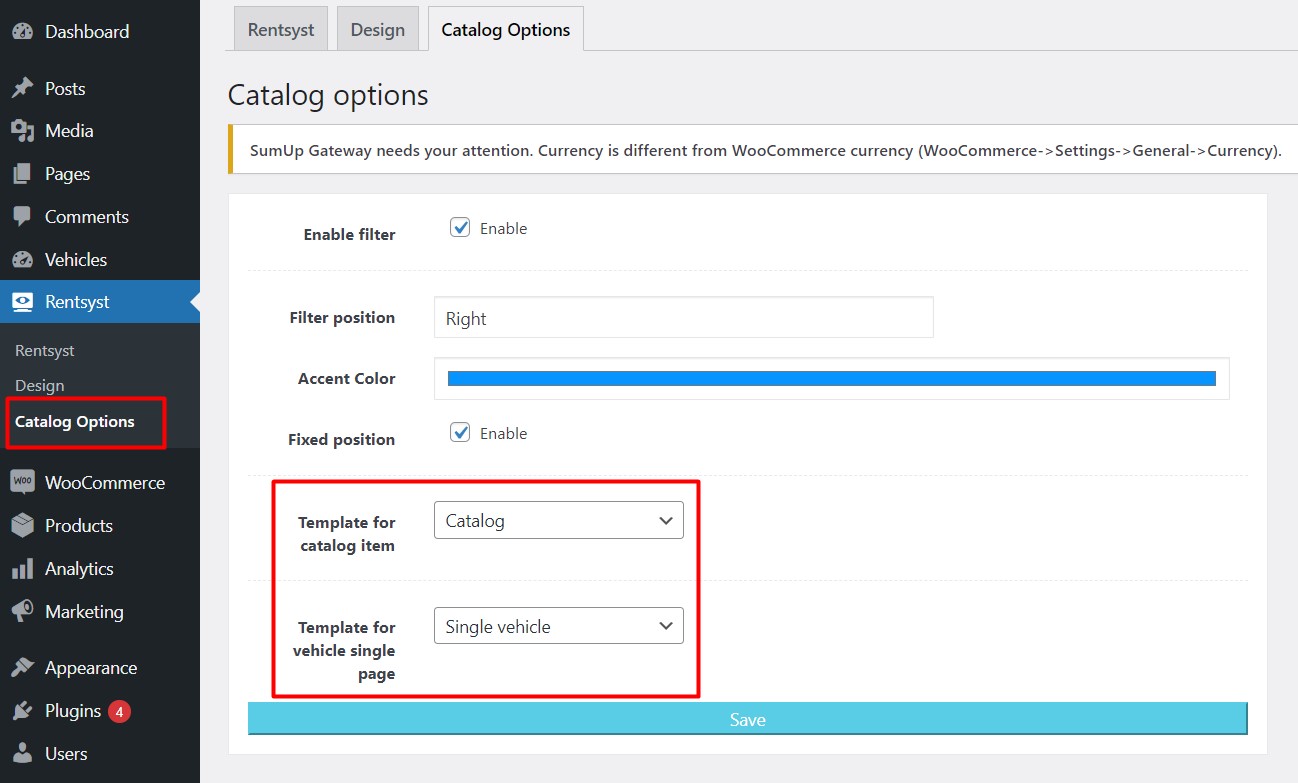
8.1. The third parameter is Catalog options. This parameter activates/deactivates the filter on your website
ENABLE FILTER -- Activates the filter
FILET POSITION -- The location of the filter. It can be on the left/right side
ACCENT COLOR -- Choose a color scheme of the filter
FIXED POSITION -- Fixing the filter when scrolling the site
8.2. The filter itself on the website will look like this.
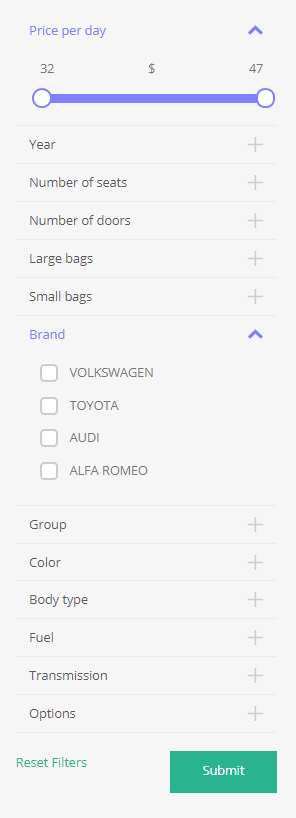
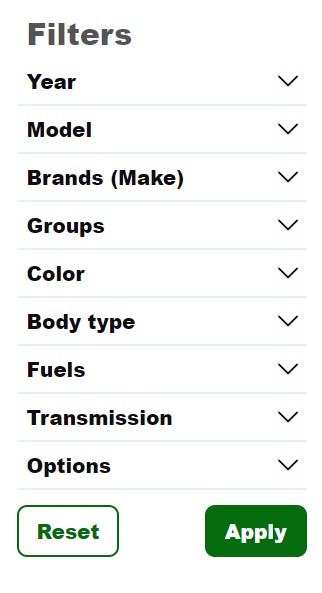
8.3. Dont forget to press Save button when make changes here.

STEP 9. CREATE CATALOG and VEHICLE PAGE.
9.1. These options are available by default, when you connect the RentSyst plugin to WP. Plugin creates default pages "Catalog" as a fleet page and "Single Vehicle" as a vehicle page.
9.2. RentSyst Tab > Activate field Enable the catalog of vehicles -- mark "Add catalog vehicles".
9.3. RentSyst Tab > Activate field Individual page -- mark "Add individual page for booking".
9.4. RentSyst Tab > Catalog Options > Select page Template for catalog item > Choose Catalog (you can also use your own page).
9.5. RentSyst Tab > Catalog Options > Select page Template for vehicle single page > Choose Single Vehicle (you can also use your own page).
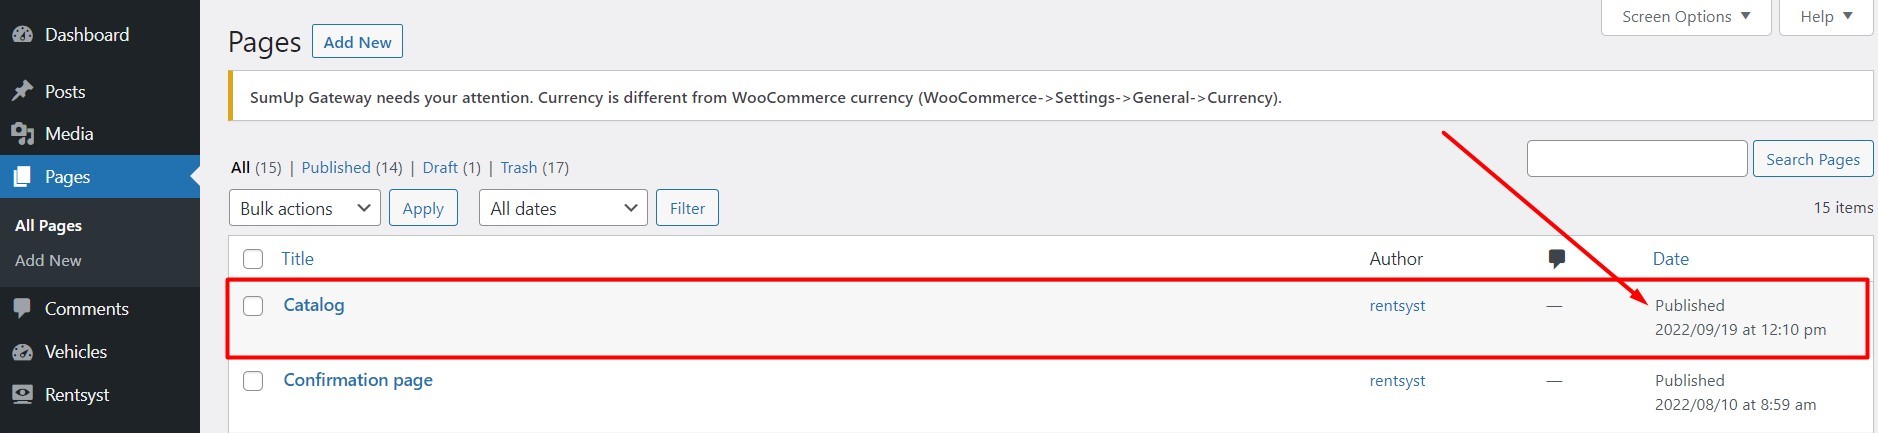
9.6. Make sure that pages "Catalog" and "Single Vehicle" are created and published. If not, create new pages and publish them.

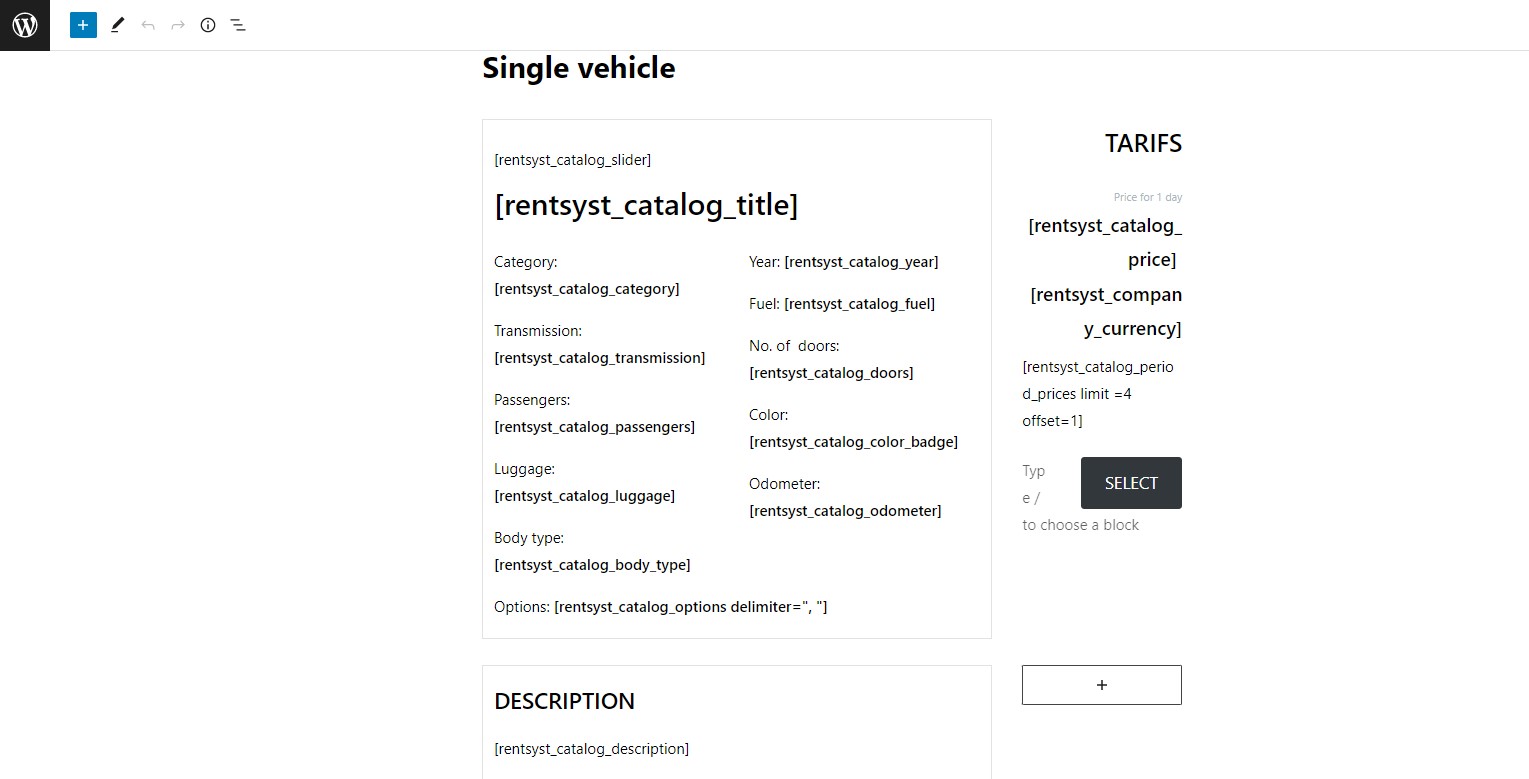
STEP 10. SHORTCODES.
10.1. You can customize Catalog and Vehicle pages according to your vision and preferences. Use shortcodes:
rentsyst_booking
rentsyst_catalog_img
rentsyst_catalog_vehicle_link
rentsyst_catalog_vehicle_link_button
rentsyst_catalog_title
rentsyst_catalog_min_price
rentsyst_catalog_price
rentsyst_catalog_period_prices
rentsyst_catalog_category
rentsyst_catalog_transmission
rentsyst_catalog_passengers
rentsyst_catalog_luggage
rentsyst_catalog_body_type
rentsyst_catalog_year
rentsyst_catalog_fuel
rentsyst_catalog_doors
rentsyst_catalog_color_badge
rentsyst_catalog_odometer
rentsyst_catalog_options
rentsyst_catalog_description
rentsyst_catalog_comments
rentsyst_catalog_slider
rentsyst_catalog_filter
rentsyst_catalog
rentsyst_company_currency
rentsyst_payment
Recommend to check our general Video guide -- Integration with website:
If you have any questions about our WordPress Plugin or wanna know more -- please feel free contact our Customer Success Department:
Email us: [email protected]
Our plugin is absolutely FREE. No hidden fees or extra purchases. All you need is the WordPress website and a RentSyst account.