7.39 Integration Guide – QuickBooks Accounting (updated)
This guide provides step-by-step instructions to integrate Rentsyst with QuickBooks - a leading accounting software.
This integration will help automate financial reporting, synchronize data, and streamline your accounting processes.
Since last Integration Guide is old, this is the latest version with full instruction how to connect.
Step 1: Prepare your accounts
- Ensure Compatibility: Confirm that both your Rentsyst and QuickBooks accounts are active and have the necessary permissions for integration.
- Update Software: Ensure you are using the latest versions of QuickBooks.
Step 2: Login to Developer account
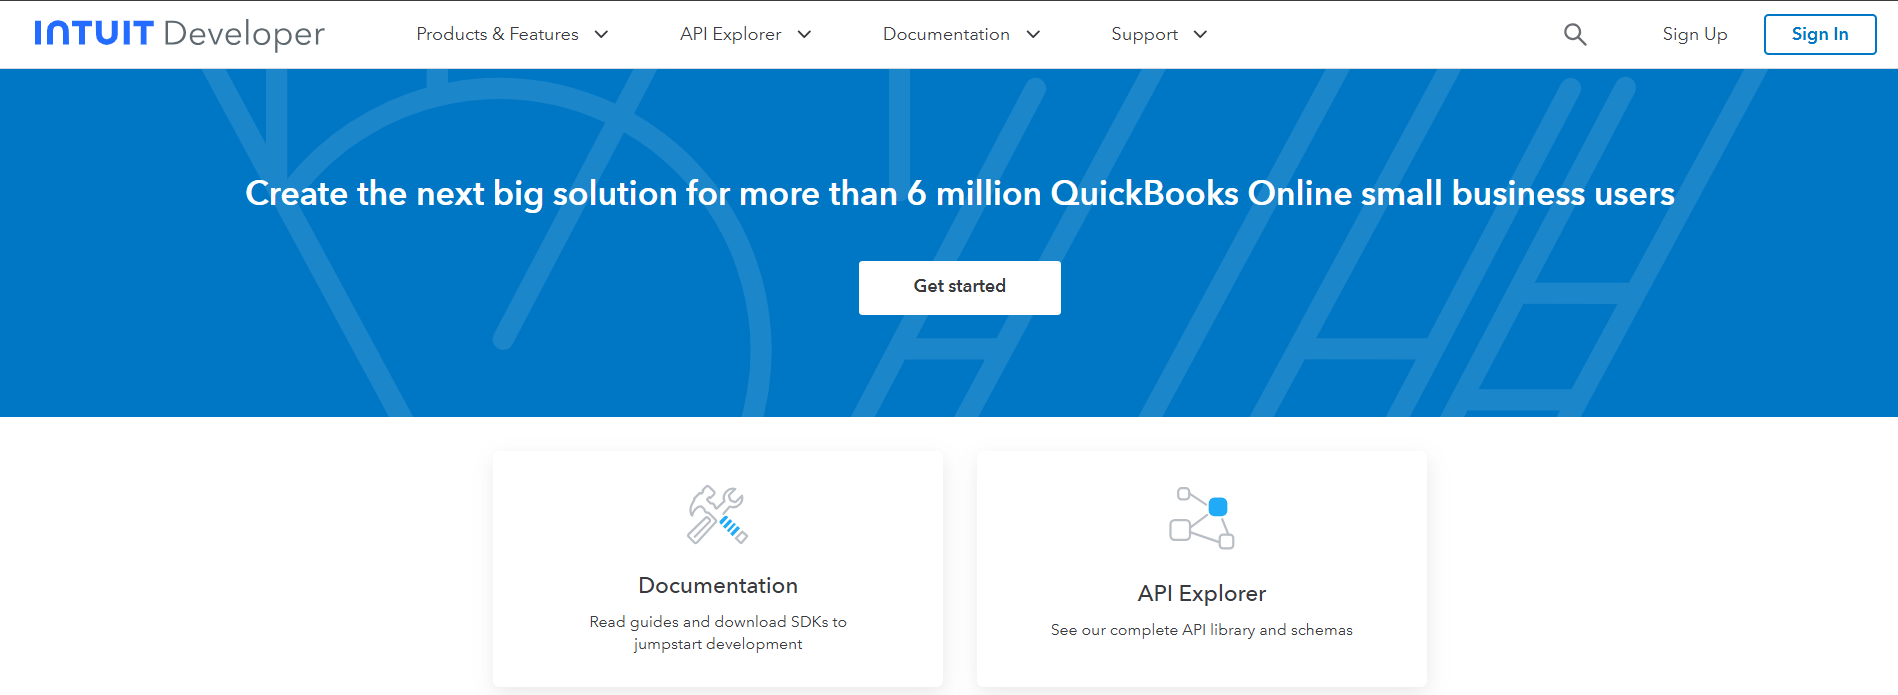
2.1. Go inside main Developer workspace - Intuit Developer. Log in with "Sign In" button.
2.2. You may use same login and password from your main Quickbooks account.
If you dont have account yet, you may register here at once.
Step 3: Find workspace tab
3.1. Click on right side corner "My Hub" and navigate to Workspaces tab.
If you dont have any workspaces yet, please create it. If you already have main workspace - click on it to dive inside:
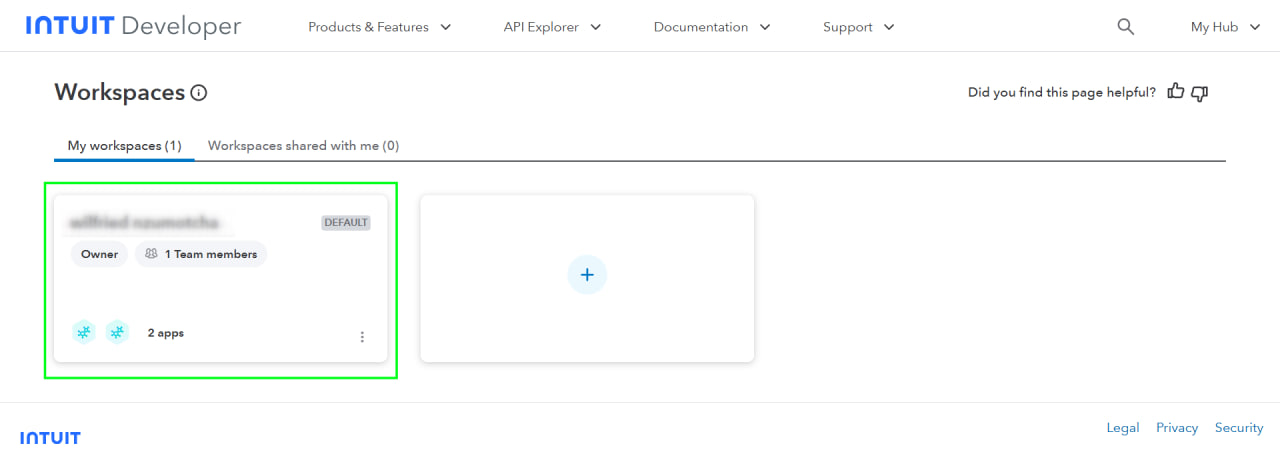
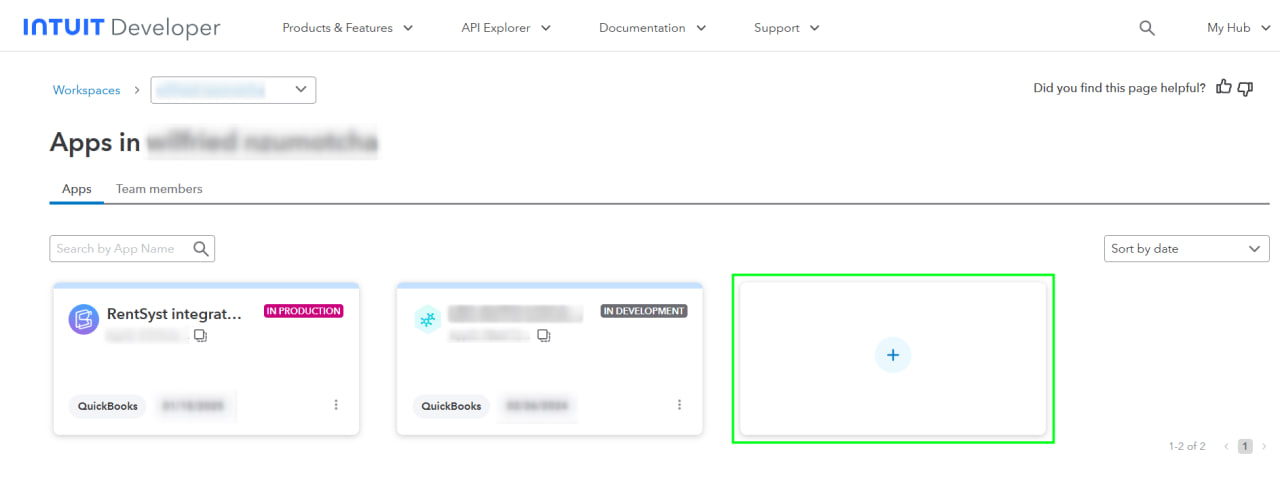
3.2. Inside your main workspace - create new App, clicking on Plus (+).
In screen below you may see we already have RentSyst App as a sample:
Step 4: Create new App
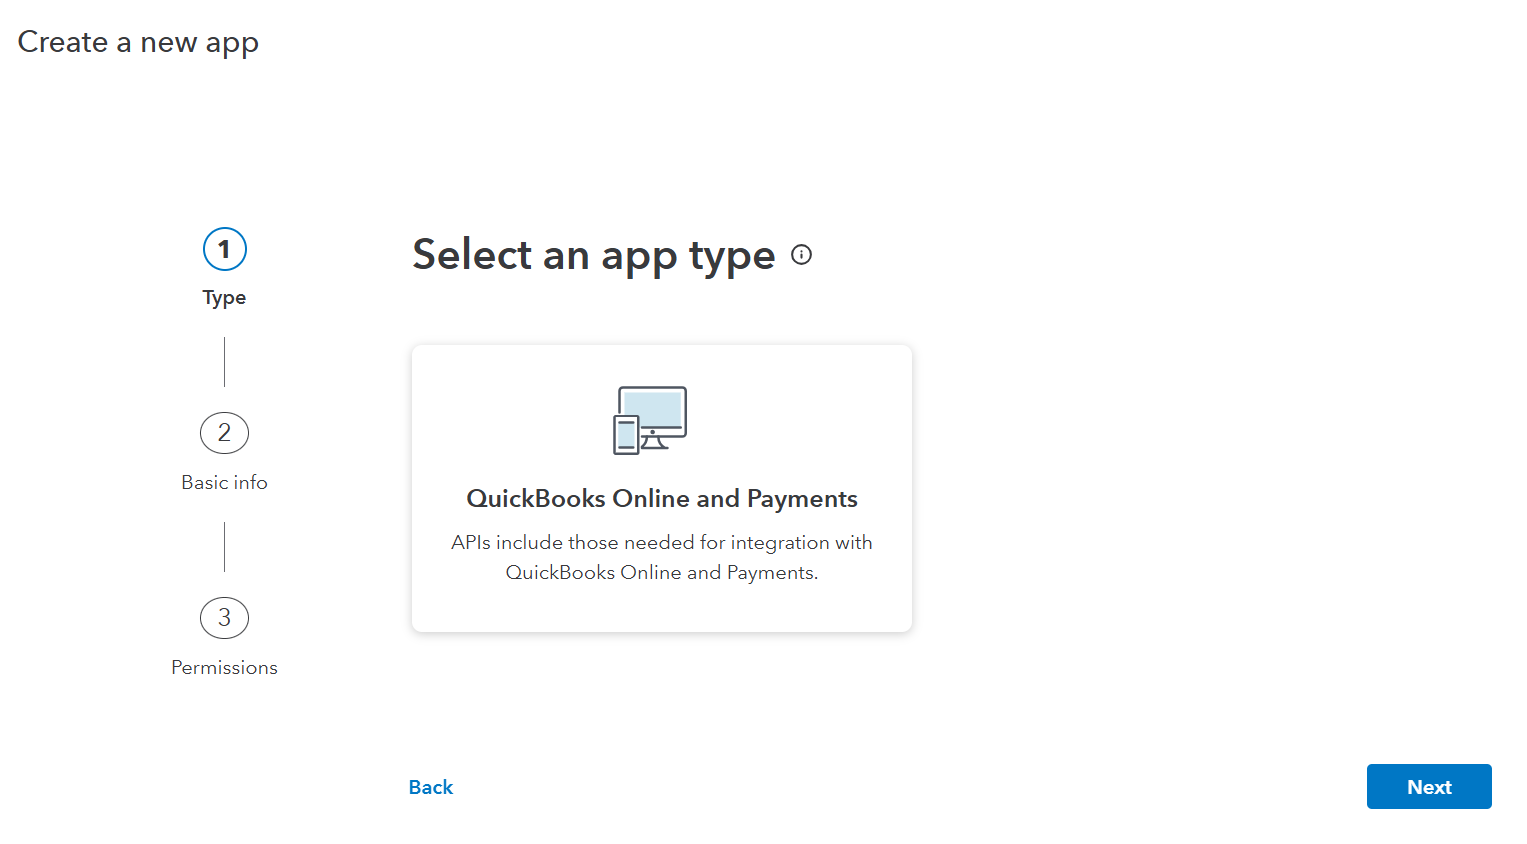
4.1. Next step are very fast and easy - just follow the system steps. Select an App type - choose QuickBooks Online & Payments.
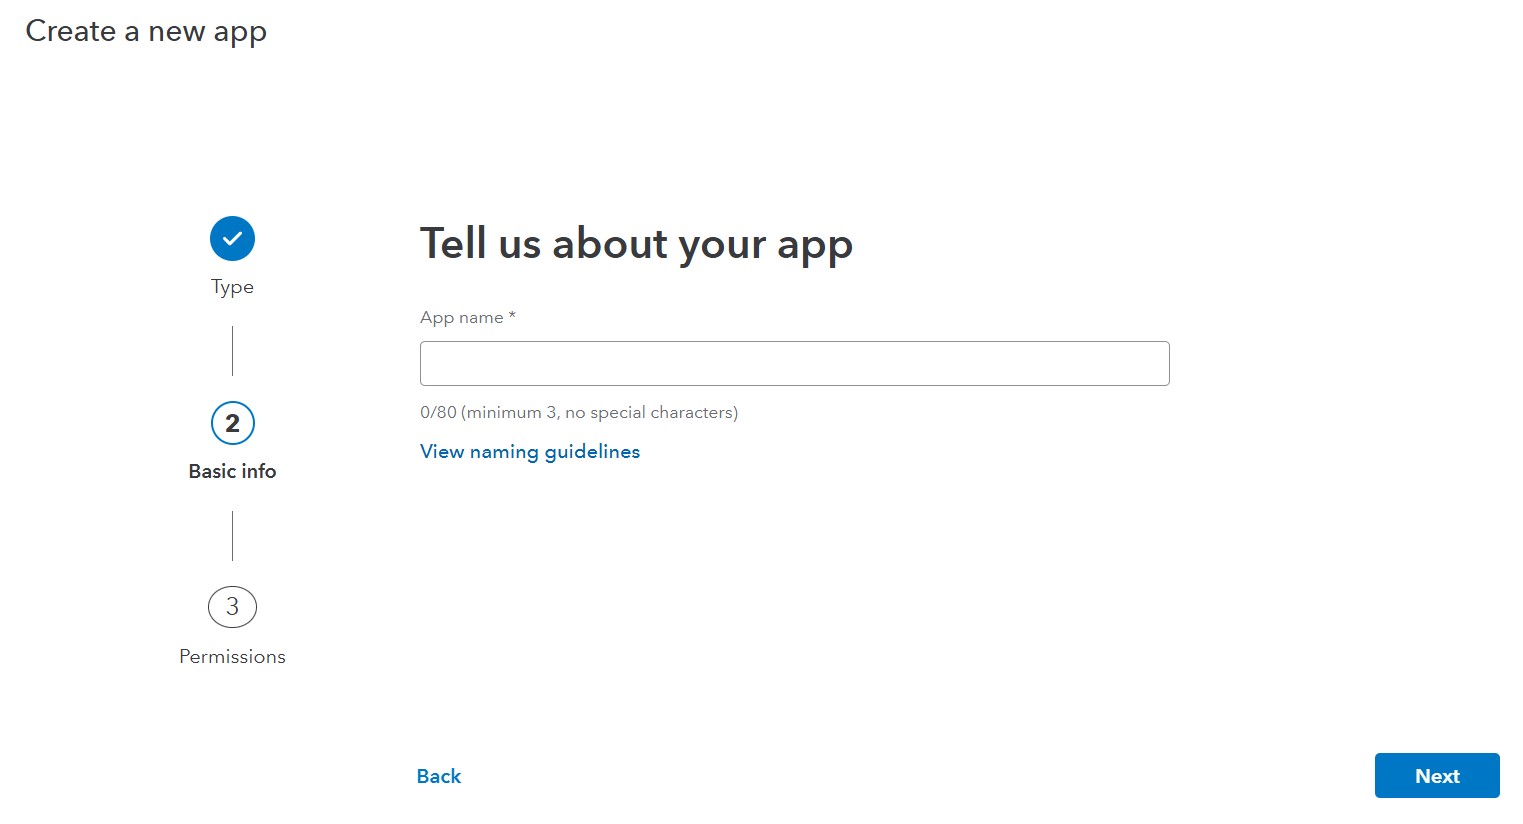
4.1. Basic info - write down your App name. It may be "RentSyst" or any other you like.
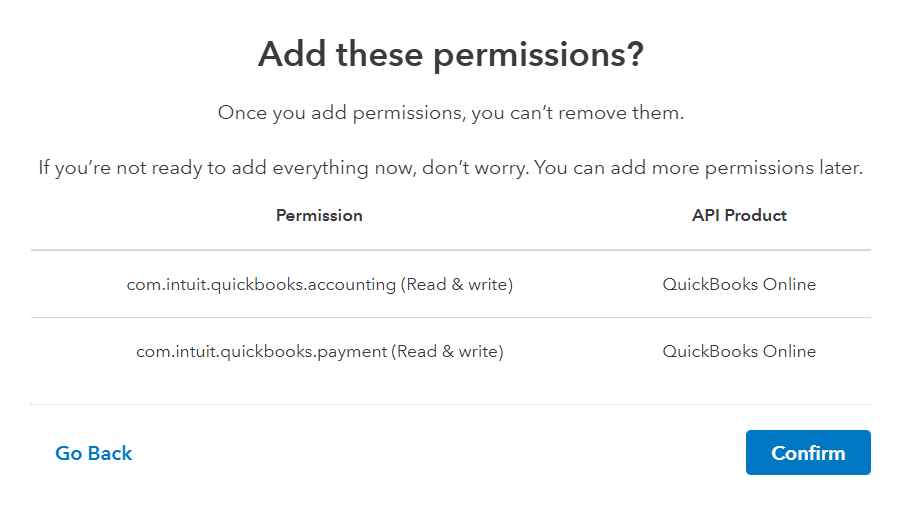
4.3. Add permissions - activate both options for accounting and payments:
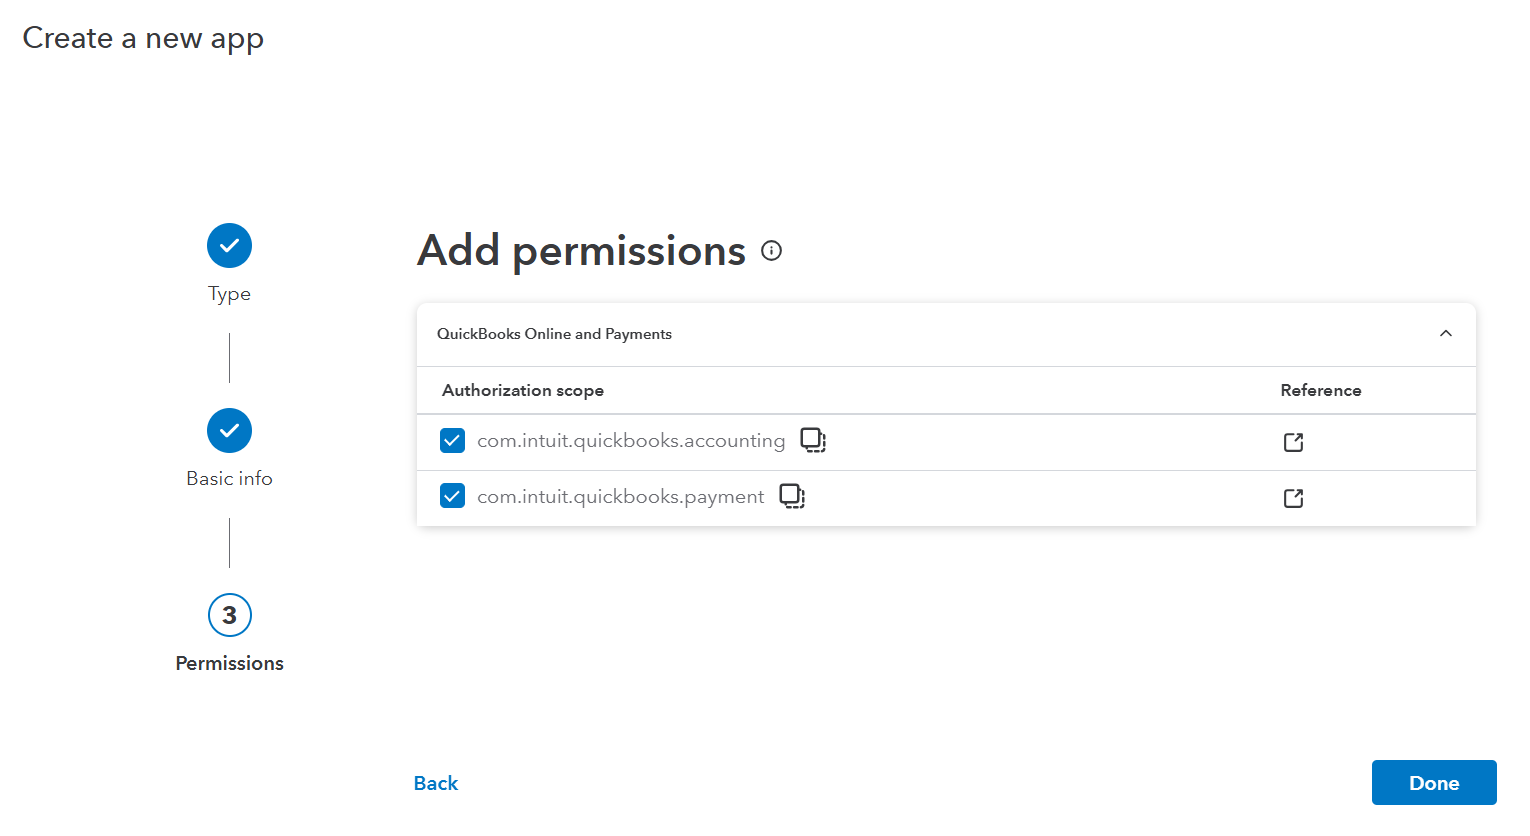
Confirm your permissions:
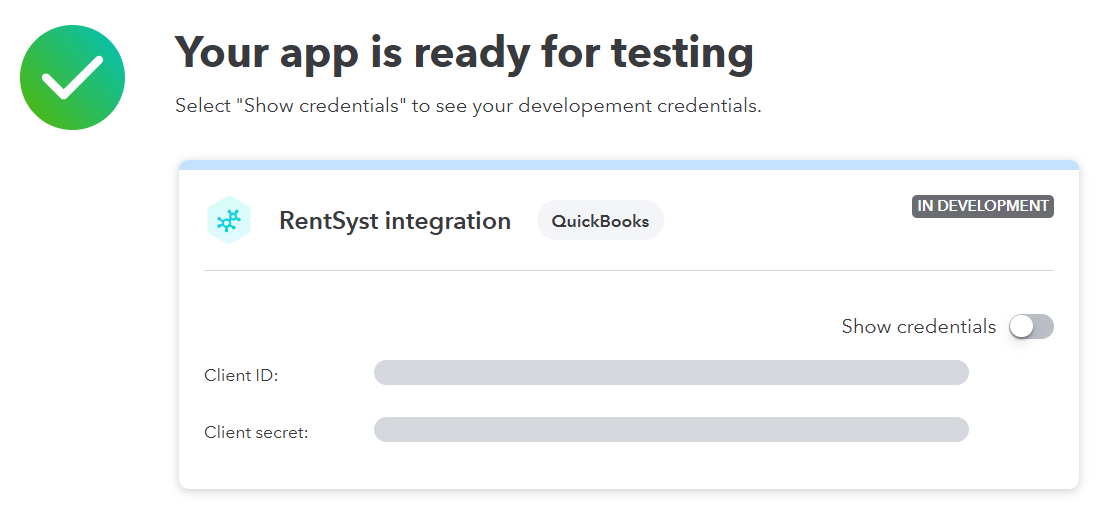
4.4. After you confirm permission, you will see "Your App is ready for testing" confirmation page:
Step 5: App overview
5.1. Access to just created App - Overview tab will be open by default.
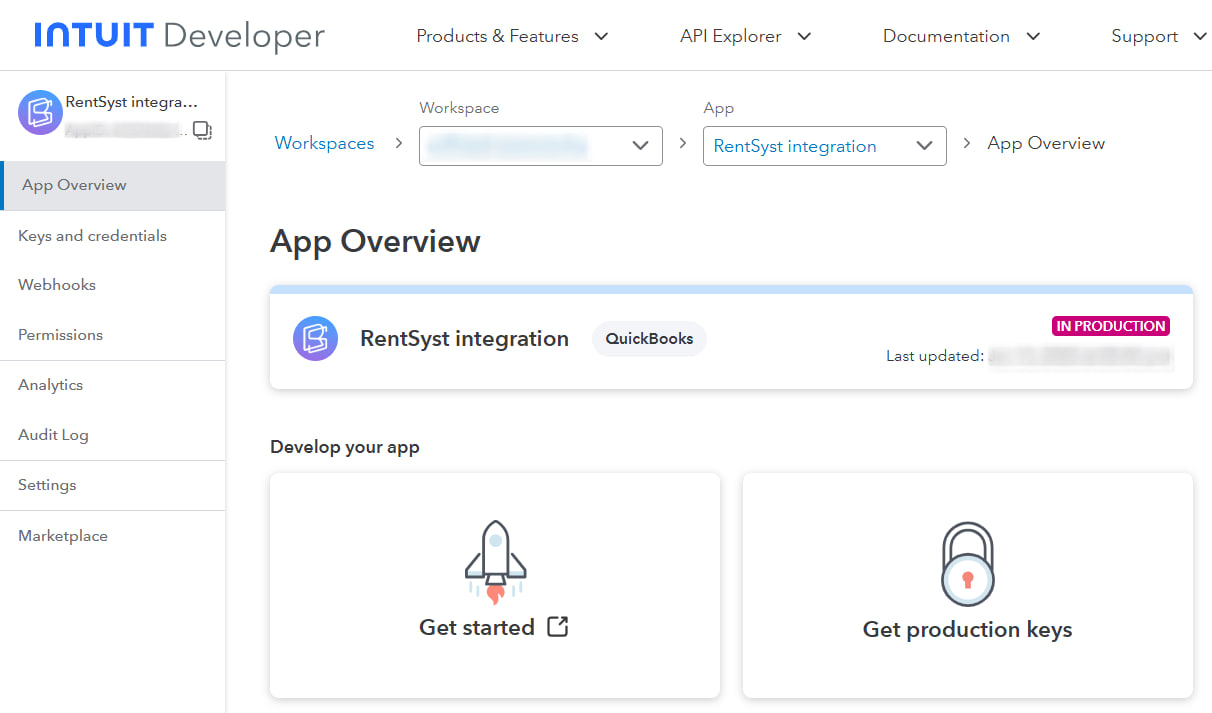
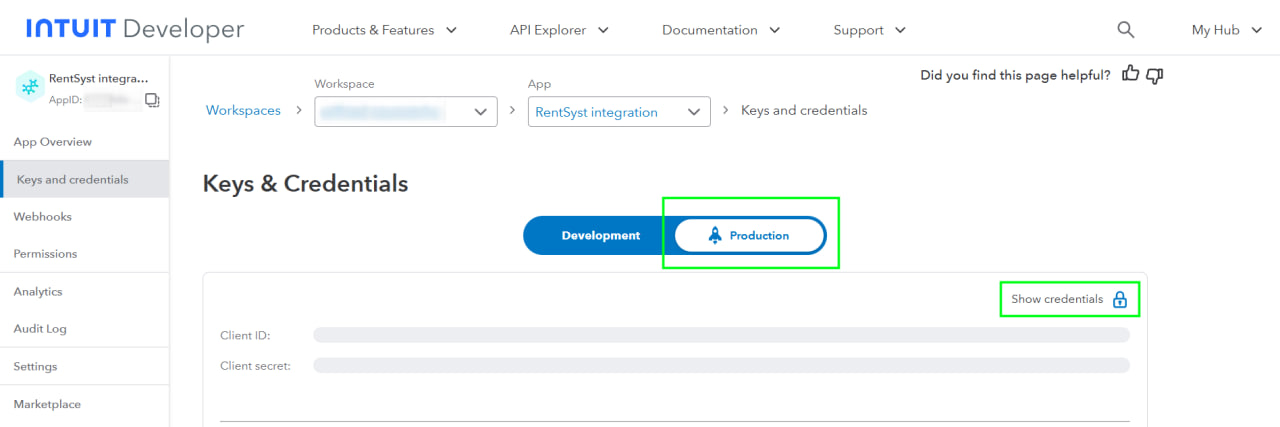
5.2. Now we need to complete "Get production Keys" first.
You will have here 2 envieronments - Development & Production.
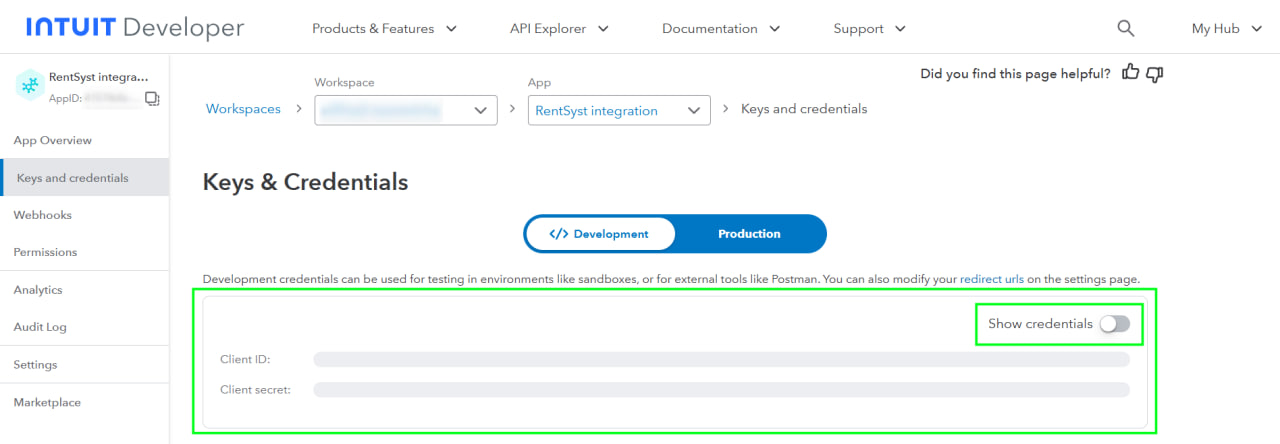
5.3. You will need to complete both, but use Production credentials to integrate later.
Step 6: Complete "App details"
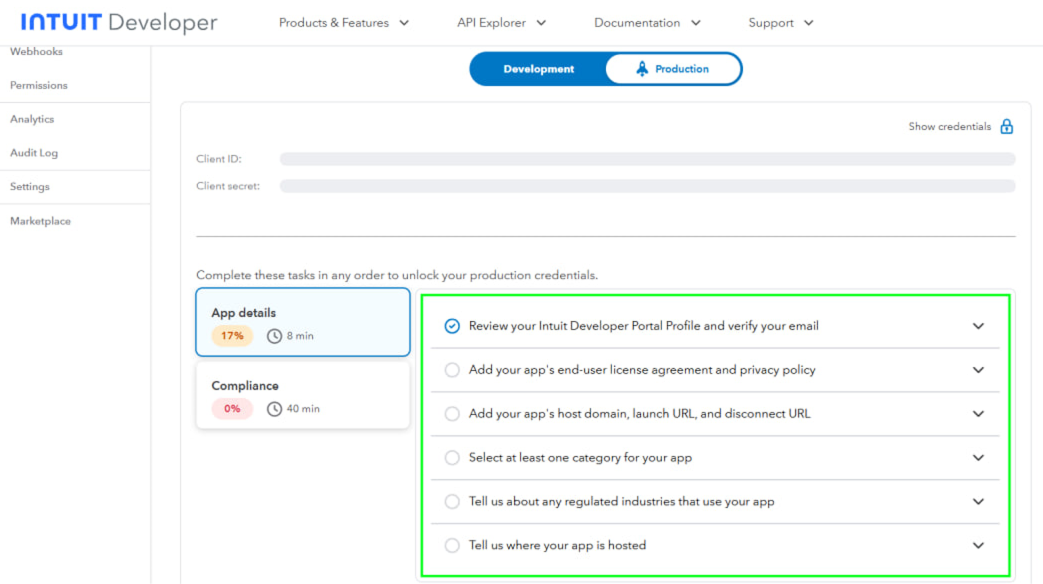
6.1. Scroll down to see tasks, that you need to complete to unlock your production credentials.
Start with App details - verify your email and review your address details:
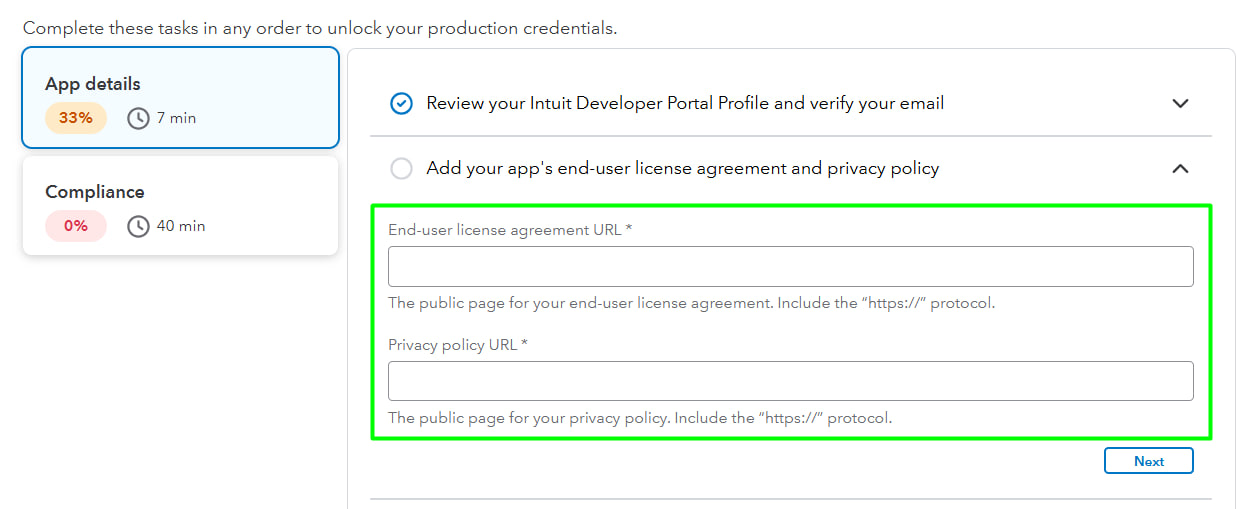
6.2. Add your Apps end-user license Agreement and Pricavy Policy:
These are links to "Terms of Use" and "Privacy Policy" from your website. This information should be on every site.
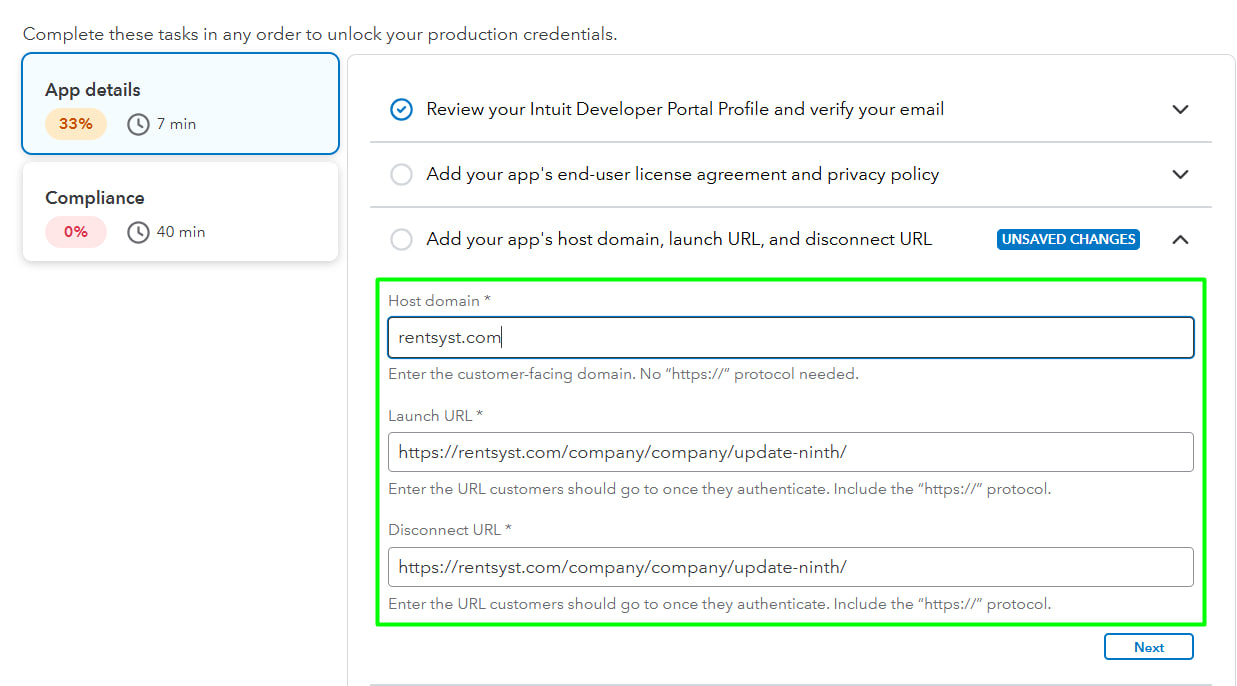
6.3. Add your Apps host domain, launch URL and disconnect URL.
Use followoing data to complete this task:
Host domain - rentsyst.com
Launch URL - https://rentsyst.com/company/company/update-ninth/
Disconnect URL - https://rentsyst.com/company/company/update-ninth/
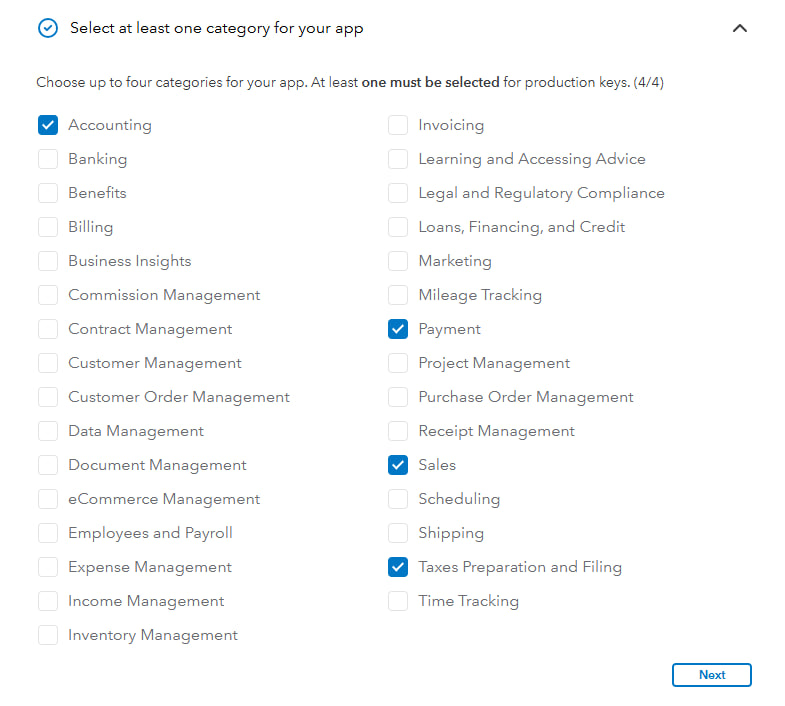
6.4. Select App category.
From proposed list please activate:
Accounting
Payment
Sales
Taxes preparation and filing
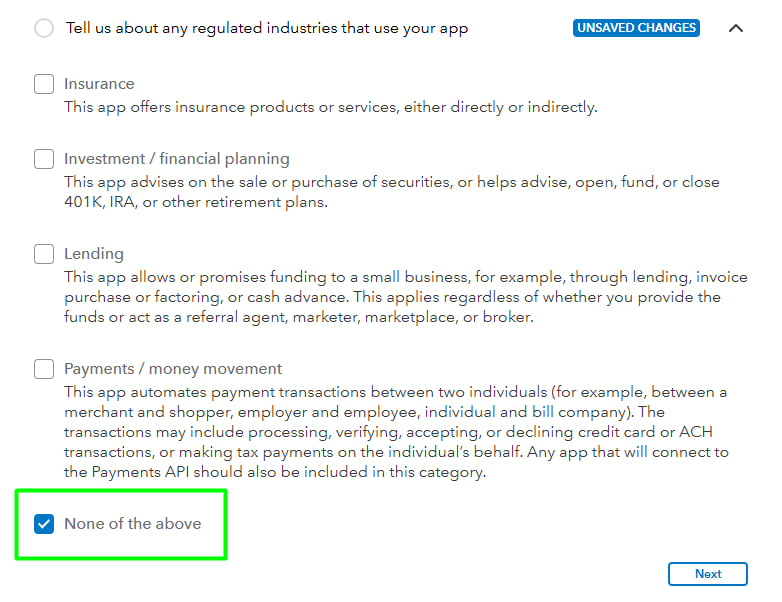
6.5. Specify about any regulated industries that use your App.
From proposed list - select "None of the above".
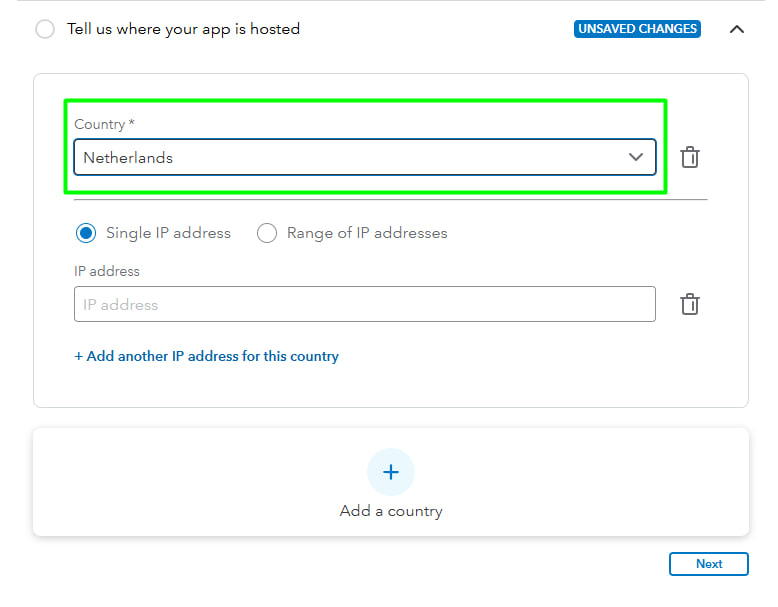
6.6. Specify where App is hosted.
In this section please add Netherlands, IP addresses should be empty.
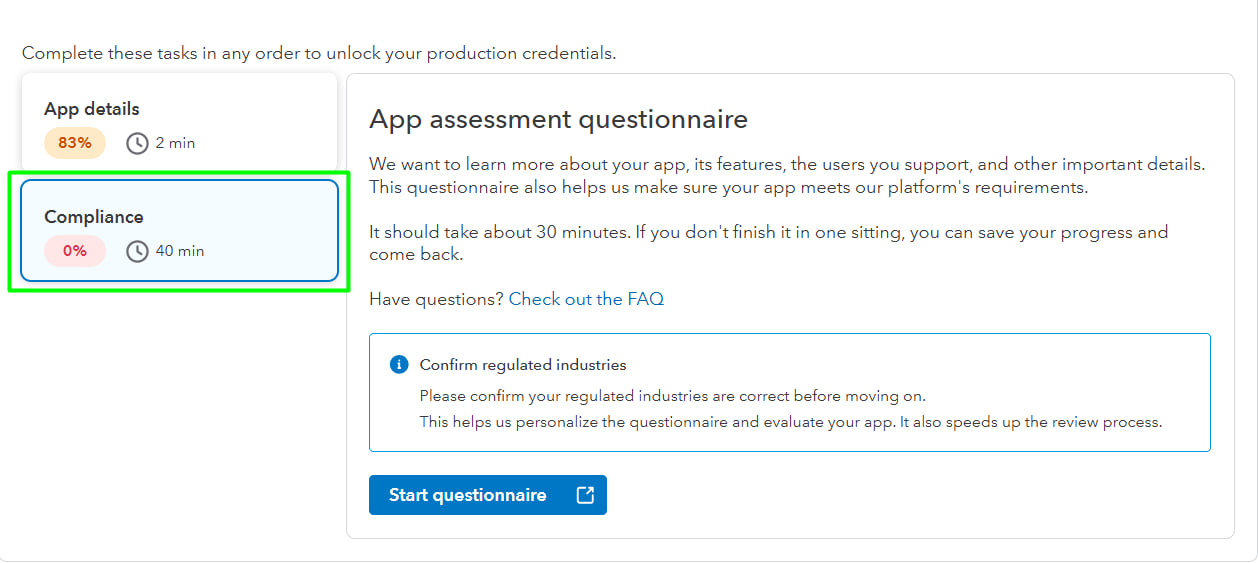
Step 7: Complete "Compliance"
7.1. Compliance - this is a App assessment questionaire.
QuickBooks require this to learn more about App. Nothing complicated but takes around 15-30 min to complete.
(If you don't finish it in one sitting, you can save your progress and come back later).
Click "Start questionnaire" button to start:
Step 8: Get production credentials
8.1. Nice! Now you get access for Production credentials.
Switch "Show credentials" to see results.

8.2. Please copy Client Id and Client secret. You may use this buttons to copy it directly:

Step 9: Add prod credentials to Rentsyst
9.1. Now you need access into your RentSyst account - integration page and open QuickBooks window:
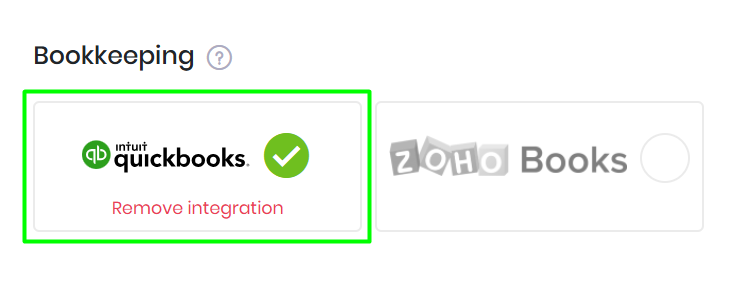
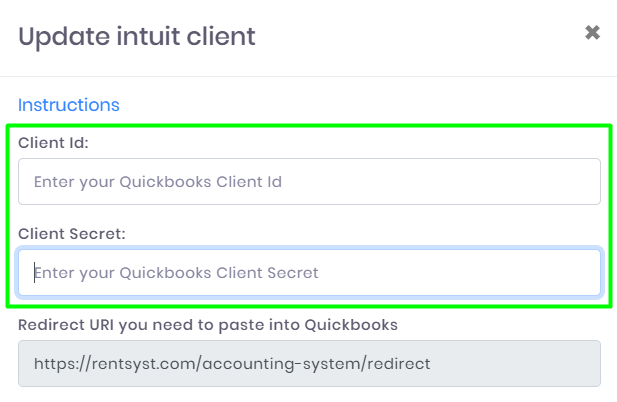
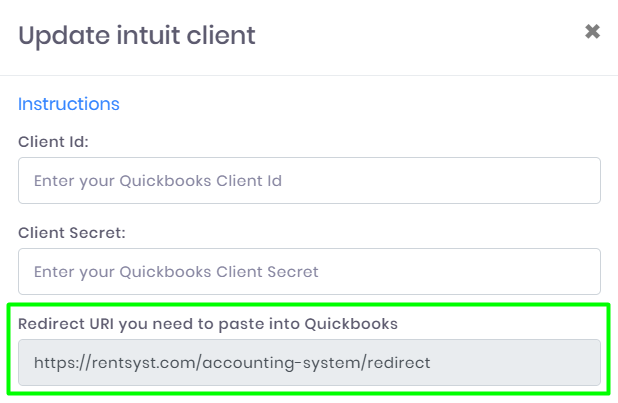
9.2. Copy redirect URL from same window:
Step 10: Update redirect URL
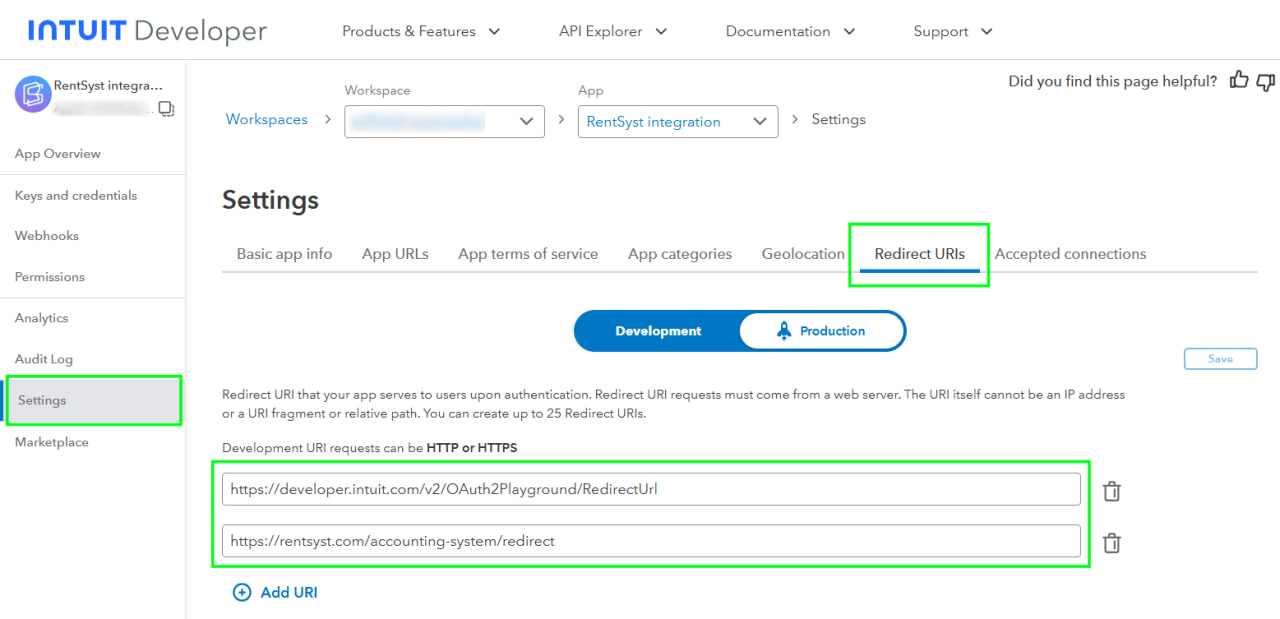
10.1. Return to your QuickBooks developer page.
Follow to the Settings and swich to Redirect URL tab. Here you will need to add one more URL that you copy from Rentsyst side.
Please pay attention, that you need to add second URL for Development and for Productions!
Redirect URL - https://rentsyst.com/accounting-system/redirect
10.2. Dont forget to press "Save" button.
Step 11: Connect App
11.1. Return to RentSyst settings page and open QuickBooks integration window. Click "Mapping items" here.
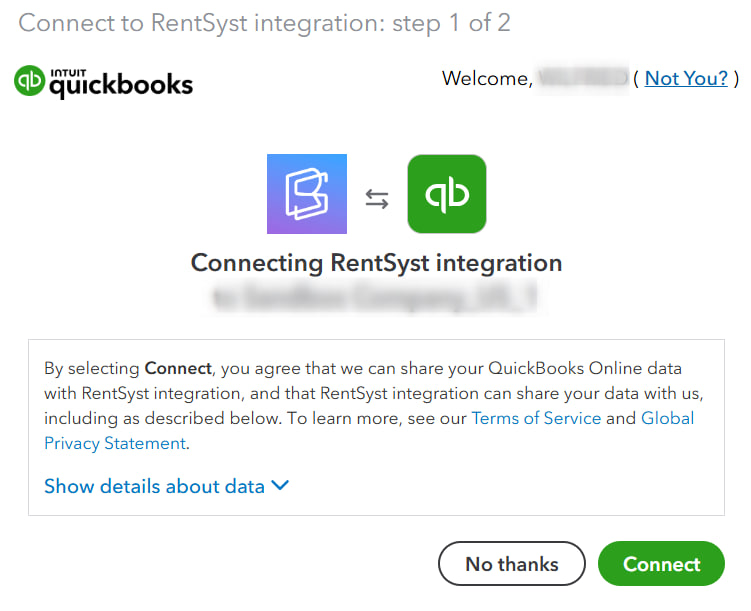
After this, RentSyst + QuickBooks are starting to connect together.
If all previous step are completed correct, you will see following confirmation page:
Step 12: Add Taxes Group
12.1. Next, you may received following error message inside QuickBooks window (on RentSyst side):
QUICKBOOKS ERROR: You need to add into your Quickbooks account at least 1 Tax Rate
12.2. This error is occur, cause you need to add Taxes on your QuickBooks account. Lets do it together.
Go to your Quickbooks profile homepage that you connected to Intuit Developer.
Get "Taxes" tab.
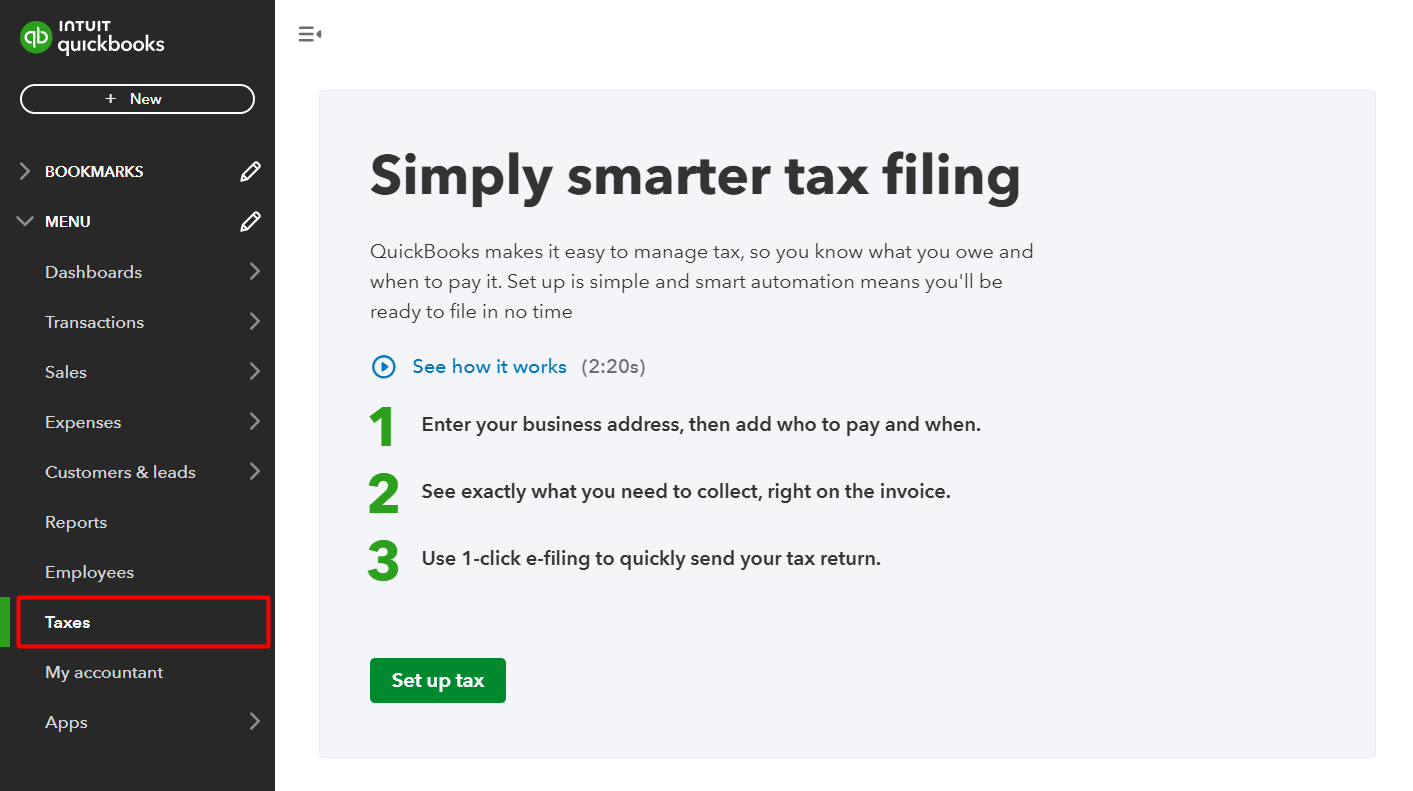
12.3. Create a name for your custom tax rate, and give a few details about how you track it.
On this page please provide:
Tax name
Description
Tax agency name
Business ID No. (optional)
Start of current tax period - January
Filing frequency - Monthly
Reporting method - Accrual
Add tax rate
12.4. After completing sale tax, you will see confirmation page, press OK to validate:
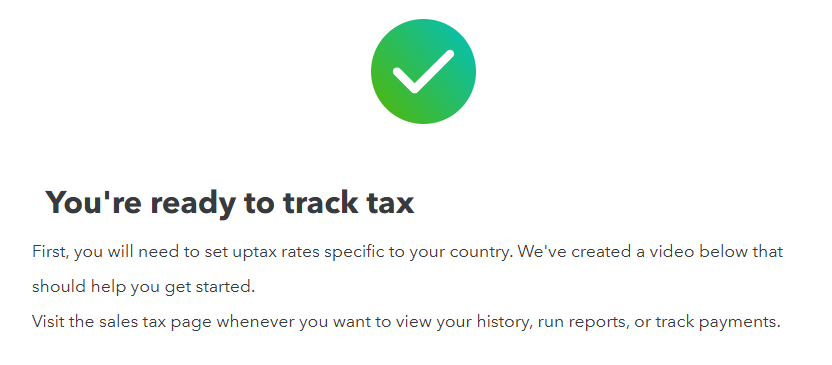
12.5. QuickBooks also recommend to check video guide below Tracking Sales Tax in QuickBooks
12.6. Refrest Tax page to see just added Tax information.

Final Step 13: Mapping
13.1. Here you will need to return for Rentsyst page with QuickBooks integration icon.
When you open it - a new window with mapping will appear.
Mapping - this is prescribed way of assigning to each object in one set a particular object in another. Means you need to connect same items from QuickBooks with RentSyst.
13.2. Create mapping in pop-up window:
- checkboxes "Send Invoices" and "Send Bills" are respond for enabling or disabling corresponding functions.
If both are turned off RentSyst won't send anyting to your Quickbooks
- Inside "From what date needs sending bills/invoices" - specify date from which you want to start invoice and bills synchronization with your Quickbooks. This is optional.
13.3. Finish mapping.
Left side options - you can see all the elements of the system that your company creates in RentSyst. They are individual for each user.
Right side options - you can see the products and services you create with Quickbooks that you offer to your customers.
For each RentSyst item (on the left), you can only select one product or service in Quickbooks (on the right).
You can see an example of filling in the remaining fields in the screenshot.
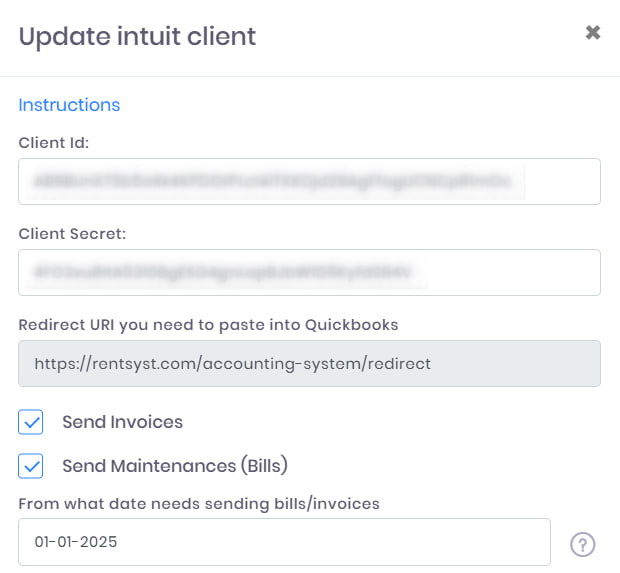
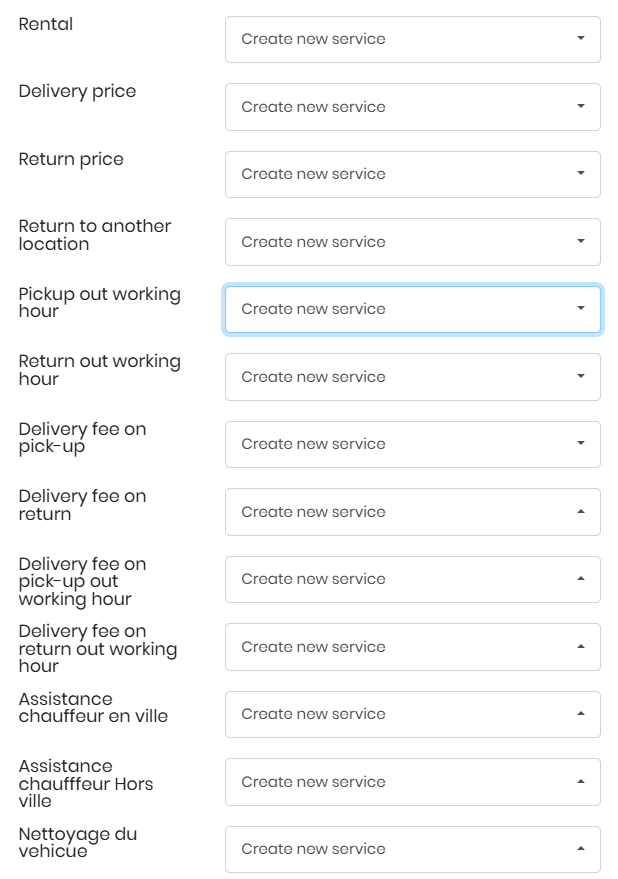
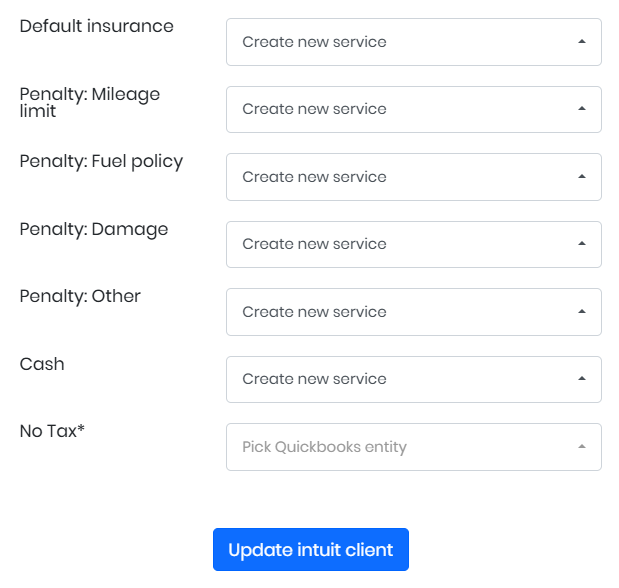
Once you are done, click on the blue "Update Intuit Client" button below.
Important note:
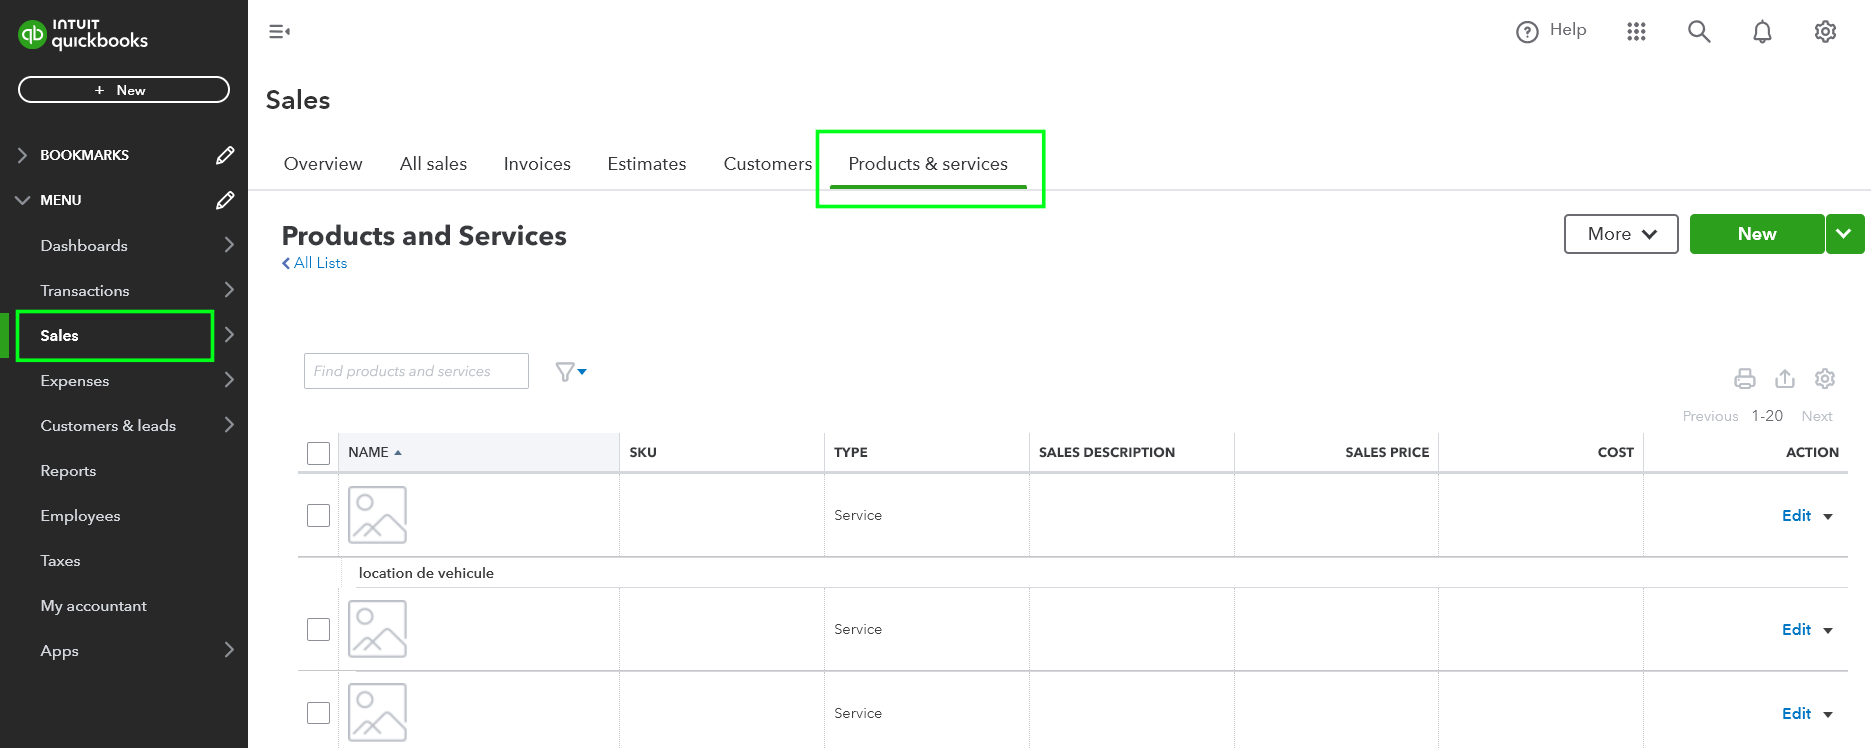
13.4. If you dont have same products on your QuickBooks account, as RentSyst has, you may go inside your QuickBooks profile and add them.
Please navigate to Sales - Products & Services tab:
Step 14: Integration logic
14.1. All set. Quickbooks has been successfully integrated into RentSyst!
Now your Invoices will be sended to Quickbooks automaticaly after the status of the order is changed to "Done".
Bills will be sent to Quickbooks after Maintenance is set to "Done" status.
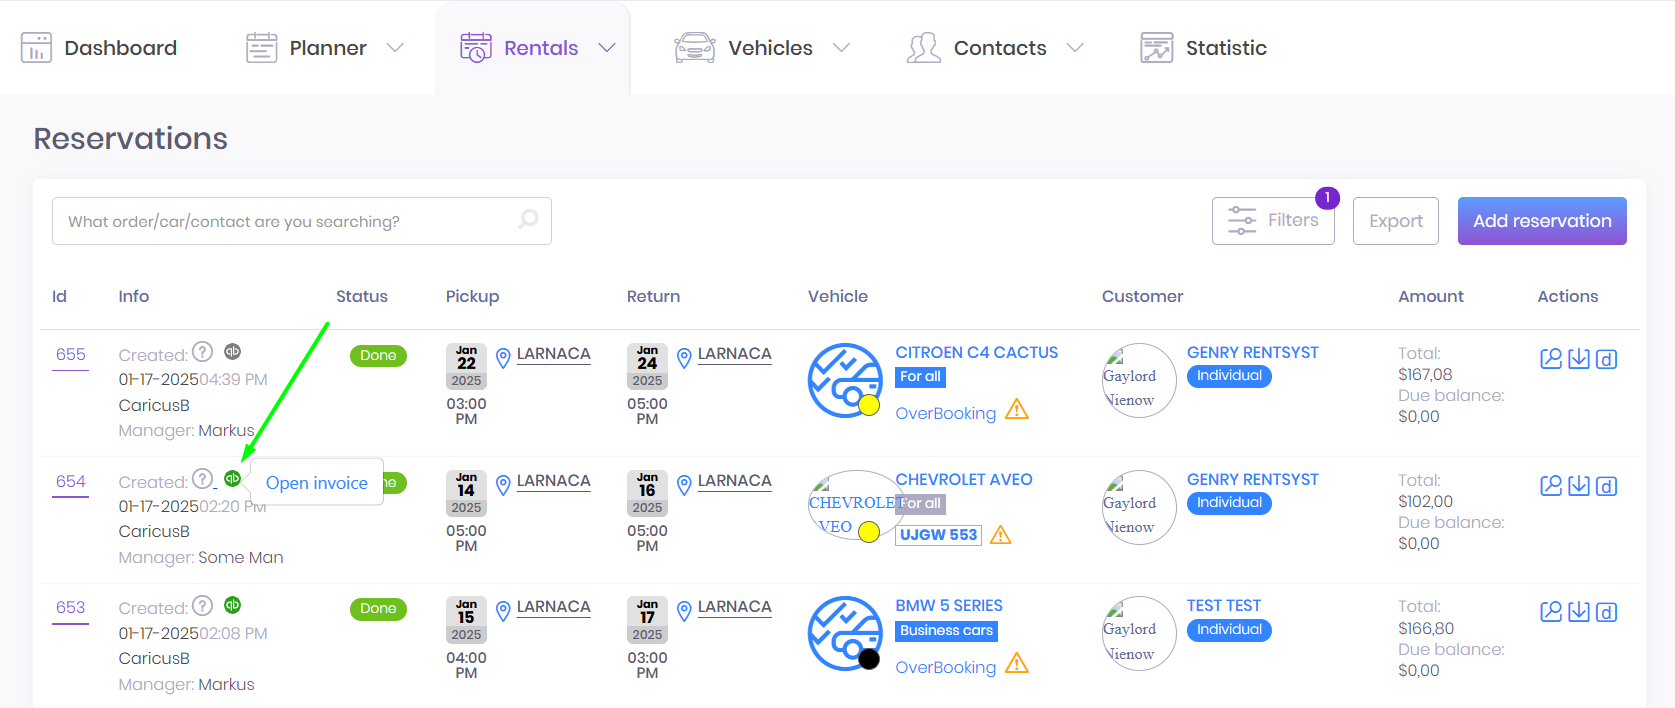
You will see QB icon nearby the reservation :
- if QB logo is highlighed grey - means Invoice was not sended
- if QB logo is highlighted green - means Invoice was successfully sended into your Quickbooks
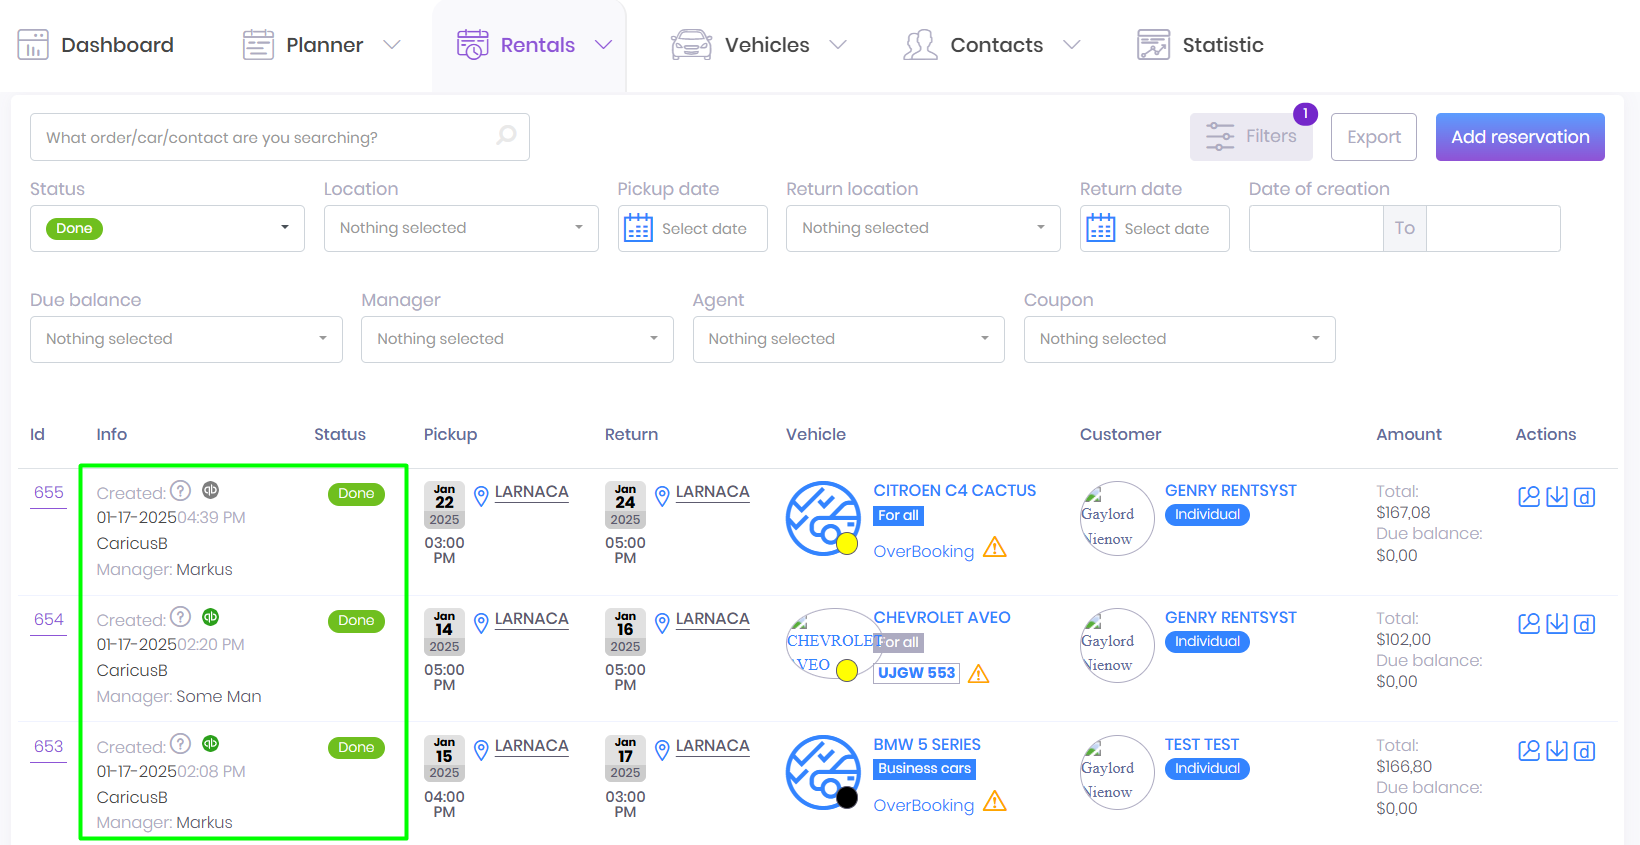
14.2. You may also send request to integrate Invoice manulay directly from Rentsyst now.
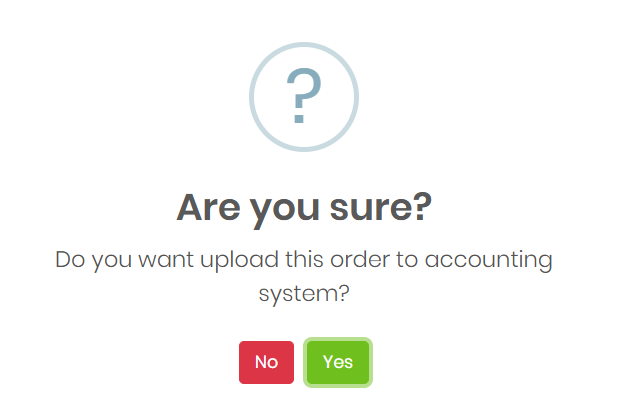
Simply press on grey QB icon, system will double check if you wanna upload Invoice to your Quckbooks Accounting.

14.3. And finally,
you can also open Invoice on your Quickbooks side directly from Rentsyst as well.
Support and Resources
- Rentsyst Support: for assistance with the integration process, contact Rentsyst support via the in-app chat or email at [email protected].
- QuickBooks Support: for issues related to QuickBooks, visit the QuickBooks Help Center or contact their support team.
By following these steps, you can successfully integrate Rentsyst with QuickBooks, enabling a seamless and efficient accounting process for your car rental business.
